
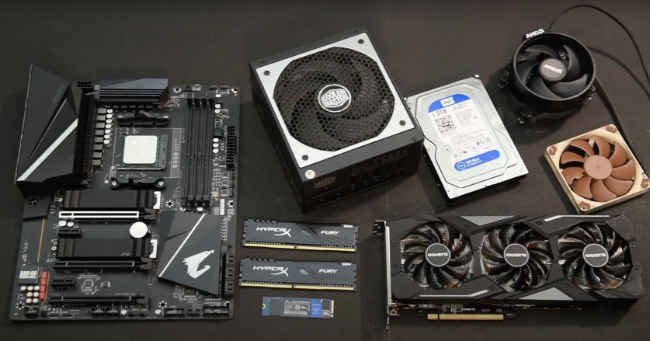
Welcome to the seventh and last article in the “Build Your Own PC” series, powered by AMD. We've gone through each step of the PC building process, from selecting components, to securing the best deal, to finally putting them all together and installing an operating system. However, we all make mistakes along the way and this article is all about addressing the most common mistakes first-time PC builders might commit. We're going to kick things off with the thermal paste application.
Too much or too little thermal paste
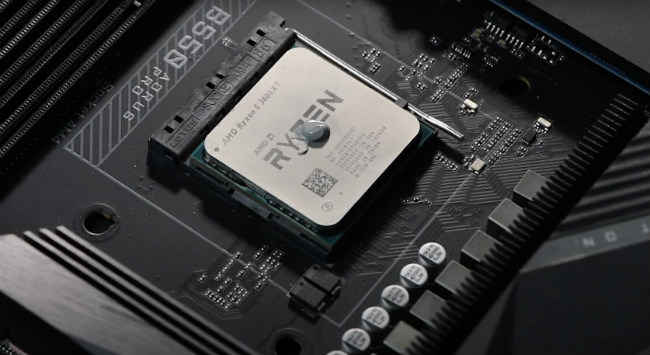
One of the most common mistakes first time builders make is to use too much or too little of the thermal paste while installing the processor. The CPU heatsink when mounted properly applies a lot of pressure onto the thermal paste and spreads it evenly as a thin layer. The job of the thermal paste is to simply fill in the surface imperfections on the CPU Integrated Heatsink and the CPU cooler's surface, and then it has to conduct heat properly from the CPU to the heatsink so that it can be dissipated. A small drop of thermal paste equivalent to half a pea is sufficient to get the job done.
Applying too little paste leads to improper coverage and hence, the heat transfer between the CPU and the heatsink is affected. And applying too much leads to spillage which can then gunk up the socket. Some thermal paste brands use electrically conductive ingredients in their thermal pastes which if spilled could short circuit your processor or your motherboard.
PCIe bandwidth sharing
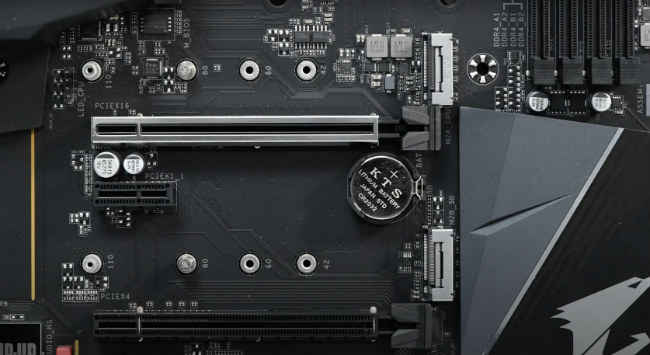
Often folks don't realise that the bandwidth on your PCIe slots are shared between PCIe slots and with other peripheral connectors. The first two PCIe x16 slots from the top, often share the same 16 PCIe lanes. So when you install just one card in the first slot, it gets the full 16 lanes to itself. However, the moment you add a card to the second x16 PCIe slot, the two slots switch to x8 mode each and the devices you've connected might not get the full bandwidth.
Modern day graphics cards can make do with just x8 lanes but there will be a slight drop in performance. Of course, the extent of the performance drop varies from generation to generation and also between manufacturers of the GPUs.
It's not just PCIe slots that share PCIe lanes. Practically every interconnect uses PCIe lanes to transfer data. So when you have M.2 slots with SSDs packed in, some of the adjacent SATA ports might stop working.
On the B550 AORUS PRO motherboard for example, the slot labelled PCIEX2 shared bandwidth with the SATA-III connectors labelled 4 and 5. So if you plug in an SSD or hard drive into either of these connectors, it will cause the PCIEX2 slot to become unavailable. Similarly, the slot labelled PCIEX4 shared bandwidth with the M.2 connector labelled M2B_SB. So if you install an SSD into the M.2 connector labelled M2B_SB slot, then the PCIEX4 slot will become unavailable.
Another key aspect to know is that the PCIe lanes and PCIE version available depends on the CPU that is installed on the motherboard. For example, a 3000-series Ryzen G-series APUs will provide PCIe version 3.0 lanes whereas a 3000-series Ryzen CPU will provide PCIe 4.0 lanes. We should also point out that the chipset also matters. Refer to the motherboard manual online to figure out exactly what all peripherals share bandwidth on your motherboard before buying the same.
Installing memory in the wrong slots
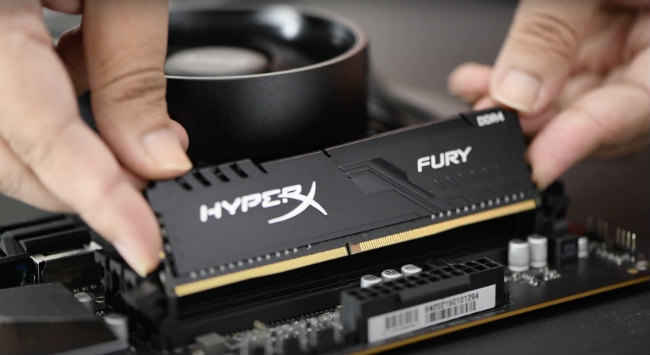
Most AM4 motherboards will have 4 RAM slots and you can install one, two, three or four memory modules in them. However, there is a configuration that you need to follow in order to ensure that your memory modules operate in dual-channel mode. Reading the motherboard manual will give you this information.
For example, if you have 2 memory modules, install them in DDR4_A2 and DDR4_B2 slots. And not in DDR4_A1 and DDR4_B1 slots. If you have 4 modules, install them in all the slots.
Using improper slots will relegate your memory configuration to single-channel mode which is much slower than dual-channel mode.
Also, remember to enable the proper memory profile in the BIOS. Each memory module has certain specific memory timings which it is designed to run optimally on. Selecting the right profile will ensure that those memory timings are read and loaded into the BIOS.
Your motherboard manual will let you know how to enable this profile properly.
Using the right connectors
The power connectors present on your power supply unit are designed to go into their specific slots. There will be certain notches or keys on the connectors to ensure that you don't insert the wrong connector. A good rule of thumb to follow is that you will never need a lot of pressure to fit a connector on your PC.
People commonly try to insert the PCIe power connector into the CPU power connector. Both are 8-pin connectors but they have different notches. So if a connector doesn't go in, try not pushing harder. It'll only make things worse.
Not getting the right Power Supply
Folks often make the mistake of cheaping out on the power supply. It's often one of the most important components within your PC. When calculating the wattage required for your PC, refer to the manufacturer's recommendations for each component.
Modern CPUs can consume anywhere between 20-300 Watts and the same goes for the graphics card. However, this variance only exists in the high-end segment. An mid-range or entry-level CPU and graphics card will not consume as much.
There are several calculators available online to help you choose the right power supply. We prefer to use the one by Outervision. It is quite detailed and simple to use. Simply select the components for your PC that you have in mind, and the tool will tell you how much power your PC will consume.
Another important aspect to keep in mind is the brand. Not all power supplies provide the amount of power that's mentioned on the label. Certain companies will provide much less power whereas better brands will be more conservative with the labelling and provide what's mentioned on the label, and a bit more.
Power supplies also come with a lot of protection circuits against power surges, short circuits and power drops. In the event of a problem, the good power supplies will filter out the harmful current spikes and shut down your PC to prevent and damage from occurring. So always, trust in a proper brand and get a power supply with enough wattage to provide a little headroom.
Installing components in the right order
Folks often make the mistake of switching the order of installing components. There's usually nothing wrong with this approach but you might run into problems when you move onto installing the next component. For example, aftermarket CPU coolers are often massive and can block the installation of RAM modules, so you might want to install the RAM before you install the CPU cooler.
The same goes for M.2 SSDs and graphics cards. The M.2 slots are often placed between PCIe x16 slots which house graphics cards, so installing the graphics card blocks the installation of the M.2 SSD.
Folks also tend to forget that they might need a few extra stand-offs for the motherboard. The bag of screws that come with your PC chassis, will often have the right number of stand-offs. Count the number of screw holes that your motherboard has and see if there are stand-offs in the corresponding places on the chassis.
And lastly, don't forget the I/O shield. Everyone forgets to install the I/O shield. It's the first thing that goes into your chassis.
Read about bottlenecks
The processor and graphics card should always complement each other. Always pair the right processor with the graphics card that you wish to use. The recommendations for such pairing are usually not provided by the manufacturers and you will have to rely on review websites and publications to benchmark such combinations and let you know.
Pairing a high-end graphics card with a entry-level processor or vice-versa isn't going to cause compatibility problems but you'll never be able to experience the full potential of the hardware.
So read up a little about which processors are generally paired with certain graphics cards and double-check the same with other websites.
Conclusion
Those were 7 of the most common mistakes new PC builders commit. We hope that by watching this video, we've helped you avoid the same. And this concludes all the articles in our 7-part series on building a desktop PC. IF you're building a PC, let us know how it goes and if you have any problems, please do reach out to us and we'll help you out. Until next time, thank you for reading. Check out the links below to view the rest of the articles in our ‘Built Your Own PC’ series.
1. Build Your Own PC: The PC built for your needs
2. Build Your Own PC: Which CPU, GPU, Motherboard, etc should you buy
3. Build Your Own PC: How to get the best deals on computer parts
4. Build Your Own PC: How to assemble a PC
5. Build Your Own PC: How to install Windows 10 and setup your PC
6. Build Your Own PC: Testing for cooling and performance
7. Build Your Own PC: Common mistakes while building a PC (You are here)
[Sponsored Post]
Sponsored
This is a sponsored post, written by Digit's custom content team. View Full Profile


