Intel RealSense 3D scanning: How To Import To Unity

The most recent SDK for the Intel® RealSense™ F200 camera now includes 3D scanning. This is an amazing feature and will allow developers and digital artists to scan in real world objects to use in their projects. One use case is to scan in a real world object and use in Unity. This is a 2 part series that will walk you through the process.
In this last step I will show you how to import your scanned object into Unity
Below are all the steps in this series. This post will cover the step 4. Follow links to the other previous steps
- Scanning using the Intel RealSense SDK 3D scanning code sample
- Converting the OBJ file format to PLY for editing in Blender
- Converting Vertex colors to UV Map and editing your 3D Mesh for lower vertex/poly count in Blender
- Importing for use in Unity
What you need to complete:
- Intel® RealSense camera running on Intel Core 4th gen processor or better using SDK (SDK is free)
- Object scanned via Intel RealSense technology and converted to PLY file (via MeshLab – free)
- Blender (free)
Step 4 of 4:
Following the last step you should have a .FBX model along with a UVTexture Map.
Open Unity (Unity 5 is free to download)
- Create a new project and scene
- Go to the Assets Menu and select Import new asset. Select the .FBX Model you had exported from Blender.
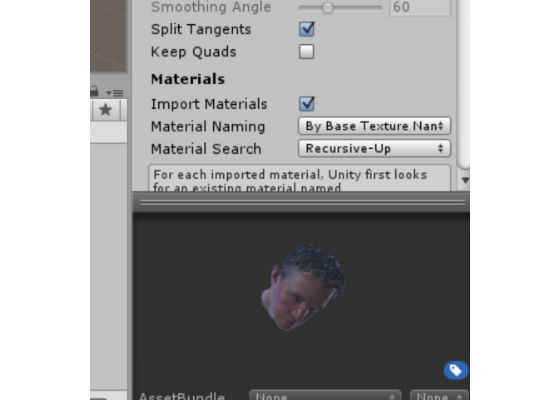
- When the object imports it is possible and likely that it did not import its texture and you will see a grayish white version of your mesh. That is OK. We are going to add in the texture map next

- Select the Materials Folder and then right click and select Import Asset. Select the PNG file you had saved in Blender then import.
- You will now see the texture map along side a greyish white material. Right click on the grey white ball shaped material that has the same name as your mesh and delete that material.

- Go back to your Assets folder and right click on the Mesh you Imported. Select Reimport
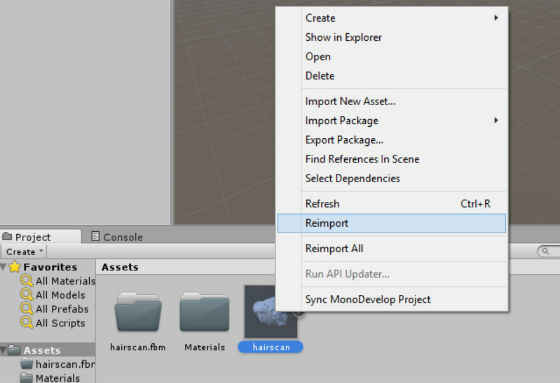
- After it reimports it will now create the material properly and texture your mesh

- If the model looks pink in the object preview, simply select another object like the camera then select your mesh again. It should refresh
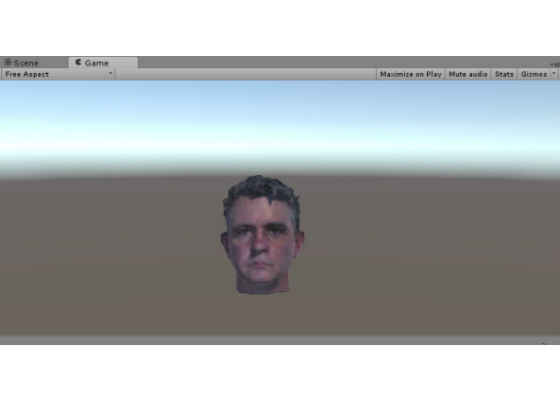
- Now you are ready to use. Drag your object to the scene. You can make it bigger and mess around with the camera perspective to get it in view.
- When you play you should see your object rendered properly in Unity
- Lastly if you want to adjust the texture. If you want to make more or less shiny or metallic. Go to the materials folder and select the round shaped version of your texture. In the Inspector window you can adjust metallic or smoothness of the texture to get the right look
For more such intel resources and tools from Intel on Game, please visit the Intel® Game Developer Zone
Source: https://software.intel.com/en-us/blogs/2015/03/27/intel-realsense-3d-scanning-how-to-import-to-unity