How to use advanced features in Windows 8
HIGHLIGHTS
Learn how to set up a trusted PC, manage accounts, run older software and games, run as a different user and create a portable Windows 8

Microsoft’s latest OS is all set to release within the next couple of months or so. Here are some tips to get you familiar with the OS and ease your transition from a previous version of Windows.
✅ Thank you for completing the survey!
Benefits of a Microsoft account
Unlike earlier versions of Windows, Microsoft now gives you the option of setting up a “Microsoft account” as they call it. Unlike a local account, a Microsoft account will actually sync your settings, contacts, apps, browser bookmarks and calendar settings and even passwords, across PCs and devices. This will be particularly useful when their tablets start to trickle into the market. Think of it as analogous to a Google account for Android devices.
Similar to a Google account, a Microsoft account is required if you want to download anything from the Microsoft store. You can still use a local account and other apps that are not available on the marketplace of course. You can sign into or create a Microsoft account at any time by hitting “Sign in” in the “modern” (it’s not Metro anymore) Start screen. You will also be prompted to set up such an account during the first install.
One major benefit of using a Microsoft account is that you can manage your connected PC’s and their accounts from anywhere. All you need are a working internet connection and a web browser.
Setting up a “Trusted PC”
A new feature of Windows 8, to complement the Microsoft account, is the option to set a PC as a trusted PC. Only trusted PCs are allowed to sync passwords, but anyone with access to your trusted PC can potentially reset your account password. Use this option with care and make sure you really do “Trust” only those PCs that you truly trust with your passwords. Public computers are a strict no no.
If you lose your Microsoft account password, all that you will have to do is go to http://dgit.in/RFgwnH and recover your password using the “Use my trusted PC” option. You will then be able to reset the password without needing access to your phone or e-mail. The only danger, as mentioned earlier, is that someone else can do the same thing if they have access to your PC and you left it unlocked. So, again, do not “Trust” a PC that you do not trust.
To trust a PC, open PC settings. To do this either type “PC settings” in the search pane or look for “Change PC settings” in the charms menu. Go to “Sync your settings” and click on “Trust this PC”.
A security code will be sent to your Microsoft account and/or your recovery e-mail id. Enter the code in the confirmation dialogue that pops up and submit the code. You might get a confirmation e-mail and you will need to click on the link which was sent to validate your request. Your PC should now show up as “Trusted”.
.jpg)
Setting up Trusted PCs
If you go to the “Security Info” page when you login to your Microsoft account online, you should see all your trusted PCs listed. You can select any PC here and click on “delete” to un-Trust that PC.
Once your Microsoft account is set up, go to your charms menu->Change My PC Settings->Sync your settings. You will be presented with a list of settings and information that can be synced across all your devices linked to your account. Note that passwords will only be synced on “Trusted” PCs.
Managing your accounts
Whether you’re a parent trying to monitor your child’s PC usage or just a paranoid geek, Windows 8 has some really nifty tools to help you monitor the various accounts on your system.
•First, you will need to create a “Child” account. To do this:
•Go to “Change my PC settings” in the charms menu.
•Click on Users and select, “Add a user”.
•Click on “Is this a child’s account?” to activate it and turn on the Family filter.
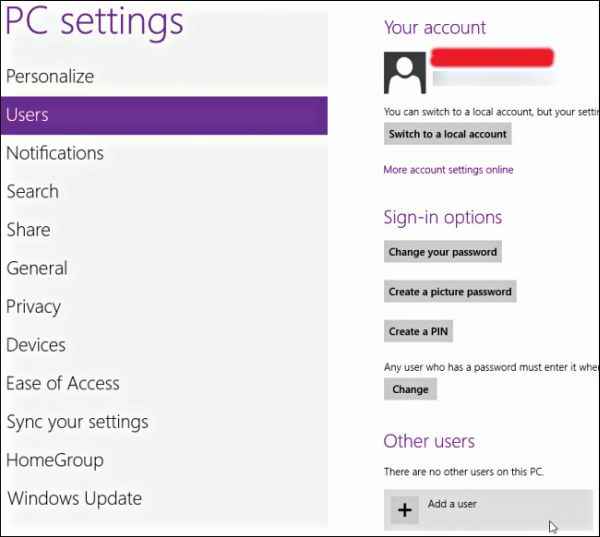
Configuring user accounts
From now on, you can head over to https://familysafety.microsoft.com/ to monitor the “Child” account usage. You can view activity logs, assign multiple “parents”, edit settings and many more.
You can even monitor the time spent on certain websites, app downloads, the searches that they performed, etc. You can take action based on the reports that you see and even restrict access to websites and apps, etc. You can even set time limits on usage of apps and sites. There are many web filtering levels present, so you can fine tune the “Child’s” usage as you desire.
Running older applications
.Net framework 2.0 and 3.0 are now considered optional extras under Windows 8. These frameworks are probably not much use to the average user, but for those who want to run some older generation apps, they will be required. As it’s considered optional, these features will have to be enabled again. To do this, hit “Win R”, type “appwiz.cpl” and click OK. Click on the “Turn Windows features on or off button and select .NET framework 3.5 (includes .NET 2.0 and 3.0) from the list that pops up and hit OK. Windows update will automatically download the required frameworks for you. You can specifically download these files separately, but if installation was deliberately disabled for whatever reason, you will not be able to proceed.
.jpg)
Use the family filter to monitor usage
Installing the good ol’ games
Windows 8 now comes with Xbox live enabled games and apps, this means that your regular Minesweeper, Solitaire, etc. are not provided and you can use only the Xbox versions. If these apps are not pre-installed, you will have to download them from the Xbox Live marketplace.
To do this, click on the “Games” tile in your Start screen and install Solitaire, Minesweeper, Mahjong, etc. from within the interface. You will need a Microsoft account first though.
If you are still a fan of the earlier versions of these games or just generally have a dislike to the new UI, there is a way to get back your old games.
•Head over to C:Program Files on your Windows 7 PC and copy the Microsoft Games folder to a USB drive (the games that you want if you don’t want all).
•Now navigate to C:WindowsSystem32 and copy the CardGames.dll, cmncliM.dll, zgmprxy.dll and cmncliM.dll.mui to that very same USB drive.
•Now plug in the USB drive to the PC with Windows 8 installed on it and transfer the contents of the Microsoft Games folder from the stick to the C:Program FilesMicrosoft Games folder from the Windows 8 root partition.
•Copy the CardGames.dll into the game folder of every game that you transferred from your old PC
and the rest of the files into the C:WindowsSystem32 folder on your Windows 8 machine.
•Download Microsoft Game Patcher from http://dgit.in/SreEOu on your Windows 8 machine and run it. Your games will now be patched and you should be able to play them.
•Make sure that you only transfer 64-bit games from Windows 7 to a 64-bit Windows 8 installation, and 32-bit games from Windows 7 to a 32-bit Windows installation. The patching process will not function otherwise.
Running applications as a different user
Running applications as a different user in Windows 7 was easy, all you had to do was hold down shift and right-click on the application you wanted to run and the option was there. In Windows 8 however it’s been disabled. To enable it again:
•Open the run dialogue by hitting [Win] [R]
•Type gpedit.msc in the box and hit OK.
•Go to User Configuration > Administrative Templates > Start Menu and Taskbar
•Click on Show Run as different user command on Start and enable it.
•To make sure the policy takes effect, hit [Win] [R] again and type gpupdate /force
•Now whenever you right-click on an application you will see a “Run as different user” option.
Creating a portable version of Windows 8
Unlike previous versions of Windows, Windows 8 comes with an in-built option to install and run the OS from a USB drive. Note that these steps are only applicable with the Windows 8 RTM version. Users of the preview versions might not be able to access this.
To enable this:
•Plug in a USB drive (preferably one with 16 GB or more storage capacity) and format it.
•Insert your original installation media, a Windows 8 bootable USB drive or DVD that you used to install Windows 8 on your PC. If you don’t have one, you will need to create one. Head over to http://dgit.in/wIn8rPins for instructions if you do not know how.
•Go to your Control Panel (right-click on taskbar)
•Search for the “Windows To Go” option and click on it.
•Choose your formatted USB drive from the device list and hit next.
•You will be prompted about BitLocker encryption and it is up to you whether you want to use it or not as it is not essential.
•Just keep following the instructions and keep hitting next. When your settings get finally confirmed, hit create and your drive will be made.
•You can now boot into a portable version of Windows 8 when the USB drive is plugged in!