How to create professional-grade videos, graphics and web pages within minutes
All you need is a web based tool called Adobe Spark and we show you how to get started with it.

Adobe has launched a free web-based tool, dubbed as “Adobe Spark” that allows non-professionals to create professional looking visually intensive graphics within minutes. Derived from the company’s popular iOS apps Adobe Post, Adobe Voice, and Adobe Slate, Adobe Spark is a single app aimed at providing graphics creation tools on the web – making it platform friendly.
Spark offers three features under the app: Spark Post, Spark Page, and Spark Video. The Spark Post provides a neat way to create social media graphics for birthdays, events, contests, and advertisements. Spark Page lets you deploy simple web stories with multimedia content embedded. Along with the ability to display every type of layout such as simple blog post, photo journals, portfolios, catalogs, etc. Spark Video allows you to create simple videos for different use-cases by taking examples covering all type of elements such as text, images, icons, and themes.
Being a web app, you can find it here. The landing page bestows you with a broad overview of everything it has to proffer. To start your creativity hit the “Start now for free” button located at the top-right corner of the page. Adobe provides standard login options – login with Facebook, login with Google, sign up manually, and additionally a way to login using Adobe ID (if you have Creative Cloud subscription). Login with the option suited to you to continue, and respond on the subsequent prompts accordingly.
With this done, you’ll be greeted with the three features – Post, Page, and Video.
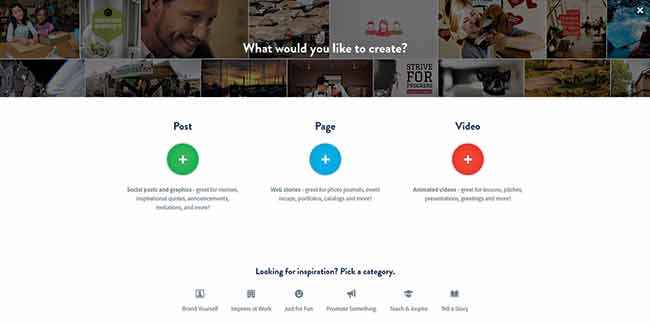
Click the “+” button below the feature to start the app.
Create an Adobe Spark Post
You can create memes, inspirational quotes, announcements, and everything that you want using Post. Hit the “+” button under the Post to initiate your creativity. Enter the title of your post under “What do you want to say?”. Also, select the size for the post from the banner located at the bottom of the page. Hit “Continue” when you’re done.
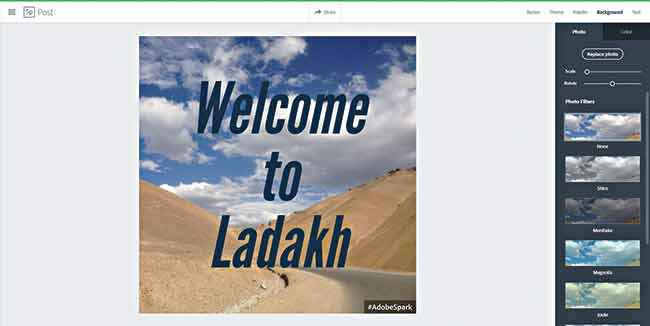
A post displaying your title will be created with a default theme initially. The top navigation bar offers you various options including: Resize, Theme, Palette, Background, and Text. Here’s what each of those do.
Resize – Go to the Resize menu if you want to change the poster size you had initially selected.
Theme – Choose from gamut of different themes to make your post look professional. A side strip with a lot of themes will be presented to you. Select a theme of your choice.
Palette – Palette offers different colour sets to apply over your theme. It automatically suggests different colour palettes based upon your background image and the colour of the text.
Background – Background lets you replace the background with image or colour. After choosing background, you’ll have two tabs to choose: Photo, and Color.
a. Photo – Under Photo, click on “Replace photo” button to add a custom background image. Here, you can either upload a photo from your PC, directly search it only from the embedded search, or choose from Lightroom, Dropbox, or Google Photos. Once the photo is uploaded, it will be applied to your canvas. Under the Photos tab, you have more options to scale and rotate the photo. Unfortunately, there is no reset button to revert your modifications. Furthermore, you can also add Photo Filters to the background image, although with limited options.
b. Color – Under Color, a colour palette will be presented with copious colours to choose from. Once you select a colour, you’ll be warned with a pop-up saying “Applying colour will remove your photo”. Hit “Apply” to continue.
The minimal UI is self-explanatory
Text – The text option has lot of customisations to choose. The panel at the right will display various tools to alter the text. These tools include,
1. Edit – Select the edit tool if you want to change the content of the text displayed. Hit “Edit” > type new text > Save.
2. Add text – Additional texts can be added using this tool. Click on “Add text” > enter your text > Save. The second text will appear on the canvas. You can resize or scale it by selecting it and scaling it using the handles around it.
3. Delete – To delete a text, select the text by click on it > click the “Delete” button > Delete. Unfortunately, there is no undo option.
4. Style suggestions – A circular slider at the middle of the panel allows you to choose pre-defined text styles. Select the text you want to change the style of > slide the slider > Save.
5. Shapes – It allows you to add cool geometric shapes, banners, decorative ribbons, and social media icons behind the text. Select the text you want to add shape to, click on “Shape” > select a shape > Resize the text accordingly > Save.
6. Colors – The text colour can be changed according to the background using Colors. Select the text you want to change the colour of, click on “Color” > select a colour > Save.
7. Fonts – Select the text you want to change the font, click on “Font” > choose a font > Save. The font collection is impressive as there are lot of cool fonts to choose for every occasion.
8. Spacing – With spacing you can change the line spacing between the texts. To change it, repeatedly click the Spacing button.
9. Align – As the name says, it aligns the text to left align, right align, or center.
10. Opacity – To make your text look transparent you can change the opacity. Select the text you want to change the opacity of, click on “Opacity” > slide the slider to change the opacity.
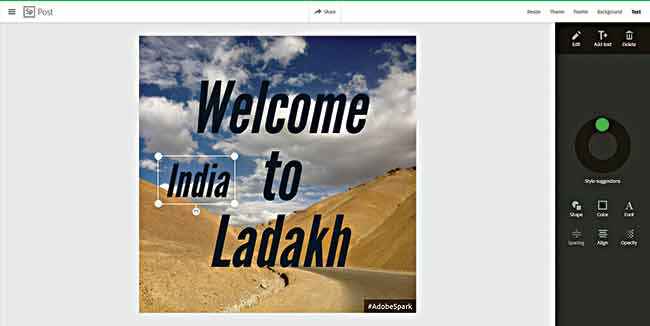
Select the text and use the handles to scale or rotate the text
Once you think you are done with the poster, click on the “Share” button located at the center of the top nav bar. A new window will emerge where you can download the image as “.jpg” or create a direct link to share with friends on the social network. All your creations are automatically saved on the Adobe Cloud, so if you want to change the poster at a later point in time, you can find your project under “My Projects”.
Create an Adobe Spark Page
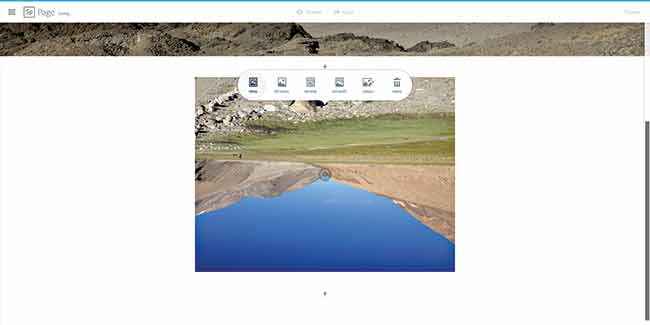
With Adobe Page you can create web stories for photo journals, event recaps, portfolios, catalogs, etc. Once you select the page option, you’ll be redirected to the page canvas. Start by adding title and a subtitle to your photo journal. To make it look better add a background photo by clicking on the photo button located right below the title of your journal. After the landing page is created, scroll down to add more pages to your story. You’ll be presented with options to add photo, text, button, video, photo grid, or a slideshow.
1. Adding Photo – Selecting “Photo” will land you to the usual photo selection panel, where you can either upload photo from your PC or from the web. After the photo is uploaded, you’ll have different options to select the photo appearance, such as – Inline, fill screen, window, full width, replace, and delete. Additionally, there’s a small text box for the captopm below the newly added photo saying “Add caption”.
2. Adding Text – To add more pages, click on the small “+” located below your page. To add text, select the “Text” option. A cursor will appear where you can write your text. Format it using the toolbar appearing right about the text.
3. Adding Button – As a part of the next page, you can also add a button, that will act as a hyperlink that will redirect the viewer to a new page. To add a button, select the “Button” option, and a new popup for customising the button will appear. You may add the title of the button and the URL along with setting the alignment of the button.
As the photo uploads, choose the photo alignment from the options offered.
4. Adding Video – Just like photos you can also add videos, however, a video cannot be directly uploaded from the PC. The video needs to be uploaded to YouTube/Vimeo. Click the “Video” option to add video > paste the YouTube link of the video that you want to add in the text box provided >Save.
5. Adding Photo Grid – The Photo Grid option lets you create a grid of your photos and add it as a single page. To do it, select “Photo Grid” and you’ll be navigated to a new window to make your grid. Following the traditional approach, add a photo by uploading it from your computer or searching it online. You may upload multiple photos by repeating the steps. After all the photos are added, click on the “Save” button located at the top right corner of the page.
6. Adding Glideshow – Finally, you can add a glideshow which will add a new page of slideshow to show more of your photos or creations. Click on “Glideshow” button > upload/search photos > Click “Save”. Once the background of glideshow is created, you can now add quotes or text, photo, button or a video over it. Click on the “+” button that appears as you scroll the slideshow and add an element.
That’s it! Once you are done adding pages, click on the “Preview” button located at the center of the nav bar to see how your story looks. To share on the social network, click on the “Share” button. Projects created with Adobe Page cannot be downloaded, you may only share them with friends with a link.
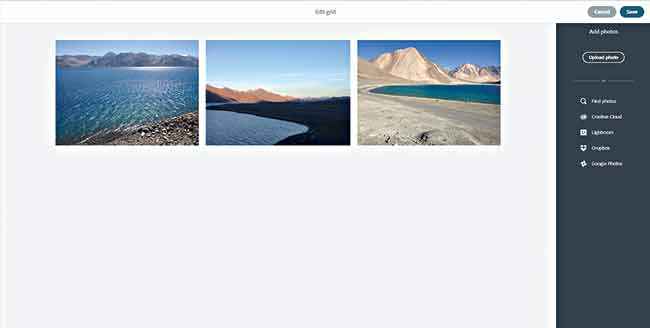
Add as many as photos to the grid, it will look like this.
Create an Adobe Spark Video
One of the coolest feature of Adobe Spark is the Spark Video. Adobe has taken the simplicity and the elegancy of the videos to a whole new level. On the landing page select Spark Video and you’ll be navigated to the video making playground. To start with, provide a title to your video when the page asks for “Every story starts somewhere”. You can always change the title later, however, we recommend you do it before moving further.
In the next step you choose a template for your video out of the seven pre-designed templates available. If the template doesn’t fit, you can always create a personalised template entirely from the scratch.
After you’ve selected your template, you’ll see the workspace to start creating your video. On the right is the tools panel to select themes, music and layout. There’s an additional panel at the bottom showing you , in the form of an array of slides, the video will be having. You can navigate between the slides from here and add/modify elements on it.
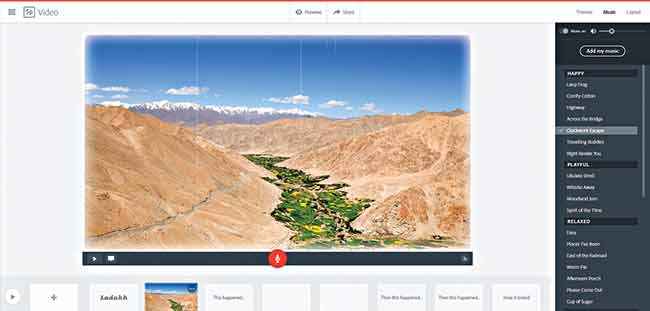
The video creation workspace is analogous to PowerPoint.
To start with select a theme from the available ones (from the right side panel). Click on the “Layout” button located at the top corner and choose a layout for your current slide. The layouts range from One Thing, Two Things to Thing + Full Photo.
After the layout is selected, click on the “+” button on the canvas to add an element which can be an Icon, Photo, or Text. To start the video a photo will always be a good option. Click on “Photo” and upload/search for a photo online. You can decide the duration of particular slide by clicking on small button “2s” located at the bottom right of the canvas. If you are done modifying the first slide, click on the second slide’s thumbnail in the bottom panel. On the next slide, select a layout according to your requirement first and add a text. This will be the title of your video. Similarly, repeat the process for each slide. To add more slides, click on the “+” button located on the bottom panel. You may add as many slides as you want.
Finally, to add music click on the “Music” button located at the top right of the page. You’ll see list of available tracks to choose from. Hover over the track and click on the play button to preview the track. Choose a track by selecting it. You can upload a music file from your PC by clicking on “Add my music”.
Alternatively, you can also narrate audio through microphone by clicking on the red microphone button. Once this is done, your video is complete. To preview your video, click on the “Preview” button located at the top.
To share your video click on the “Share” button located above. Enter title, subtitle and the category and create a link to share with friends. Additionally, you can also click on the “Download” button to download the video in MP4 format.
Adobe Spark can definitely be your primary tool for poster making, photo editing, and presentations because of its elegance and ease of use.
This article was first published in October 2016 issue of Digit magazine. To read Digit's articles first, subscribe here or download the Digit e-magazine app for Android and iOS. You could also buy Digit's previous issues here.