The NZXT H500 offers an impressive value for money considering its features, build quality and performance compared to the other cases we’ve tested so far. You could go ahead with the H500i if you want to splurge on the smart module. However, the convenience and usefulness of the module aren’t justified yet for the extra price. On online markets, you can find the case for much lesser than the MRP and that’s where it becomes extremely competitive. With the beautiful cable management system behind the motherboard plate and the minimalist aesthetics, the H500 deserves your sweet time while building a neat-looking rig inside it.
Specifications
Motherboard form factor: Mini-ITX, Micro-ATX, ATX
Power supply standard: ATX standard (max. length of 180mm)
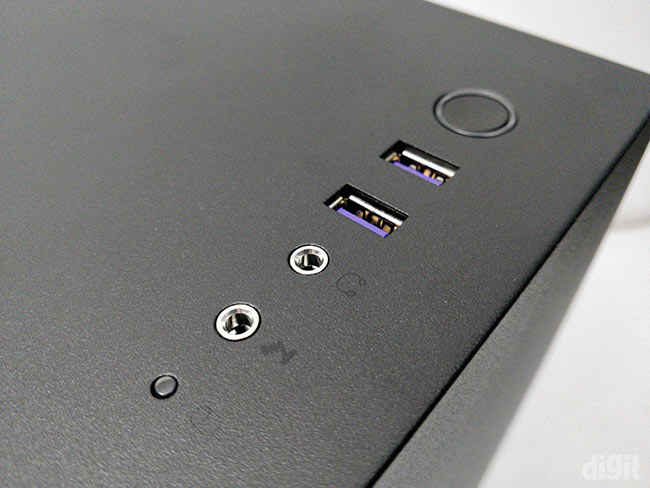
I/O ports: 2x USB 3.1 Gen-1, 1x headphone/microphone combo
Drive bays: 3 x 3.5-inch HDD, 2 x 2.5-inch SSD
Fan support: 2 x 120/140mm (front), 1 x 120/140mm (top), 1 x 120mm (rear)
Radiator support: Up to 280mm (front), 120mm (rear)
Clearances: CPU cooler – 165mm, Graphics card – 381mm
Dimensions (H x W x D): 435mm x 210mm x 428mm
Exteriors of the NZXT H500
NZXT has used steel panels all over the body while maintaining the minimalist design that is slightly unique to the new H series than the older generation. It’s followed on the interiors as well that we will talk about later. We liked the removal technique of the glass panel which is way better than the corner mounted screws. The top portion of the panel has a metal strip with clips that insert into the case’s frame. However, you have to get accustomed with the force required to remove the panel and be careful not to apply too much force.
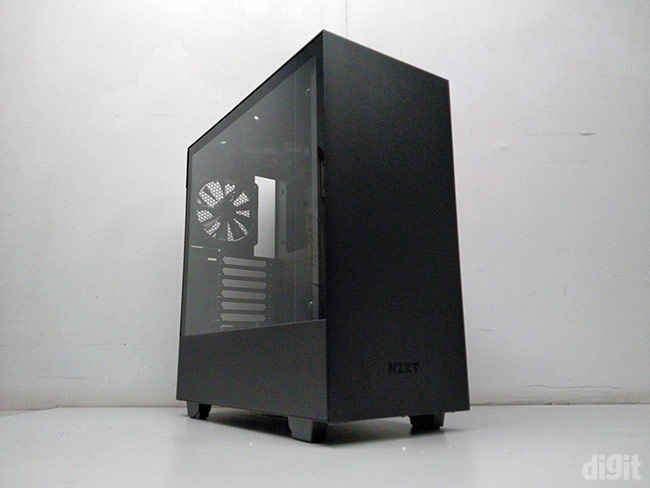
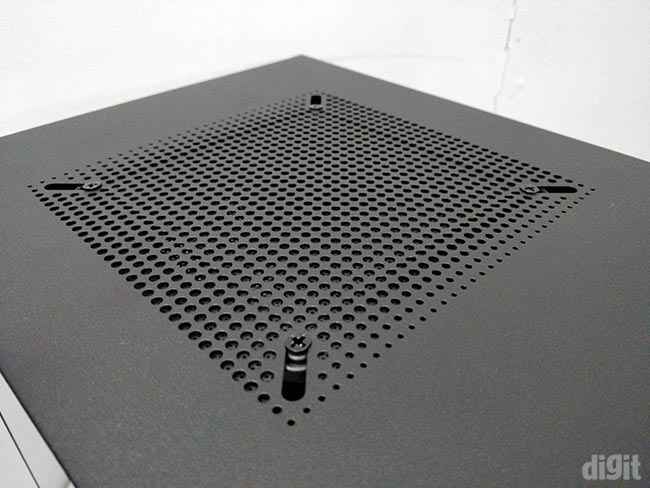
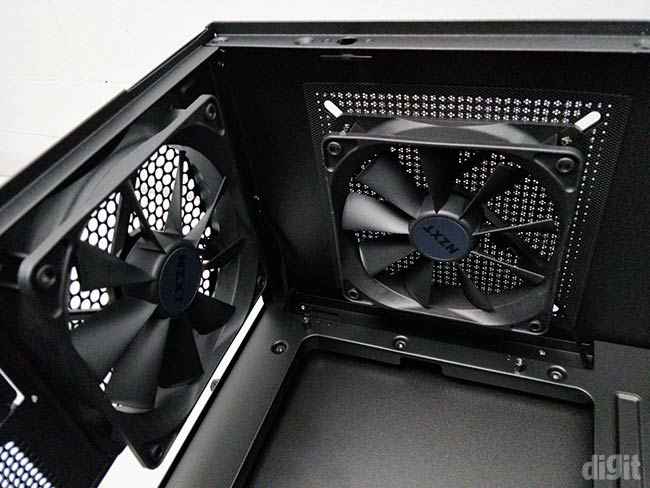
Because of the design choice of the H500, the front panel doesn’t support any vents for air intake. Instead, the vents are moved to the side panel towards the front. On the top panel, there’s a support for one 120 or 140mm fan for exhaust. The case comes with one pre-installed already with another one at the rear.
The ports on the top panel blend in well with the case and they have NZXT’s purple accent to them instead of the blue indicators of USB 3.0. It would have been great if the IO ports included a newer USB Type-C port as well.
We didn’t find anything on the exteriors to complain about. However, the only area where we’ll nitpick is the quality of the thumbscrews. They could have been better and denser. You will come across dust filters wherever there’s air intake or exhaust.
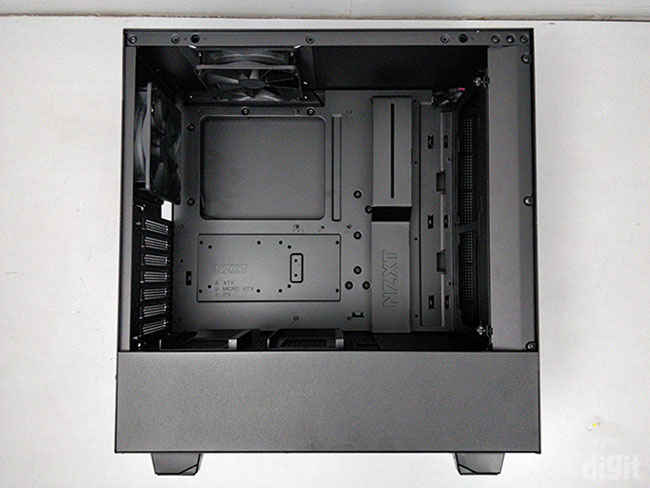
Interiors of the NZXT H500
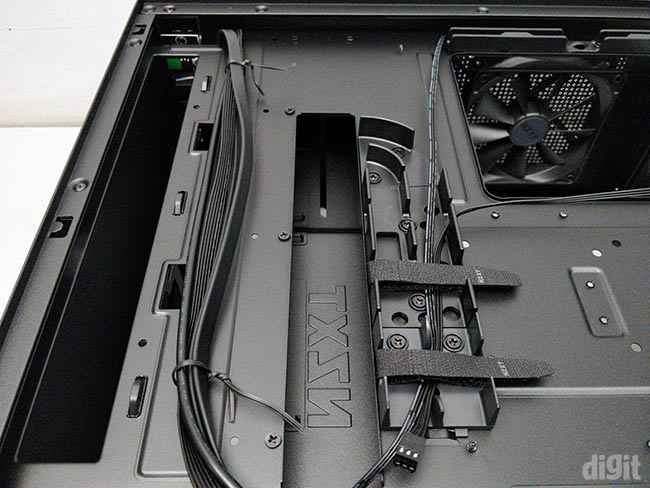
The insides are built well except the front panel fan mount. While the motherboard plate and PSU shroud were thick enough to not bend easily, the fan mount could easily bend. Although it wasn’t flimsy, the thinner gauge was surprising compared to the other parts. Aside from its build quality, having a removable fan mount is extremely convenient during fan or radiator installation.
The difference between the H500 and the H500i is the presence of the smart module. In the H500, you won’t find one. Although this means you’ll be dependent on your motherboard’s fan headers to connect your case fans, it reduces the price of the case considerably.
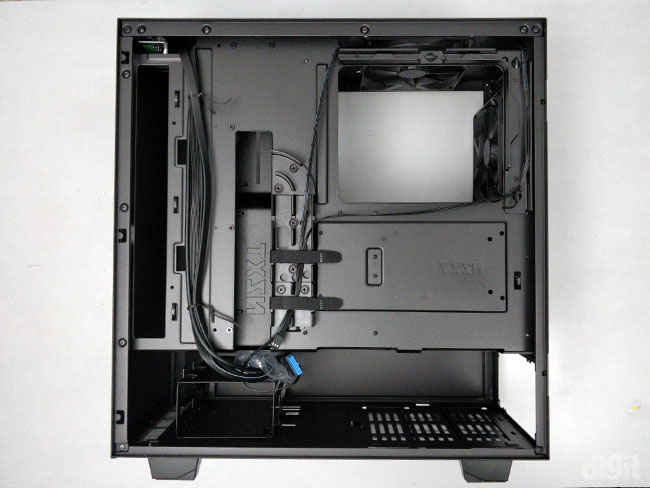
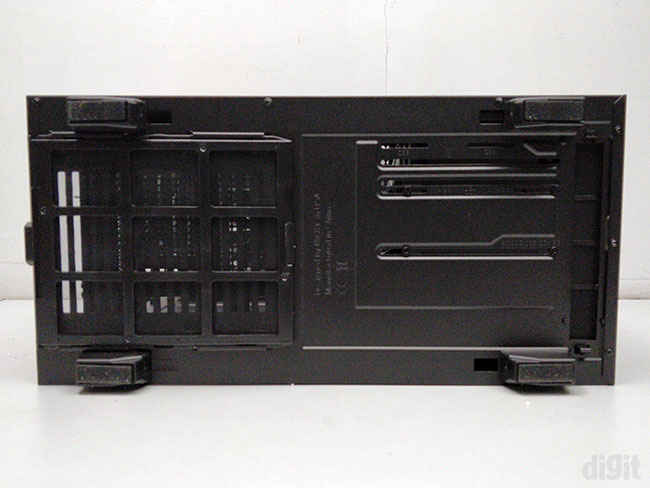
The cable management system in the new H series is brilliant. Similar to the H700 and H700i, it takes care of all your cables with a generous number of tie points all across the back of the motherboard plate. At the middle, there’s a convenient cable routing channel to accommodate all the thick cables behind velcro straps. Throughout the build process, because of these pre-existing channels, we were able to plan the build better.
In terms of cooling capability, the maximum of the radiator that you can install is 280mm on the front panel. There isn’t much scope on the top panel since you can install only one 120/140mm fan on the top panel.
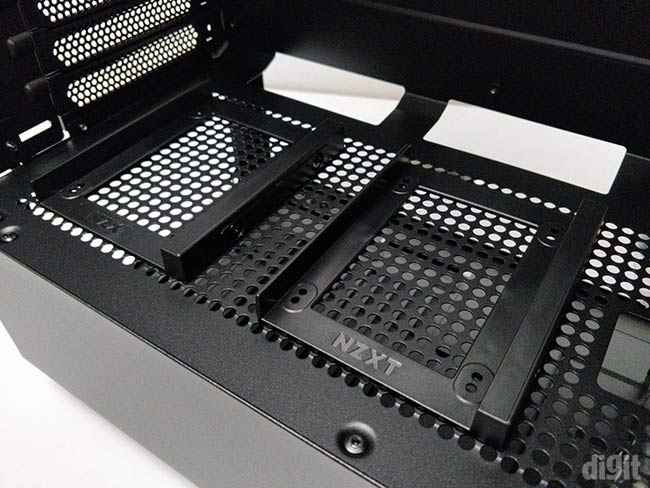
In terms of storage, NZXT came up with a smart way to make the SSD trays modular inside. Because of the perforated PSU shroud, the two SSD trays can be attached anywhere on top of it. They can also be moved to behind the motherboard plate but that would also hinder with the cables on the back.
Your HDD trays can be installed below the PSU shroud in the drive cage. It can comfortably accommodate three HDDs. We were a little disappointed that installing HDDs wasn't a tool-less feature. Also, you'd have to remove the drive cage out of the cage, thus, increasing complexity slightly.
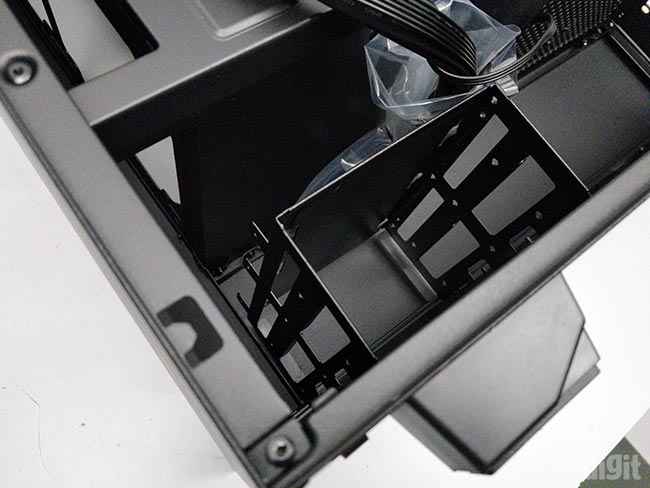
If you need more room for your PSU cables, the drive cage can be moved forward by removing the screws on the bottom of the case.
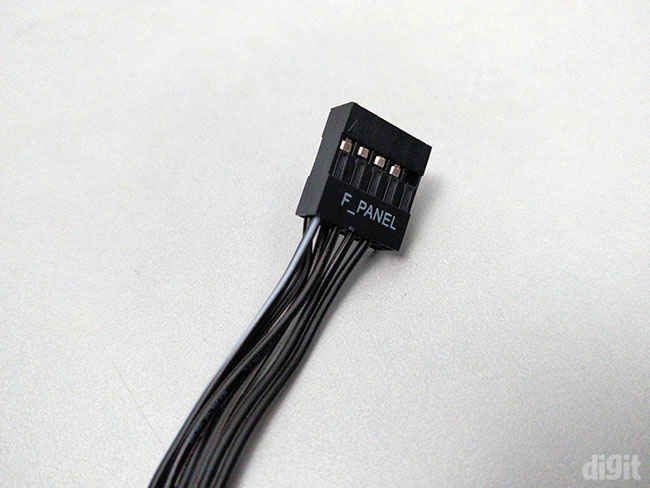
Another feature we want to highlight is the extremely useful IO port connector. Usually, you would have to individually connect the cables of the power and reset button. But NZXT has bundled up all these connectors into a single connector that can be attached like the USB connectors. This is something other case manufacturers should definitely adopt.
Testing methodology
The H500 was tested initially with the two pre-installed fans. If you want to learn more about our testing process, we would recommend you to read our review of the Corsair Obsidian 500D. For our second part of the testing, two 120mm fans were installed on the front panel as intake. In this configuration, the case had a balanced air pressure inside with two fans acting as intake and the other doing exhaust.
Our testing configuration is as follows:
CPU: Intel Core i7-4960X
Motherboard: ASRock X79 Extreme9
Graphics card: Sapphire Radeon HD 7790
CPU Cooler: Noctua NH-L9x65
RAM: Corsair Dominator 2x8GB DDR3 (16GB)
HDD: WD Red 2TB
SSD: SanDisk Extreme II (240GB)
Power supply: Antec HCP-1000 Platinum
Thermal performance
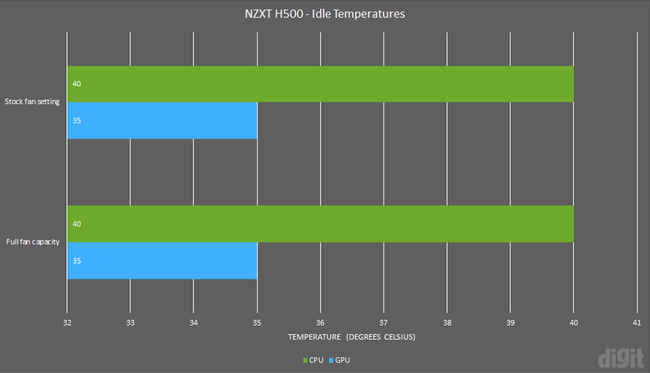
Two Aer F120 Case Version fans are included in the package where each of them exhausts hot air out from the top and rear panel. Without any air intake, we expected the internal temperature to be slightly higher than average. However, that wasn’t the case and the recorded temperatures were within the acceptable range. Before running the stress tests, we let the system idle for 15 minutes. The Intel Core i7-4960X idled at 36 degrees Celsius and Radeon HD 7790 stabilised at 34 degrees.

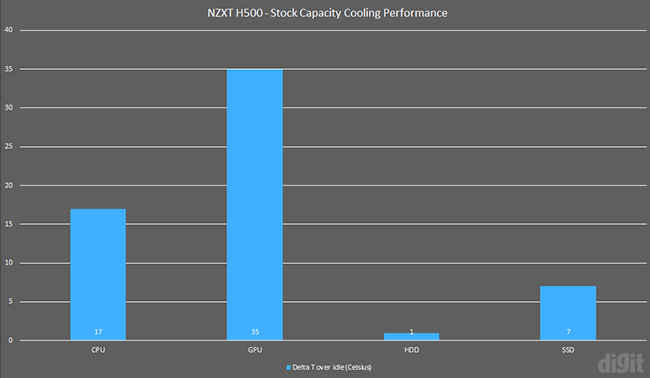
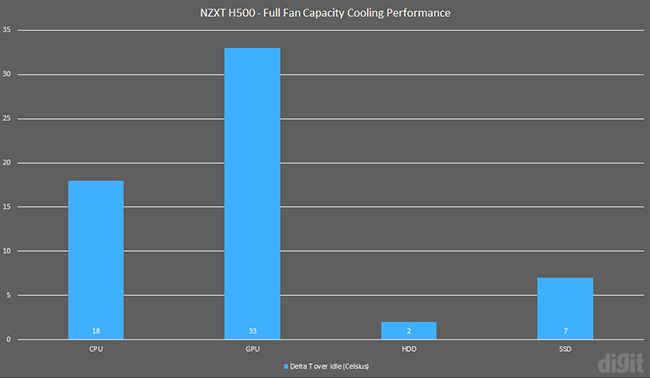
In our Prime95 stress test, the CPU went up to 53 degrees while the GPU touched 69 degrees. For a better picture of how well the case performs with more fans, we installed two more 120mm fans on the front panel as intake. Surprisingly, it didn’t do much at all. Installing a radiator in the future for your CPU would be a better investment rather than adding fans to cool the case. Additionally, replacing the top exhaust fan with a high airflow fan later will also lower the temperature inside by a few degrees.
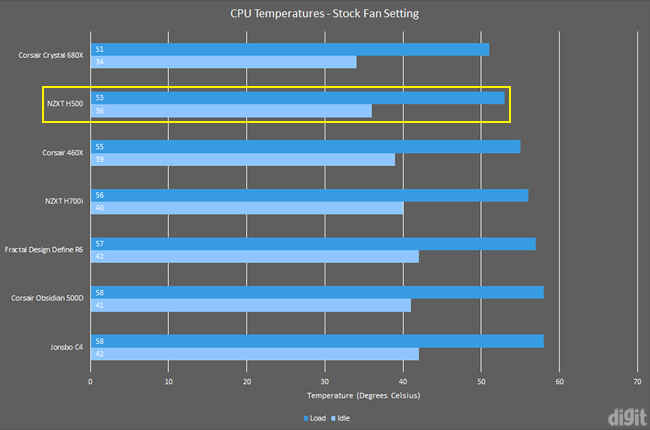
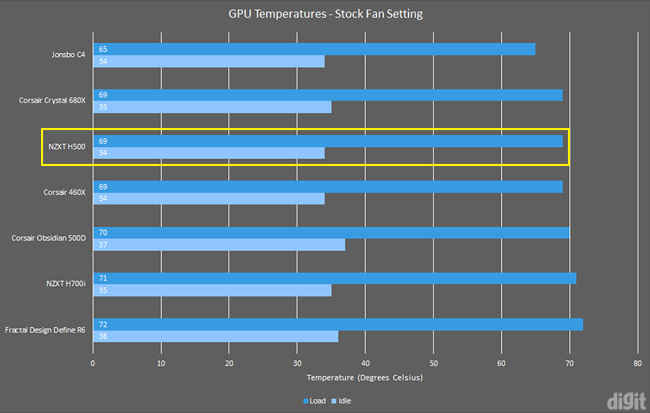
At this price, the cooling performance of the case is way above average. You can rely on the case fans itself to cool your system instead of replacing them with new ones.
Abhijit Dey
A Star Wars fan and sci-fi enthusiast. When I'm not playing games on my PC, I usually lurk around the Internet, mostly on Reddit. View Full Profile


