Microsoft Copilot AI will soon provide text explanations within Notepad: Here’s how
Microsoft has started testing a new feature in Notepad.
With ‘Explain with Copilot’, you can ask Copilot in Windows to help explain text directly from within Notepad.
Microsoft has also started testing the ability to add shapes to captures in Snipping Tool.

Microsoft has announced that it has started testing a new feature in Notepad. The new feature will help you quickly understand content in your text files using Copilot. You will be able to ask Copilot in Windows to help explain text directly from within Notepad.
This feature is currently rolling out to Windows Insiders in the Canary and Dev Channels on Windows 11.
Also read: Microsoft Copilot gets 2 new features to help edit AI-generated images
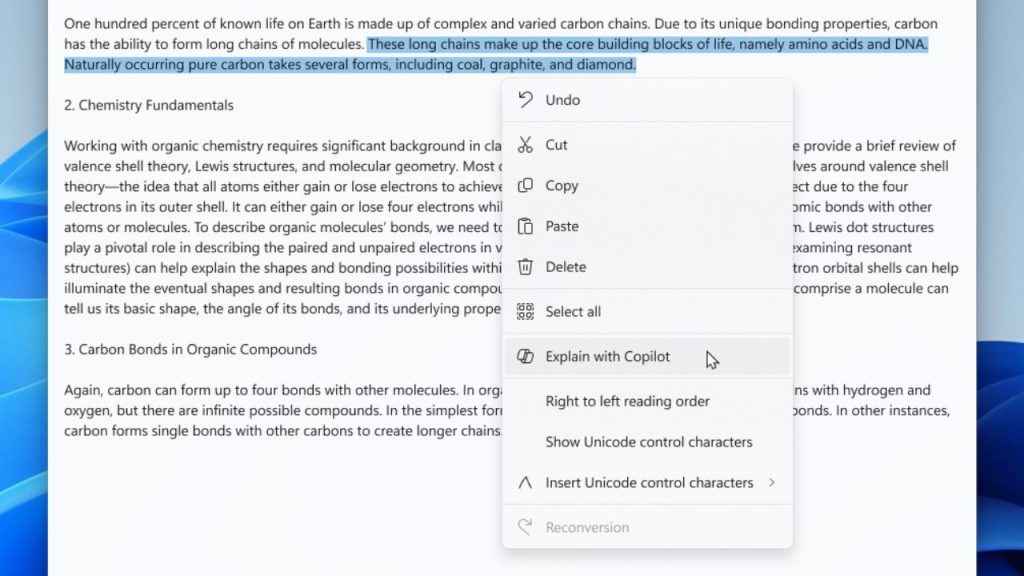
“With ‘Explain with Copilot’, you can ask Copilot in Windows to help explain log files, code segments, or any selected content directly from within Notepad,” the company said in a Windows Insider blogpost on February 8th.
To use this feature, you will just have to highlight any text, right-click, choose “Explain with Copilot” from the menu or use the new Ctrl + E keyboard shortcut, and a detailed explanation will appear in Copilot.
It’s important to note this feature will be available on devices that have Copilot in Windows.
Also read: Google Bard vs Microsoft Copilot, who generates better AI images? Here are the results
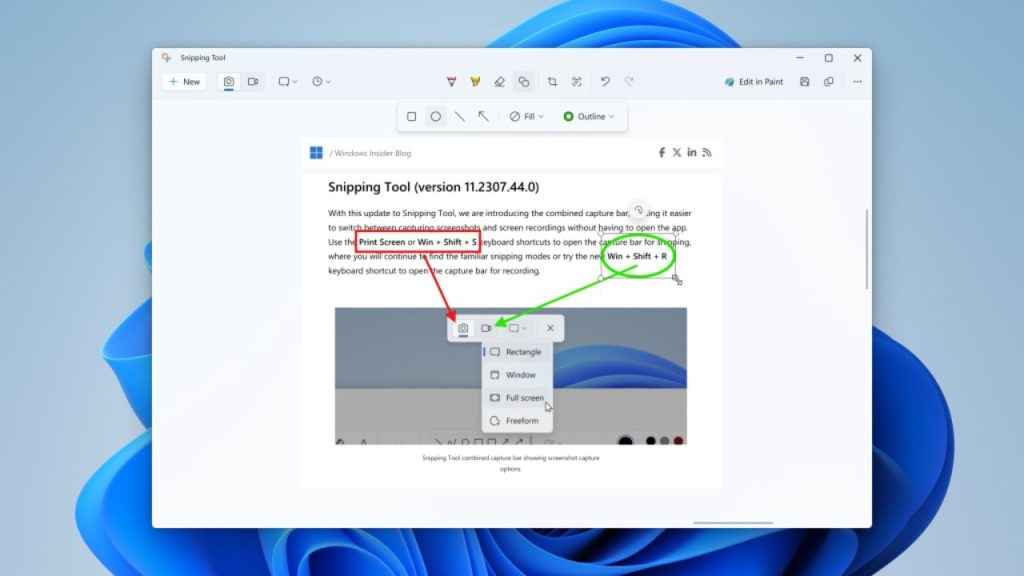
Along with the new Notepad feature, Microsoft has also started testing the ability to add shapes to captures in Snipping Tool, so that you can quickly add rectangles, ovals, lines and arrows to mark up your screenshots.
You will just have to select the new shapes button in the toolbar, and select the desired shape (you can change the fill or outline colour if you want to). Click and drag anywhere over your image to draw a new shape. You can even resize, move or change your shape colour before clicking away.
Once the shape is deselected, it will merge with your image, but you can still remove shapes with the eraser tool or undo your annotations, the tech giant explained.