
The DDR5 memory standard is a significant upgrade given that it completely overhauls the way power delivery is handled, error correction is native within DIMMs, channel architecture is optimised for higher efficiency and lower latency. There are obviously the generational advantages of getting faster speeds at lower power consumption and memory densities growing higher. In this article, we’re going to look at the key changes and how they impact performance using a Kingston FURY Beast DDR5 Memory kit.
Kingston FURY Beast DDR5 Memory
The Kingston FURY Beast DDR5 module has a slightly different heatsink design than the DDR4 modules under the FURY Beast lineup. The heatsinks are just shy of 35 mm in height making these modules compatible with practically all beefy CPU coolers in the market. The mating mechanism for the two metal halves of the heatsink is the same as what we’ve seen before.
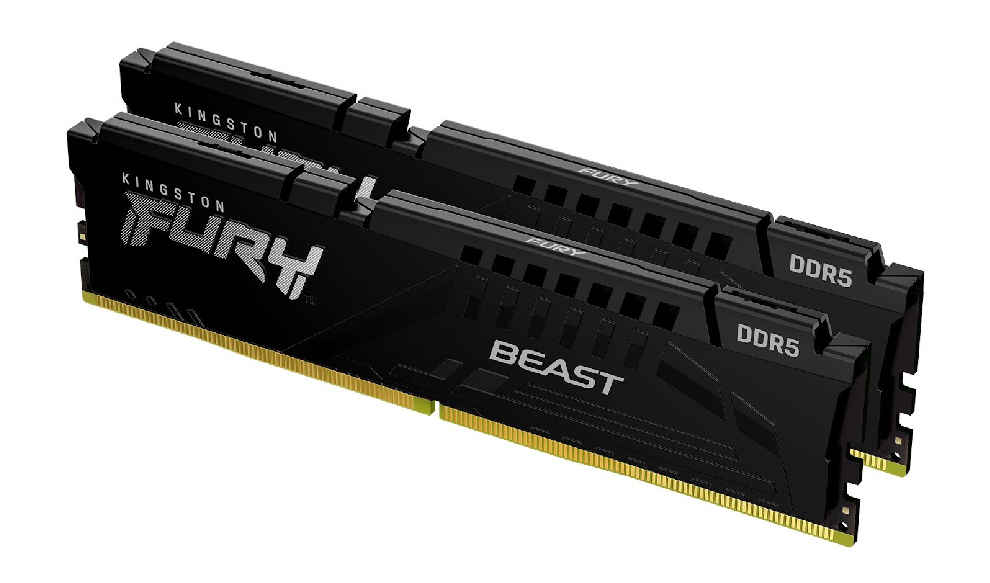
The 5200 MT/s modules sport Micron MT60B2G8HB-48B DDR5 SDRAM chips with a density of 16 Gb and they’re rated to operate at 4800 MT/s and can be overclocked to hit 5200 MT/s using one of the XMP profiles. The Kingston FURY Beast DDR5 memory kits cover a wider gamut of performance profiles. Here’s a look at the specifications for the lineup.
|
Kingston FURY Beast DDR5 Specifications |
|
|---|---|
|
Capacities |
Singles – 8 GB, 16 GB, 32 GB Kits of 2 – 16 GB, 32 GB, 64 GB |
|
Speeds |
4800 MT/s, 5200 MT/s, 5600 MT/s, 6000 MT/s |
|
Latencies |
CL38, CL40 |
|
Voltage |
1.1 V, 1.25 V, 1.35 V |
|
Operating temperature |
0°C to 85°C |
|
Dimensions |
133.35 mm x 34.9 mm x 6.62 mm |
What you'll need
This article mostly deals with overclocking DDR5 modules, however, the concepts can be applied to older memory standards as well. DDR5 is currently only present on the latest Intel 12th Gen platform and the best of the lot happens to be the Intel Core i9-12900K processor. It has 8 Performance Cores and 8 Efficient Cores leading to a total core count of 16. However, there's also multi-threading on the P-Cores, so the operating system gets to see 24 Threads. The Intel Core i9-12900K has a Max Turbo Frequency of 5.2 GHz for maximum performance.
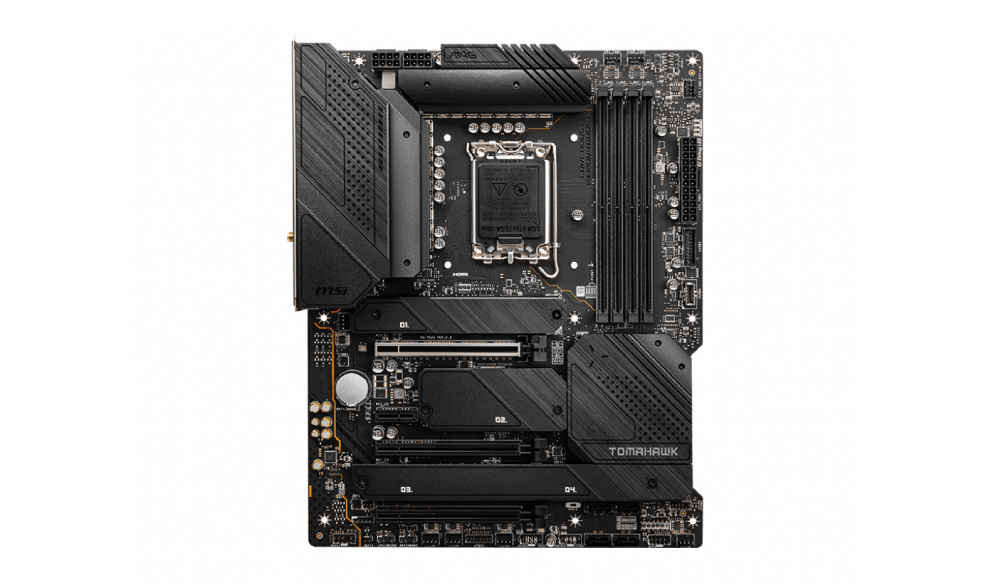
You'll also need a compatible Z690 motherboard for running the Intel Core i9-12900K. The MSI MAG Z690 TOMAHAWK WIFI is the board that we're using here. It's a DDR5 motherboard with support for memory clocks going all the way up to 6400 MT/s. The board has all-metal cladding across the entire surface and has provisions for seating 5 M.2 NVMe SSDs. It also has some of the fastest LAN, WIFI and USB connectivity options resulting in an all-around feature-rich package.
DDR5 parameters that matter the most
Before we get into optimising your DDR5 memory kits for higher performance, let’s understand the metrics and how they impact performance. There are several key parameters which have the highest impact and then there are the secondary parameters which further help with tuning the performance. We will, of course, start with Speed.

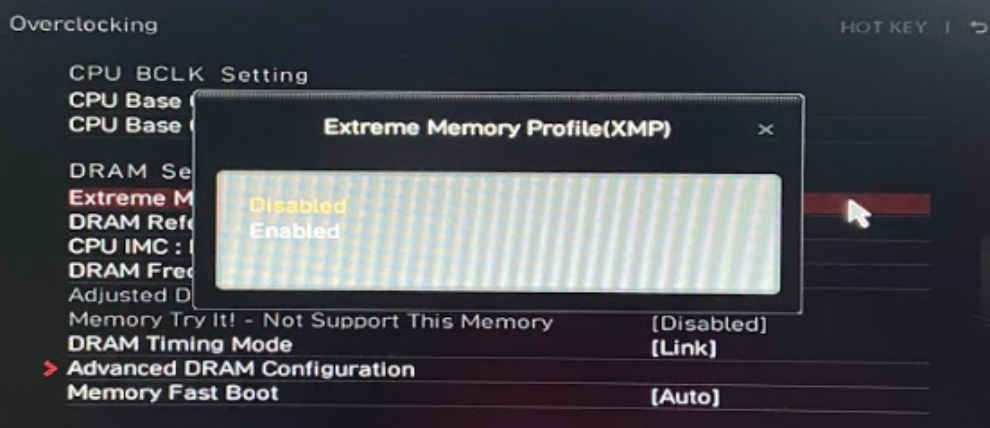
XMP
XMP or eXtreme Memory Profile is an Intel technology that groups several memory sub-timings or parameters which are stable and labels them as a profile. You can have several such XMP profiles on a single ram module and you will get different performance levels with each profile. There’s a small chip called the SPD on the RAM module which stores these profiles with the rated speed and memory timings which a particular module is rated and tested for. With DDR5, you can now have up to three XMP factory profiles in a RAM module whereas until DDR4, you could only have two profiles.
Speed MT/s
JEDEC, the organisation that decides the memory standard, has set the bare minimum speed for DDR5 memory standards to be 4800 MT/s or Mega Transfers per second. And as of writing this, the peak rated speed can go up to 8400 MT/s. However, there aren’t any modules available with such high speeds.
Density
With DDR4 modules, the highest density possible is 16 Gb per Single Die Package (SDP). This meant that you could have DIMMs or memory modules of up to 64 GB. With DDR5, JEDEC has revised the standard with the max density being 64 Gb per SDP. This leads to DIMMs with a max capacity of 256 GB. While 256 GB DIMMs might be possible to manufacture, current mainstream desktop systems such as the Intel Alder Lake platform only supports a maximum of 128 GB across all DIMMs.
Power Management
With DDR5, the power management has moved from the motherboard to the RAM modules. This is done using a component called the PMIC or a Power Management Integrated Circuit. Previously, the motherboard would use the 12V input from the power supply and downscale that to a usable level for the memory modules. This meant that both supply and stability of supply were dependent on the motherboard. And premium motherboards would do a much better job than mid-range and entry-level motherboards. With the power management moving to the RAM modules, it’s now up to the RAM manufacturers to build a more robust voltage regulation circuit on the module. This also means that there are more components on the module which generate heat, thus, making modules with heatsinks such as the Kingston FURY Beast DDR5 lineup more appropriate.
Channels
With DDR2, DDR3 and DDR4 memory modules, each DIMM could only have one memory channel. And depending on the motherboard and the processor, you could have a single channel, dual channel, triple channel or quad-channel configuration. This also meant that you would need – one, two, three or four slots (or multiples thereof) on the motherboard. Each slot could only handle one memory channel so you either needed 2 or 4 slots to achieve a dual-channel memory configuration. With DDR5, you now have the possibility of having two memory channels within a module. So you can have two sticks of memory connected on a motherboard and that would give you a quad-channel configuration. Memory-intensive workloads tend to benefit because of this feature. This doesn’t mean that you will get a triple channel configuration if you populate three out of the four slots on a motherboard. That’s up to the motherboard and processor manufacturer to decide. Most mainstream Z690 boards will support up to a quad-channel configuration.
Timings
There are five primary timings. tCL, tRCD, tRP, tRAS and tRFC. When you buy a memory module, you will most certainly see the tCL or CL timings labelled clearly. In some cases, you will see the entire list.
Gears
The Gear Mode(s) is simply the ratio of the base frequencies of the memory controller to the processor’s memory controller. There are three Gear Modes and this is how they are related.
Gear 1 – Memory:CPU Ratio is 1:1
Gear 2 – Memory:CPU Ratio is 2:1
Gear 4 – Memory:CPU Ratio is 4:1
In Gear 2, the memory is running at twice the speed of the controller so you have headroom for hitting higher speeds a.k.a. MT/s. However, this comes at the cost of memory latency. Gear 4 allows for even higher speeds at much lower latencies.
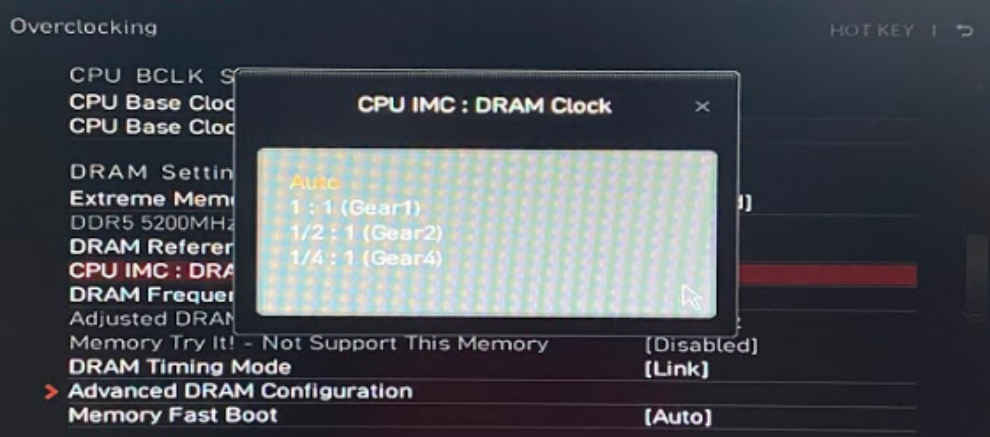
You can discern that Gear 1 is the most unforgiving configuration but it offers the lowest latencies and the highest performance. Most modules in the market will feature Gear 2 and Gear 4 profiles and you’ll only find Gear 1 profiles in limited edition modules meant for overclockers.
Overclocking with DDR5
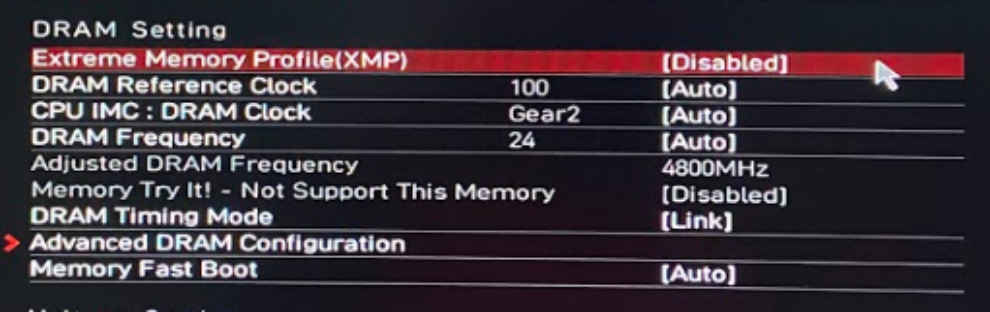
Let’s get the easiest bit out of the way first. If your memory module has an XMP profile stored in it, then you should check all the profiles that the motherboard and processor supports. Then switch to any of the supported profiles. This is the fastest and easiest way to get a significant performance bump.
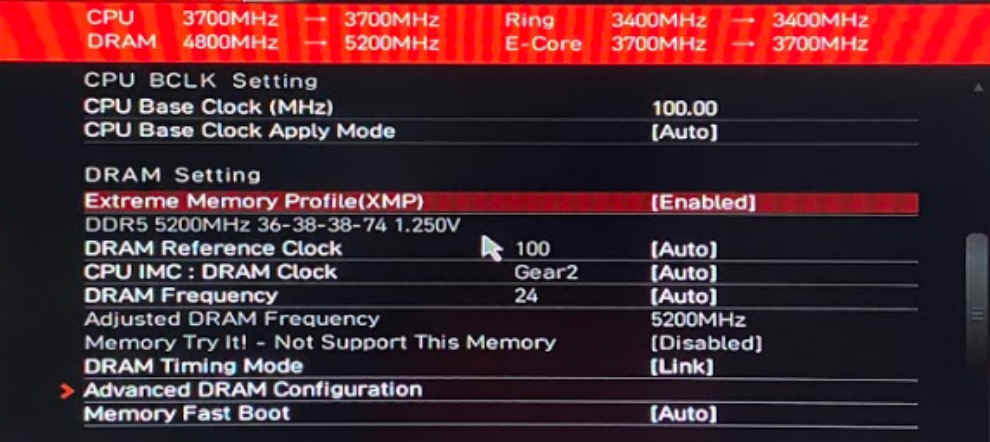
If you aren’t satisfied with a simple XMP overclock, then you can always try your hand at manually tweaking the settings. Always remember to perform a stability test to ensure that the performance numbers that you’ve input are working properly. You can use software such as HCI Memtest to perform a stability test. Let’s get on with the overclocking then.
Frequency / Speed
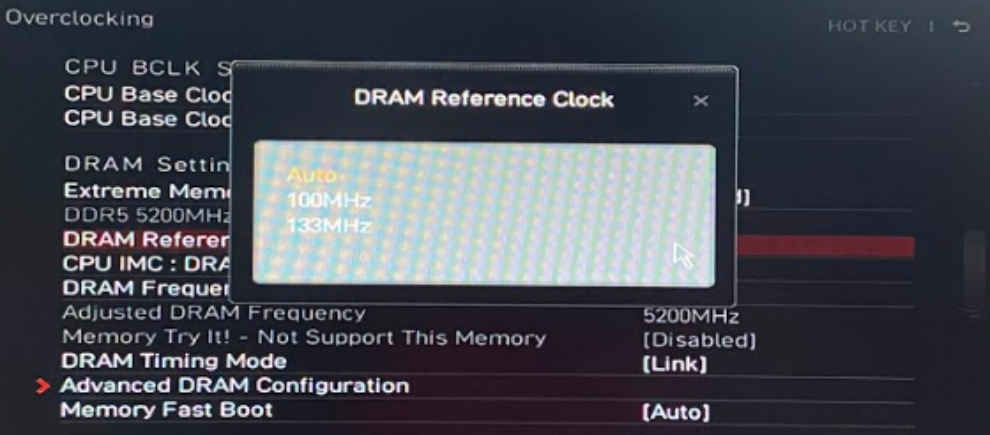
Before starting off, you need to pick the BCLK/DRAM ratio. You will get options such as 100:133 and 100:100. With Alder Lake systems, stick to 100:100.
Then pick the Gear which will be G1, G2 or G4. G1 will be extremely tight and difficult to play around with whereas there’s significant headroom for experimentation with G2. So go ahead with G2.
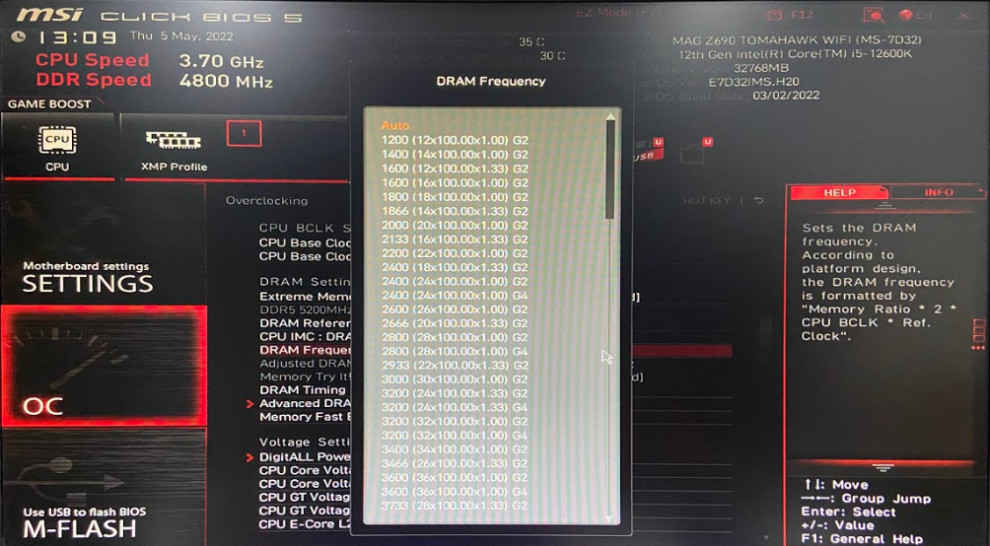
Now pick the frequency. Let’s say that the module that you have goes up to 5200 MT/s. This means that you should be able to overclock to 5333, 5400, 5600, 5800, 5866, and 6000 MT/s. Remember that we’d decided to go with a 100:100 BCLK/DRAM ratio? This will whittle down some of the options. Let’s rewrite these numbers in a tabular form to see the appropriate speed applicable.
|
MT/s |
Multiplier |
BCLK |
DRAM |
Gear |
|---|---|---|---|---|
|
5200 |
52 |
100 |
100 |
G2 |
|
5333 |
40 |
100 |
133 |
G2 |
|
5400 |
54 |
100 |
100 |
G2 |
|
5600 |
56 |
100 |
100 |
G2 |
|
5600 |
56 |
100 |
100 |
G4 |
|
5800 |
58 |
100 |
100 |
G2 |
|
5866 |
44 |
100 |
133 |
G2 |
|
5866 |
44 |
100 |
133 |
G4 |
|
6000 |
60 |
100 |
100 |
G2 |
|
5600 |
60 |
100 |
100 |
G4 |
Now eliminate the profiles with a BCLK:DRAM ratio of 100:133 and those profiles with the Gear set to G4. We get the following profiles.
|
MT/s |
Multiplier |
BCLK |
DRAM |
Gear |
|---|---|---|---|---|
|
5200 |
52 |
100 |
100 |
G2 |
|
5400 |
54 |
100 |
100 |
G2 |
|
5600 |
56 |
100 |
100 |
G2 |
|
5800 |
58 |
100 |
100 |
G2 |
|
6000 |
60 |
100 |
100 |
G2 |
With manual overclocking, you’ll go step by step starting with the 5400 MT/s profile to the 6000 MT/s profile till you find one that’s stable. Once you come across a bit of instability, your first approach would be to increase the voltage a little.
Increase Voltage
It is essential that you know which chips are being used for the memory modules that you have. This is because different chips from different manufacturers have a frequency range which they can run at without needing additional voltage. Also, after a certain point, there is no point in increasing the voltage at all.
Your best course of action is to check the voltages that other overclockers have used and then follow suit. Ideally, increase the voltage in the smallest steps possible. For beginners, it’s best to not increase the voltage and stick to tweaking the timings of the RAM modules.
Primary Timings
The goal here is to start reducing the sub-timings to the lowest stable values. You can start by dropping one of the timing values by 1 or 2 and then checking if the system is stable or not. If it isn’t, go back and increase it by 1 and retest for stability.
The Kingston FURY Beast modules we have are rated for CL40. So a good place to start would be to drop the CL timing by 2 (making it CL38) and check if the system is stable or not. If not, increase to CL39 and retest.
This is an extremely tedious process but there’s a list of XMP 3.0 profiles on Intel’s website – https://www.intel.com/content/www/us/en/gaming/xmp-3-for-core-processors.html. You can use these profiles to see which timings to tweak and by how much.
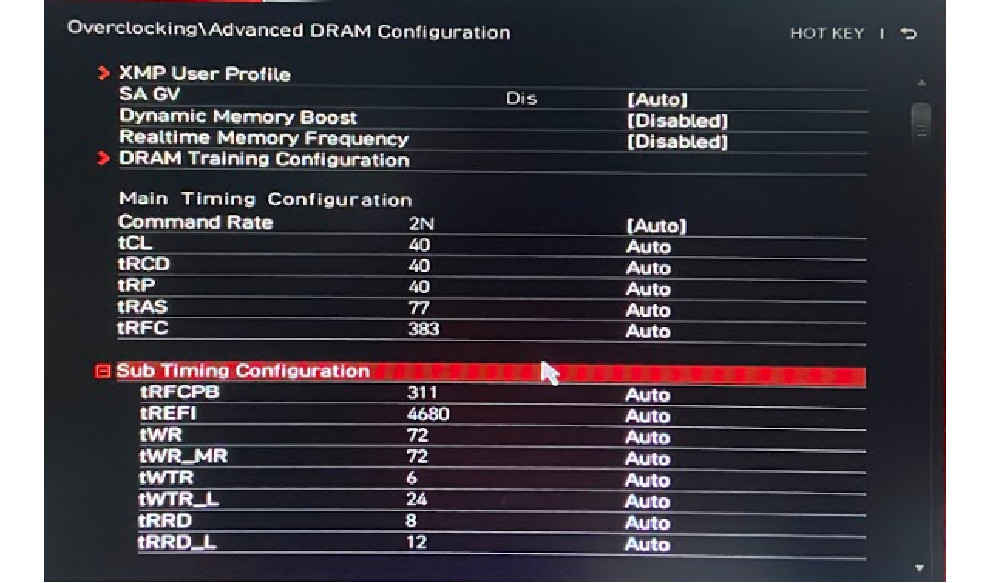
Secondary timings are a lot more complex to tweak and it’s best that you let the motherboard figure these things out. They are set to ‘Auto’ by default and you should let that be until you’ve grown proficient with tweaking the primary timings.
Reduce voltage
Once you’ve achieved stability with reduced timings, it’s always a good practice to try reducing the voltage. Driving too much voltage will reduce the life of your components and bringing it down is always favourable. The steps are similar to what you might have performed while twiddling with the voltage levels the first time. Only that you’re now reducing the voltage by the smallest possible amount before retesting for stability.
DDR5 Performance Reviews
We seeded several members of the Digit community with DDR5 kits powered by Kingston, Intel and MSI to let them experience how DDR5 improves their lives. You can read their experiences here.
Sponsored
This is a sponsored post, written by Digit's custom content team. View Full Profile


