How to calibrate and check your monitor.
A few things you should look at after having purchased your new display

Your labour of love is now complete. All the days of restlessly trawling e-commerce websites, price comparison engines, and haggling with dealers in hardware shops have finally come to fruition. Be it an OLED TV, 144 Hz gaming monitor with all sorts of bells and whistles, or curved LED-backlit LCD abomination – the most important step involves making sure the darn thing works. While this may seem trivial and stating the obvious, that only applies when you have display that comes dead out of the box. However, real life isn’t all black and white, you come across shades of grey. By that, I mean displays that seem to work fine out of the box, but have damning issues or even niggles that range from mere annoyances to rendering them practically unusable.
Seek Replacement Within a Week
Whether or not the manufacturer has done its quality assurance, it’s your job as a power user to detect any latent or dormant flaws and claim the initial no-questions-asked returns policy. The very first step therefore involves ascertaining exactly how much time you have to report manufacturing defects and get the products replaced. For most consumer electronics products purchased from brick and mortar shops, this period is usually seven days. Displays purchased from reputed online stores such as Flipkart or Amazon can come with generous 15 to 30 day returns guarantees. After we have figured out how much time you have, we move onto the more challenging aspect. That is, putting the display through the paces to reveal any inherent manufacturing flaws.
Ensuring whether the TV or monitor has shipped with all packaged contents is a good place to begin. Replacing a standard cable is easy, but it’s not good if your display has shipped without an important proprietary accessory or a remote. The next step involves checking the display for any physical defects or damage. Check the body for dents (in case of metal chassis) or tell-tale white marks where the plastic body may have warped. Do this especially near the screw bosses for VESA mounting point and other snap-on attachment points. What you’re essentially checking for is to ascertain whether you haven’t received a used, refurbished, or open unit. While the chance of that happening is slim, wise men don’t rely on the honesty of their vendors.
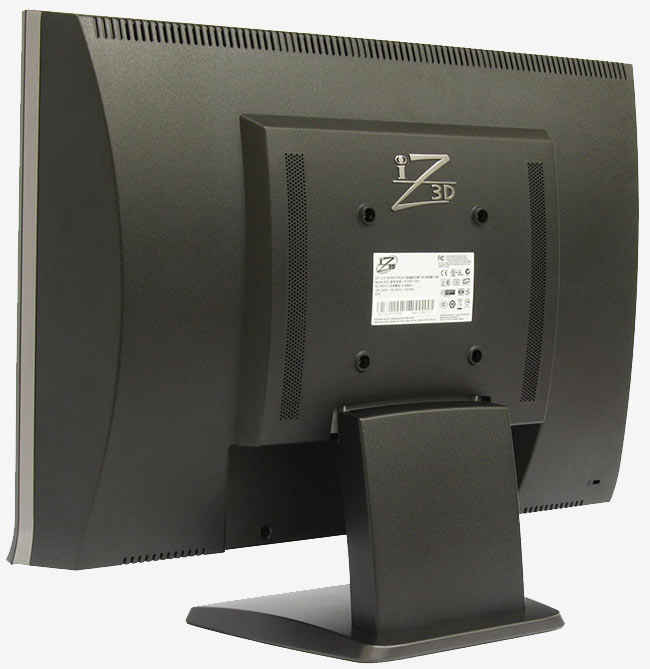
Thereafter, check the area between the inner side of the screen bezel and the panel for any tell-tale nicks or marks, which could be a sign of the product being opened for panel replacement for refurbishing. Checking this gap for uniformity is also a good indicator of the unit’s build quality, because the gap between the bezel and the panel largely dictates how controlled or severe the backlight bleeding issue will be for LCD/LED panels. Now that we know that the display isn’t physically broken, switch it on and test all the I/O ports. It’s better to find out about a faulty Display Port input now rather than a year later when in the unlikely event that you will have upgraded to a Display Port-only graphics card. Run through all the setup menus and check every mode and software setting to verify whether everything works as advertised.
Don’t Forget to Check the Panel
Well, congratulations. You seem to have a perfectly working display. Albeit, with the minor exception of the display panel. Which is, you know, pretty much the most important aspect of the TV/monitor itself. Begin by opening MS Paint and pressing <Ctrl> + <e> to bring up the “Image Properties/Attributes” menu and setting the image width/height to the native resolution of your display. Now, use the Paint Bucket tool to paint the canvas pure black. Press <F11> to make the image full screen. What you’re looking for are faulty pixels that stay lit continuously. No lit pixels? Well, now rather, rinse, repeat with white to check for dead pixels, followed by pure red, green, and blue to check the subpixels for any issues. The white and black screens can also be used to test for colour cast and excessive backlight bleed issues (make sure the room is pitch black before testing), which can be unfortunate since these make seeking replacement a bit harder depending upon your display manufacturer.
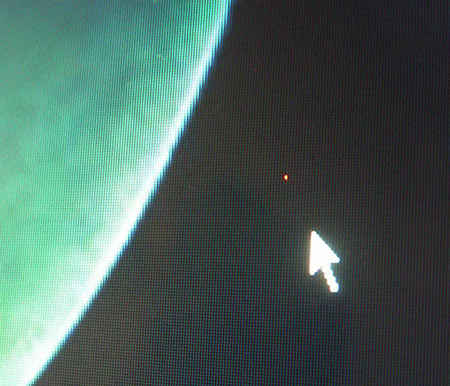
Look carefully for dead pixels on your display panel.
If you do find any dead or lit pixels, check the manufacturer’s warranty for replacement policies. Some manufacturers will replace units with any number of wayward pixels within the first seven days. Others such as Dell have a zero tolerance policies, which guarantees panel replacement even if one stray pixel shows up during the warranty period. Few others such as Asus demand multiple dead pixels to be clustered in one area before you can even demand for replacement. Therefore, it pays to verify these policies before making a purchase decision, seeing as even one dead pixel in the centre of the panel can ruin an otherwise perfect display.
Ditch the Horrible Factory Settings
Hurray to the nice quality assurance dude, who seems to have done an impeccable job of ensuring that your display was absolutely problem free. But wait, your display isn’t perfect yet. Not even by a long shot. It’s common knowledge that the default settings on the TV are deliberately calibrated to shine through the bright fluorescent lights. The picture appears gaudy thanks to oversaturation and have their brightness and contrast settings exaggerated, with noise filtering and sharpness settings turned all the way to eleven. In short, every display out there (this is especially true for TVs) – no matter how good it actually is – is calibrated to appear absolutely horrendous out of the box.
This is where you can either go the whole hog and invest in a good calibration/testing Blu-ray such as Spears and Munsil HD Benchmark 2nd Edition or Digital Video Essentials HD Basics. If you have invested. If you have even deeper pockets, or have made a substantial investment in a colour accurate professional monitor or a monstrously large and hence expensive TV, it’s a great idea to invest in a good display calibration tool such as Datacolor’s Spyder colorimeter, which can set you back by around fifteen to twenty-five grand depending upon the features. If you’re not committed to spending a lot on calibration tools and software, there’s a free alternative that still gives pretty stunning results provided you know what you’re doing.
In all probability you probably don’t know how to go about calibrating your display without any hardware or fancy software calibrators, but don’t fret because we have got that covered. Like most free stuff, this free calibration tool too comes from the generous land of Europe. Netherlands to be precise, where a university has released some handy and reliable suite of display calibration test images on its website. Here’s what you need to know about using these free test images to calibrate your display using only your eyes.
Calibrating the Display With Your Eyes
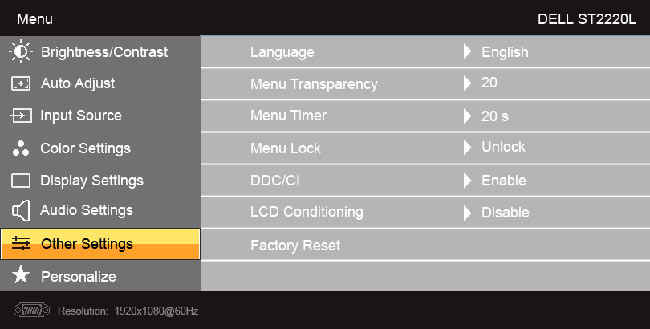
Before we begin to tweak any settings, it’s important to tone down the horrendous default settings and image “optimisations” the manufacturer has dialled up to vie for your attention in the showroom. First off dial down the brightness levels down to anywhere between 35 to 40 percent, depending upon which level gets you the deepest blacks. Don’t fret about getting things perfect at this juncture, we shall be doing that later with the help of calibration images. The contrast setting should be kept at anywhere between 70 to 80 percent prior to final calibration.
This will sound counterproductive, but go ahead and switch off absolutely all picture enhancement gimmicks without any exception. This includes noise reduction, dynamic backlight control, contrast enhancements… the whole lot. Since you’ll be performing this calibration by hooking up your display to a PC/laptop, make sure you set the TV up to disable image scaling and enable 1:1 pixel mapping. Sadly, enabling this setting is not that easy because some TV’s flat out lack this crucial feature, whereas others have it hidden away in the deeper sub-menus under an obscure name. Some manufacturers dub 1:1 pixel mapping as “Aspect Ratio: Normal”, whereas others call it “PC Mode”, “Screen Fit”, or “Dot by Dot”. If you can’t find this setting, most displays come with detailed manuals (which are sometimes online) that explain how to enable it. Note: this setting doesn’t apply to PC monitors.
Thereafter, change the HDMI colour mode from analogue YCbCr to digital RGB mode. Also make it a point to go through the GPU’s driver setting to disable all colour and image enhancements. Finally, make sure you set the colour temperature or white point to 6500 K, which should be called “normal” or “mid” setting depending upon your TV’s make.
Now that everything’s primed and ready, make sure that you have left your display switched on for at least 30 minutes before loading up calibration websites for the final calibration. What follows is a detailed explanation on what the important test patterns entail and how you can go about adjusting your display settings optimally.
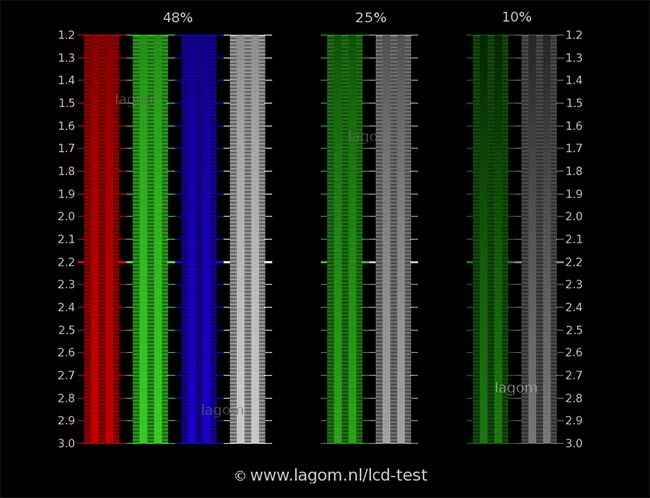
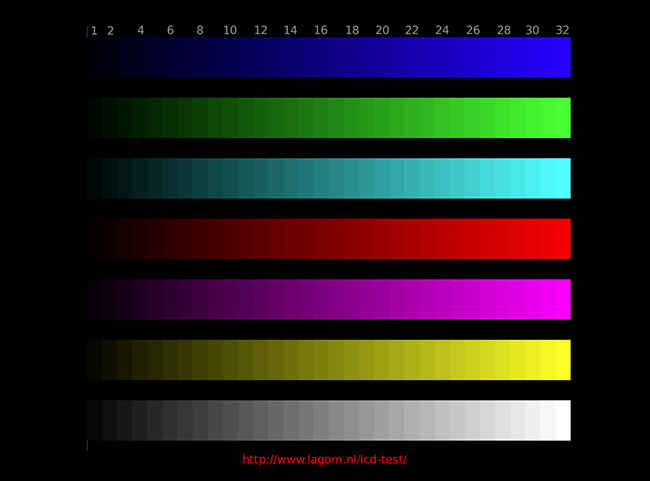
Lagom's LCD tests have all tools to evaluate your display panel
Black Level: This evaluates the capability of the television to display deep blacks. The image is comprised of multiple swatches of progressively black tints that finally blend into the perfect black background. The idea is to first coarsely adjust the brightness setting until the background stops being grey and appears black. You know you have got the brightness setting right when any further reduction in the level doesn’t many any difference to the blackness of the background. Once the brightness levels are optimally set up, look out for the first ten tints of RGB value 1 to 10. If your display has an excellent panel, it should be able to differentiate all ten swatches from the black background. If not, increase the brightness until you can tell the darker swatches from the background. Make sure that you aren’t turning the black background grey by increasing the brightness too much.
White Saturation: Like the last test image, this one allows the ability of the display to distinguish between extreme white details. This is achieved by setting the contrast setting to optimum level. What you’re looking for is the ability of the display maintain optimum contrast levels in order to distinguish between the last five swatches represented by the values 250 to 254. Make sure the contrast is set as high as possible without causing the swatches to bloom at the edges. A good display will be capable of displaying all five tints.
Contrast: As the name suggests, this test measures the extent of contrast the television is capable of displaying and the overall uniformity. You’re want to use this test image to fine tune the brightness and contrast settings until the display can distinguish between as many RGB values 1 to 5 (leftmost swatches) and 28 to 32 (rightmost swatches), while also maintaining the uniformity within the gradient.
Adjust your monitor's contrast levels using Lagom's LCD tests
Gradient Banding: Before viewing this test image, make sure to check if your video card or display source itself is capable of displaying “true colour” depth (24 million colours) and isn’t susceptible to banding artefacts. Thereafter, you will observe the TV for smooth transition from deep black to bright white. Displays that show discernible banding and greenish/pinkish discolouration in some swatches aren’t capable of reproducing the entire colour spectrum. Either that or the source (GPU) cannot handle true colour modes. This test is more to identify and rectify anything that prevents your display from reproducing the full colour gamut than a means to tweak any display settings.
Sharpness: This test image is best viewed from a fairly large distance. You’re essentially adjusting the sharpness until the entire image appears grey from a distance. If the display cannot make the central circle disappear, it means the the gamma settings are off.
Gamma: This test image is best viewed from a distance at which the horizontal stripes appear uniform. Now, observe the image to check exactly where the lighter and darker bands within the vertical colour bars blend into each other. The bands should ideally blend in at 2.25 (48%), 2.20 (25%), and 2.17 (10%) for the three vertical bars. If they don’t adjust the gamma settings through the GPU, or if that setting is available on the display itself.
Can't figure out which monitor to buy? Read our Monitor Buying Guide here.
Content Lead at MySmartPrice.com by day and avid gamer/DIY geek at night, Nachiket Mhatre channels a decade of experience writing about consumer technology, PC hardware, audio/video, and videogames.