Featured RIA: Autodesk Homestyler

Autodesk Homestyler started off as an Autodesk Labs product, where it existed under the code-name Project Dragonfly. It has come a long way in the past year, with massive changes in its user interface, and feature set, and has since graduated from Autodesk to become a full fledged member of the Autodesk family of products. Even so, Autodesk Homestyler still remains a free product for anyone to use. You can use it without registering an account, however a number of features are only available for registered users, including saving projects online at Autodesk’s servers.
Autodesk Homestyler is online application that allows you to lay out and furnish a building. The rich interface makes it amazingly simple to create even complicated floor plans, and furnish it to choice. One can switch between a 2D and 3D layout in real time to explore your design from all angles. Creating multi-storied buildings is also possible, and so is creating curved walls and other exotic designs. It is not a replacement for a full-fledged architecture application such as Autodesk Revit, but for the audience it targets, it is perfect.
 |
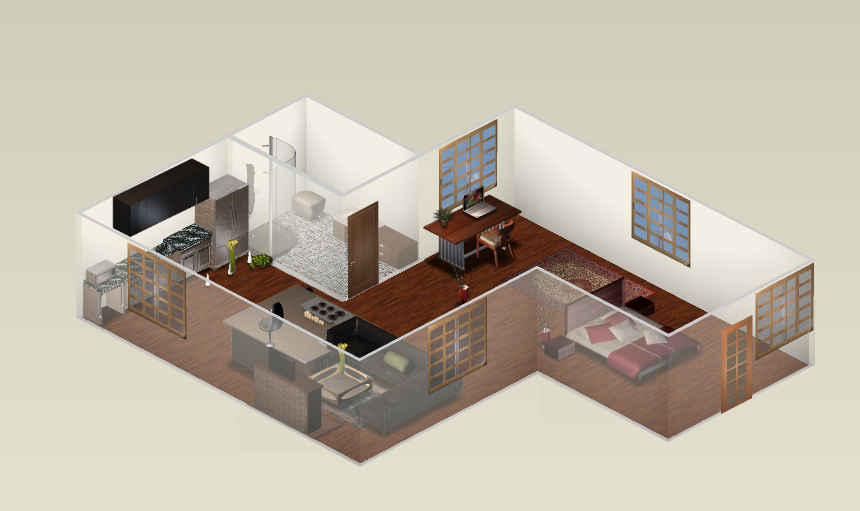 |
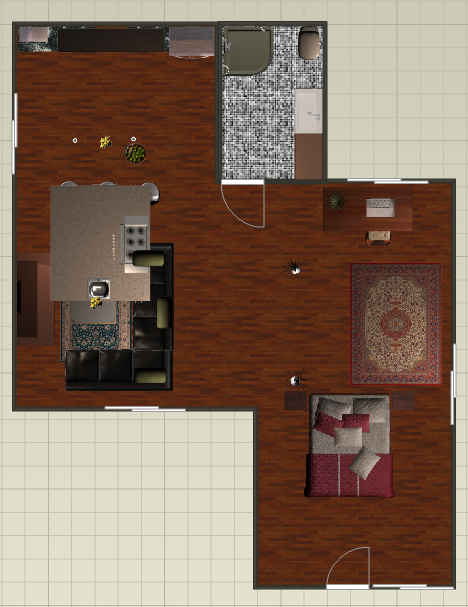
| 2D View of project | Corrresponding 3D view |
It is amazing to see how much is possible in this application straight in the browser, without sacrificing ease of use. Autodesk Homestyler is possibly one of the most impressive utilizations of Flash technology out there. A “fast, easy, free way to design your home” indeed!
Since the application is rather complex and rich, it does take a while to load, and starts you off with instructions on how to begin using it. The application interface has significantly changed over time, and it follows the desktop paradigm more closely now. It features a tool bar including a menu bar on top, panels on the right include the tools and objects you can use in your work. Turn on the fullscreen feature of your browser (usually using the F11 key), and you will barely notice that this is a browser app. In fact the application supports its own fullscreen mode using the fullscreen support available in Flash. However in this fullscreen mode Flash doesn’t support keyboard input.
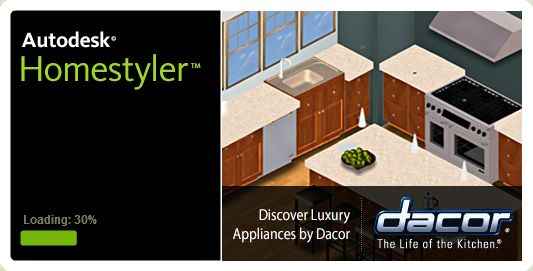 |
| Autodesk Homestyler loading |
 |
| Getting started screen |
The menu bar exposes a majority of the features, with the usual menu layout, i.e. a File menu for creating a new layout, saving and loading. The Edit menu simply has the undo and redo options that are also available along with a save option to the right of the menus, and an menu item to edit your preferences. Unfortunately you cannot copy and paste objects, a feature that would have been quite useful in such an application. The View menu is where you can switch between the 2D and 3D view modes and you can control other display setting and dimension units.
| File menu. On the left-most end are the save and undo / redo buttons |
| View-related options / buttons are all here, including snapshots |
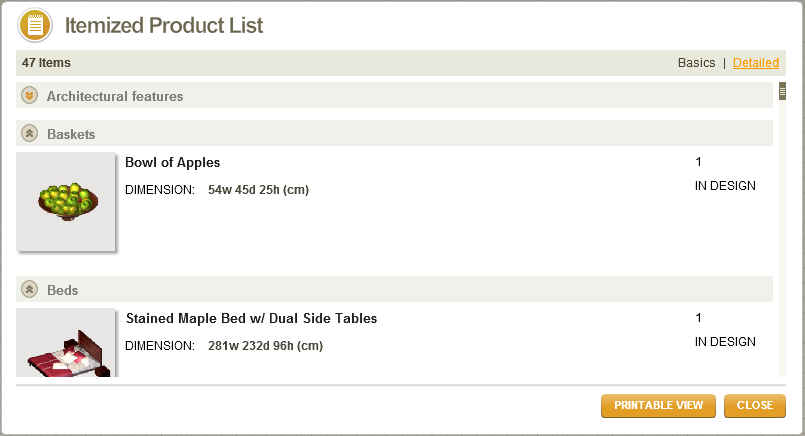
The shopping list menu is especially interesting. Once you are done with your design, this will automatically generate a shopping list of items that need to be purchased to actually build the project you have designed. Some items are even linked to websites for more information. This view includes a useful print function. Then there is a share menu item that has become the staple of any web application these days. It has the customary Facebook, Twitter and email links for sharing your designs.
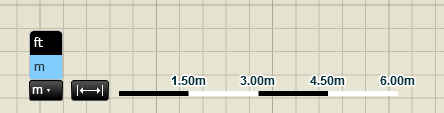
A majority of the interface of Autodesk Homestyler is rightfully taken up by the project design itself. This area displays a grid that is either 0.5 m x 0.5 m or 1 ft x 1 ft depending on the units you are using. Near the bottom of the grid are tools to quickly switch between m and ft for measurement, and to show detailed dimensions for any selected object. The grid automatically and immediately changes to reflect the units you select. Additionally the application uses your mouses scroll-wheel to zoom in or out into your workspace.
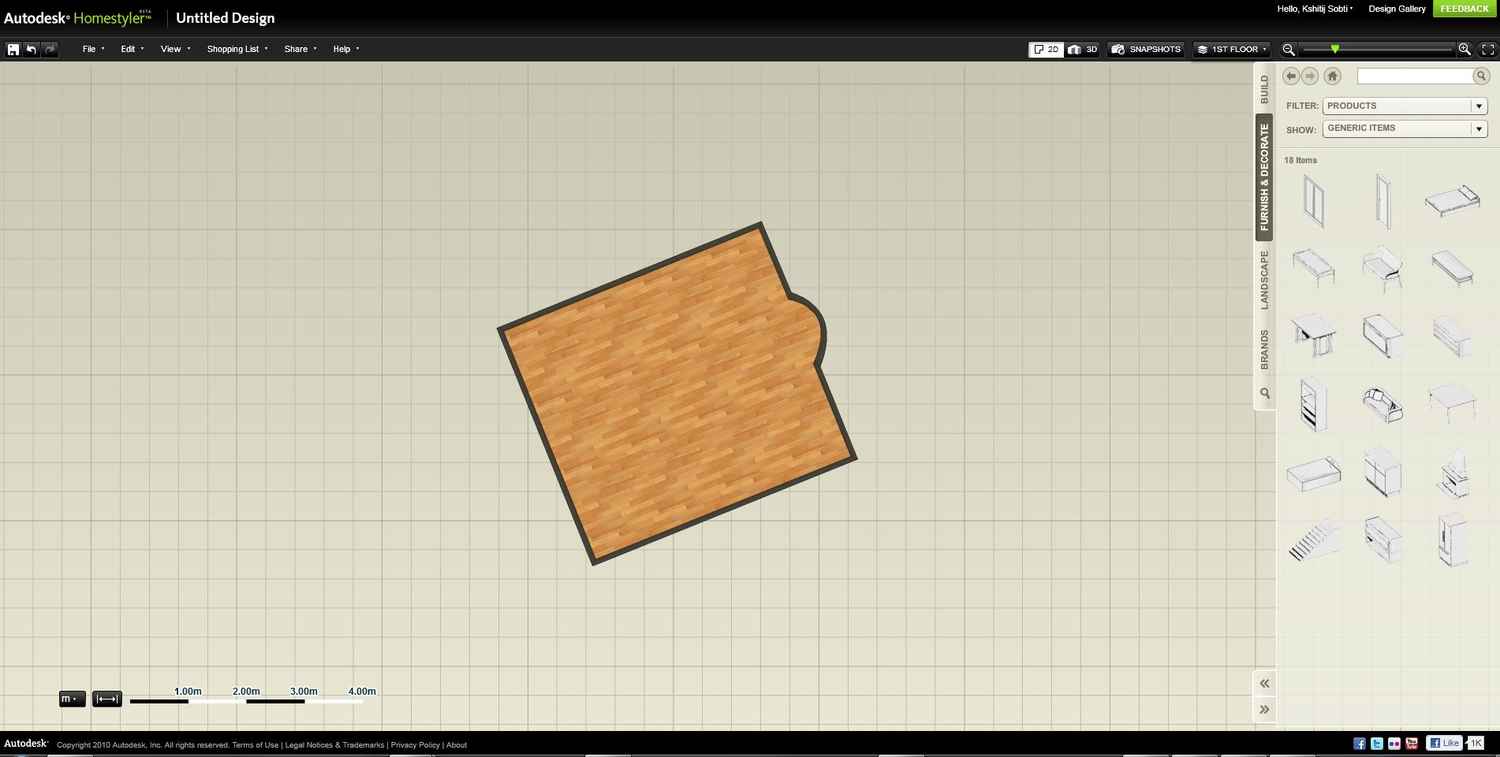
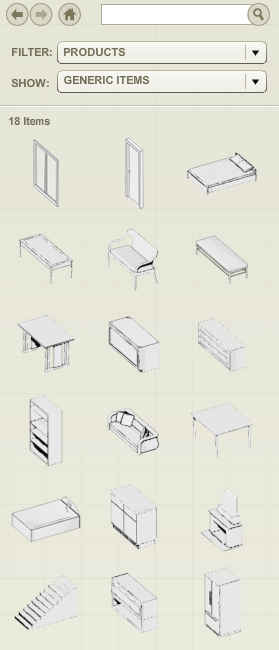
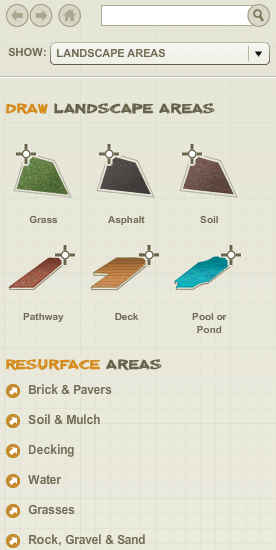
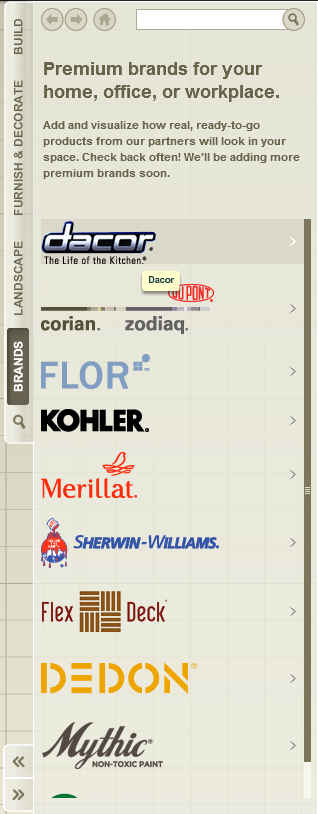
A vertically tabbed panel on the right of the interface has all the objects you can use in your layouts. It includes 5 tabs, Build, Furnish & Decorate, Landscape, Brands and a search tab. From here you can drag drop objects to your project. The Brands tabs is especially interesting since it includes popular brands of consumer products and materials. Your designs will look more realistic as you can include real-life products instead of generic shapes and shades.
 |
 |
 |
 |
|
| Build | Furnish & Decorate | Landscape | Brands |
Autodesk Homestyler takes a very simple approach to creating and manipulating objects in your project. There is no array of tools to exploit in order to create your project. Simply grab anywhere on the grid or floor to pan the view. Click on an object to select it, following which you can drag it to reposition it. You can also reposition an object by selecting it and using the arrow keys. A rotate icon appears near a selected object, which can be dragged to rotate an object. Selecting an object will also display a floating menu that has operations you can perform on the object. While the exact options will vary, all objects have an “Info” and a delete option.
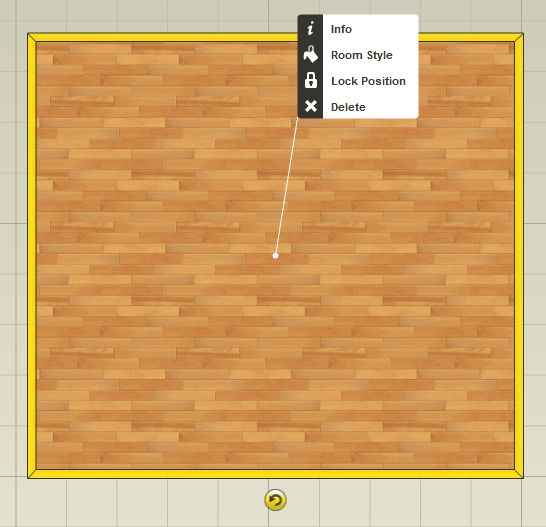 |
| Selected object showing a rotate widget at the bottom, and a context menu |
Using this menu you can change the properties of objects that support it. For example, you could change the wall’s finish, or a refrigerator’s colour choice / model. Wall’s can be split, floors can be locked, the sizes and trims of doors / windows can be changed. For some objects you can turn of placement rules which ensure that odd situations such as objects intersecting walls do not occur.
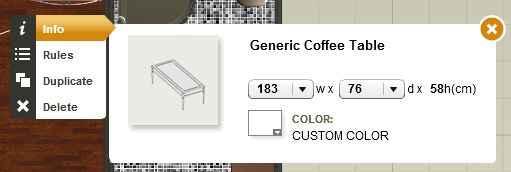 |
| The “info” selection for a “Generic Coffee Table” |
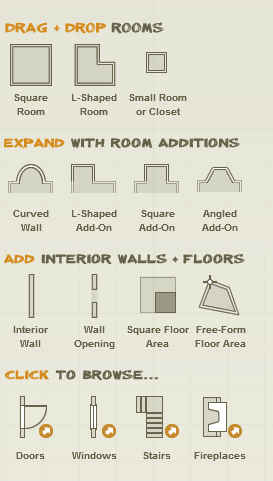
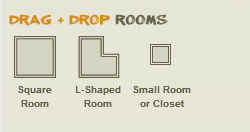
Creating a floor-plan is quite simple and intuitive. As the application instructs, simply drop a floor-tile onto the view. Floor are available for square or L-Shaped rooms, however creating other more exotic layouts is not difficult. You can select and drag a wall to move it will extending the attached walls. Walls can only be moved along their perpendicular to expand the rooms they contain. You can also select a point of intersection of two walls to change the angle of the wall.
 |
 |
| You can drag a room-shape from here to the workspace | You can quickly create room expansions of different shapes by dragging them onto a wall |
 |
|
| Moving a wall while Autodesk Homestyler shows updated dimensions | |
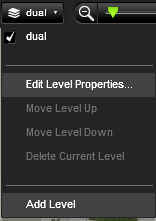
You can select a wall and split it to move parts of the wall individually, or at the junction to create angles. For creating curves, you can use room add-ons to add a curved portion that can then be manipulated to get the exact shape you want. For creating multiple floors, you even have an option to add levels, and switch between them.
 |
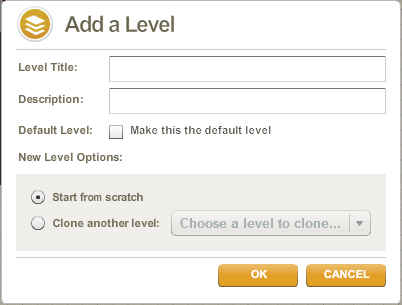 |
| The level drop-down menu | Adding a new level to your project |
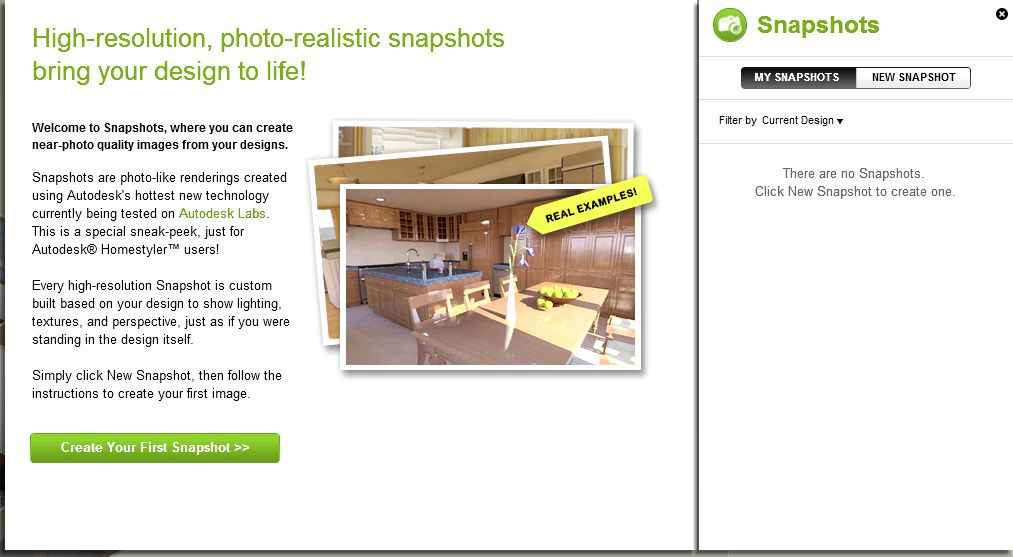
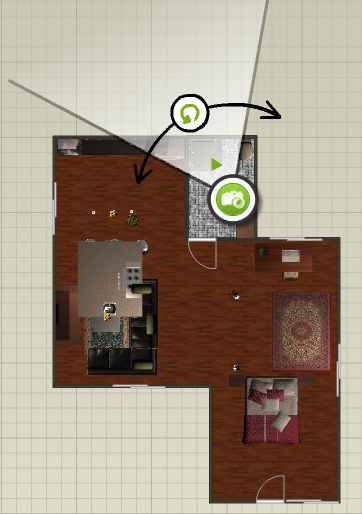
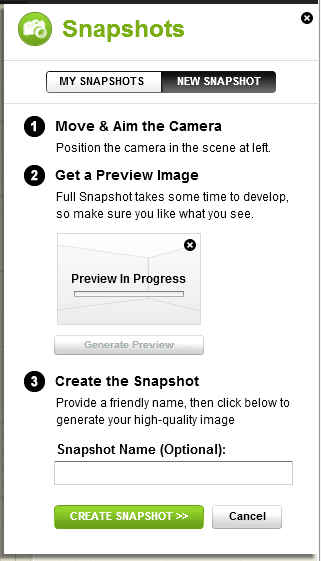
You can always switch to the 3D view to get an overview of project, however there is also a snapshots feature which will let you get a photo-realistic rendering of your project. This is done on Autodesk’s servers so your computer doesn’t need to be a powerhouse. When you use the snapshot tool you can position a camera on the scene, after which your snapshot will be generated in the background. Once the render process is completed you will get a link to it via email.
 |
 |
 |
 |
| Creating a new snapshot | Positioning the camera for a snapshot | You can quickly preview the snapshot | The snapshot takes time to generate, you can opt for an email notification |
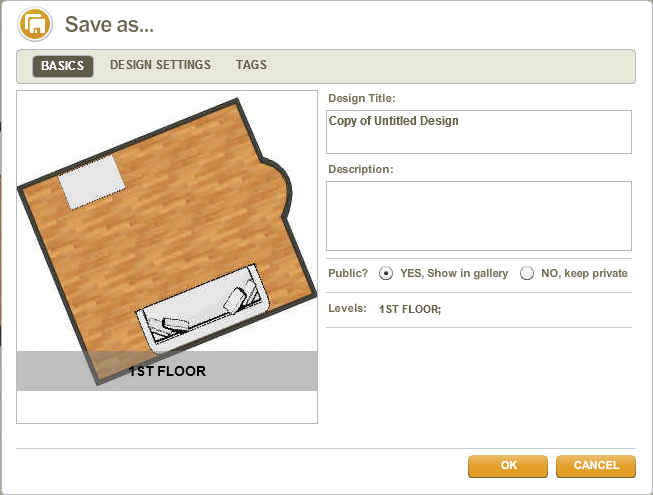
You projects can be kept private or shared with the world. If you choose to keep your project public, it will appear in the design gallery, from where anyone will be able to pick it up and build on it, in true open source fashion. It does not support assigning a licence to your design though.
It is amazing what all you can accomplish in the browser itself using this tool. By mixing between client-side features and using their servers for many resource-heavy operations such as creating snapshots, Autodesk Homestyler manages to keep its performance and resource consumption in check. It uses significantly lesser memory than a native CAD application (around 70 to 80MB), and being an RIA built on only Flash and no other plug-ins, it is accessible to a wide range of people. This is an application which shows just how powerful and rich web applications can be, and makes a good case for browser-hosted RIAs as the future of computing, even for such complex applications.
The interface is very intuitive, and seems to be created for people with design skills but not much experience with CAD tools. You don’t need to read a long manual or receive training just to use the application. It seems to prefer convention over configuration, where the defaults usually work out of the box, but you can go ahead and customize to get exactly what you want.
Most of the work you do will be in dragging and dropping ready-made objects onto the workspace and subsequently repositioning and editing them. Objects automatically snap to walls to simplify even object placement for you. The library of objects available is quite extensive, and seems to cover most normal house-designing needs, best of all, you can use real object designs to get a realistic feel.
The export options allow you to export to DWG – the popular CAD format used by Autodesk AutoCAD and many other applications – so you can create your own house design and share it with an architect who is using an AutoCAD-compatible tool. You can use this to express your requirements more clearly. Besides, the snapshot tool in HomeStyler can give you a beautiful rendered shot of your project so you can see your home even before its built.
Creating a house really is a drag and drop affair with this tool, and if you have a good aesthetic sense you will be able to do wonders with this application.
Visit Autodesk Homestyler at http://www.homestyler.com/