
This guide will walk you through adding the IoT Cloud repository to your Intel® IoT Gateway and adding support for Microsoft Azure* so you can begin developing applications for this platform in your programming language of choice.
Adding the IoT Cloud repository to your Intel® IoT Gateway
1. Access the console on your gateway using either a monitor and keyboard connected directly to the gateway or SSH (recommended).
2. Add the GPG key for the cloud repository using the following command:
rpm –import http://iotdk.intel.com/misc/iot_pub2.key
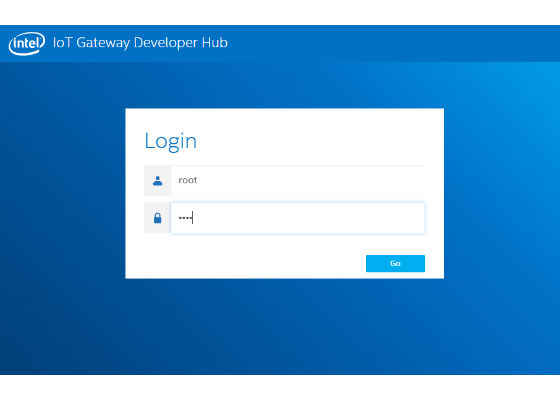
3. On your host computer, open a web browser and load the Intel® IoT Gateway Developer Hub interface by entering the IP address of your gateway in the address bar.
Tip: You can find your gateway’s IP address using the ifconfig command.
4. Log in to the IoT Gateway Developer Hub interface using your credentials. The default login and password are both root.
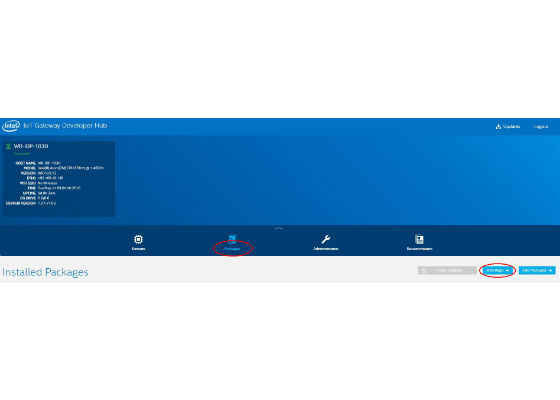
5. Go to the Packages section and click the Add Repo + button.
6. Populate the fields with the following information and click Add Repository:
- Name: IoT_Cloud
- URL: http://iotdk.intel.com/repos/iot-cloud/wrlinux7/rcpl13
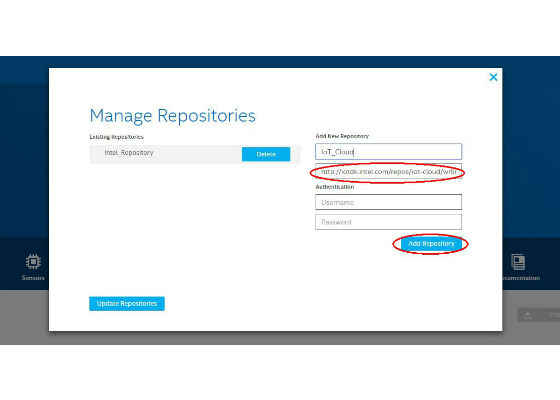
7. Finally, click Update Repositories to update the package list.
Adding Microsoft Azure* support to your Intel® IoT Gateway
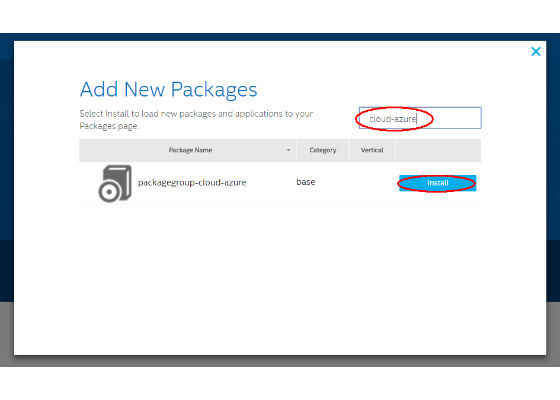
1. Click Add Packages + to bring up the list of packages you can install.
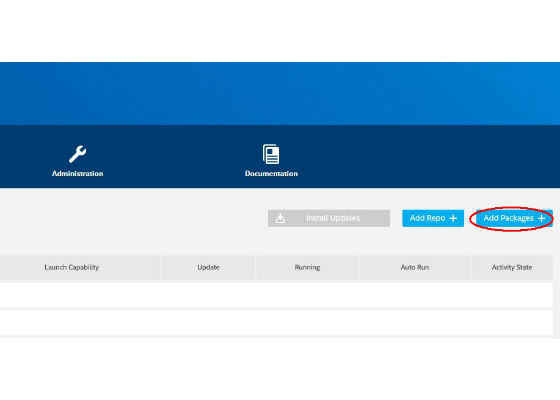
2. Search for cloud-azure using the search box at the top of the package window. Click the Install button next to the packagegroup-cloud-azure entry.
Setting up an Microsoft Azure* IoT Hub
1. In a browser, navigate to the Azure Portal at https://portal.azure.com and log in to your Azure account.
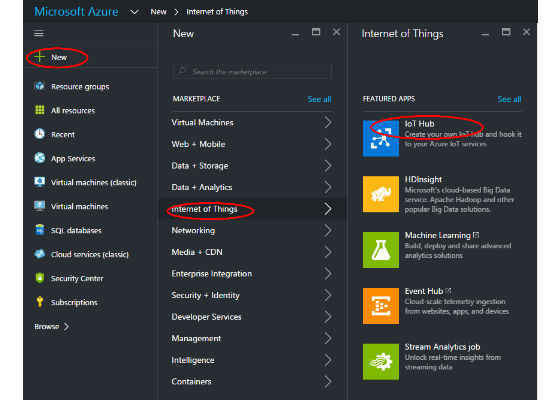
2. To create a new IoT Hub, click New in the top left of the Azure Portal. Choose Internet of Things > IoT Hub.
3. Give your new IoT Hub a unique Name and select your Pricing and scale tier.
4. In the Resource Group section, select Create New and type a unique name in the text field provided.
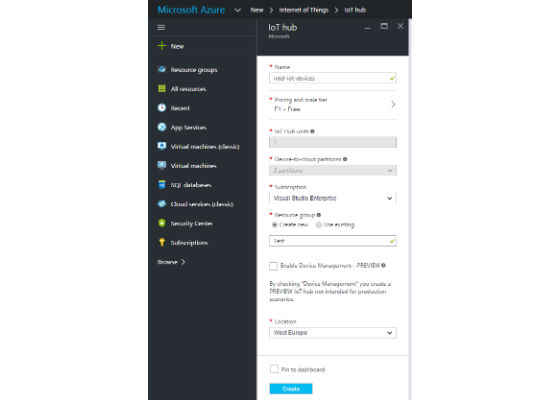
5. From the Location drop-down list, select the location nearest to you. Click Create. It will take some time to deploy your new Resource

6. Group and IoT Hub. Once the process is complete, a “Deployments succeeded” message displays.
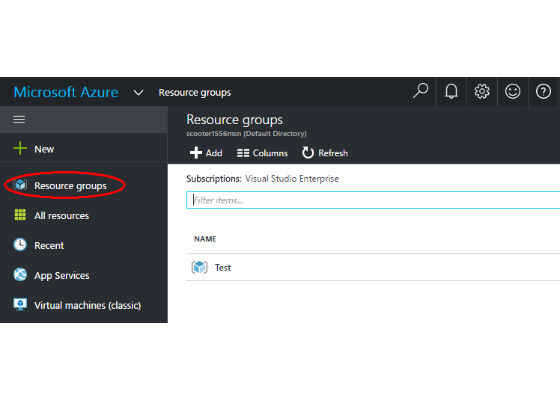
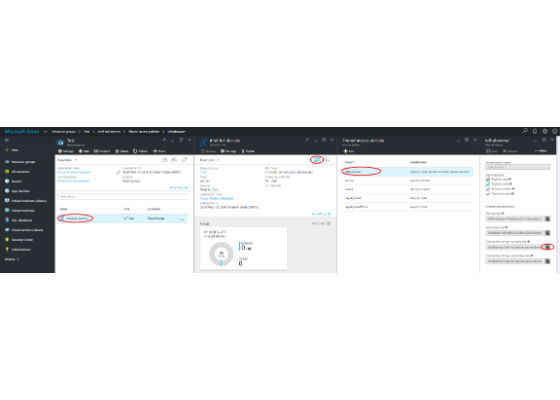
7. Once your new Resource Group has been created, navigate into it by selecting the Resource groups option in the left-hand panel and selecting the Resource Group you just created from the Resource Groups list.
Select the IoT Hub you just created from the list and then click the Keys icon. Select iothubowner from the policy list and then click the Copy button next to the Connection string-primary key to copy your IoT Hub connection string to the clipboard.
Create a new Microsoft Azure* IoT Device
Tip: We recommended you use SSH to connect to your gateway or access the command line through the Intel® IoT Gateway Developer Hub interface to make copying connection strings easier. If you are accessing the command line of your gateway directly using a keyboard and mouse, you’ll need to manually enter the connection string in the next section!
1. Enter the following in your gateway’s console to add it to your IoT Hub, providing the connection string you copied earlier:
iothub-explorer "[YOUR CONNECTION STRING]" create IntelIoTGateway –connection-string
If adding the device is successful, you will get output similar to the above image.

2. The device connection string identifies the device by name and includes a key that is only for that device. Copy the device connection string so you can use it in the next section.
Connecting to Microsoft Azure* with Node-RED*
1. Not that you've installed the Azure cloud package, you need to restart the Node-RED service so it can pick up the newly installed nodes. Run the following command from the gateway’s console:
systemctl restart node-red-experience
2. Go to the Administration section of the IoT Gateway Developer Hub and click Launch under the Node-RED icon.

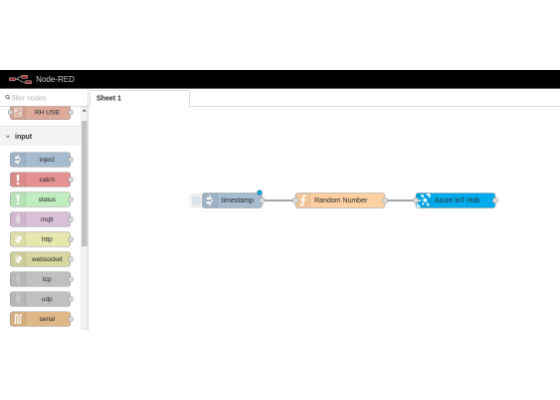
3. Drag an inject, function and azureiothub node from the nodes panel on the left into the current flow (you may need to scroll down in the nodes panel to find these nodes).

4. Next, you'll arrange and connect the nodes as in the screenshot above. The screenshot shows an inject node, which will send a trigger at a specified interval to a function which will randomly generate a number to send to your Azure IoT Hub. First, you need to configure the nodes.
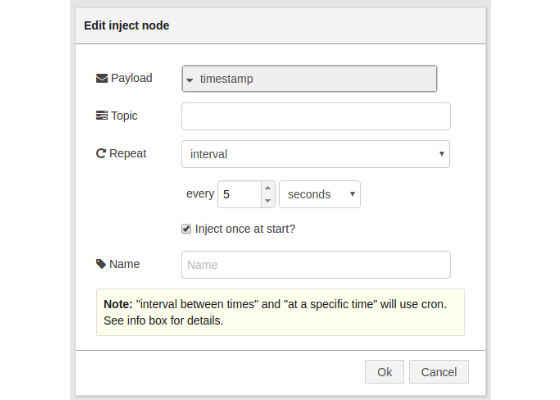
5. Double-click the timestamp node to bring up the configuration dialog box. Change the settings so they match the screenshot above and click Ok when done. This will set the node to send a trigger every 5 seconds.
6. Double-click the function node to bring up the configuration dialog box. Here you are going to add some simple code to generate a random number, which you can then send to your Azure IoT Hub.
Note: Although this example uses a random number, you could just as easily modify the code to use a sensor reading instead.
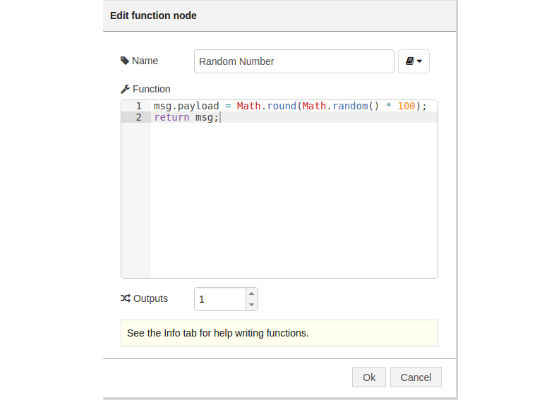
7. In the Function pane, enter the following code as in the screenshot above:
msg.payload = Math.round(Math.random() * 100);
8. Click Ok when done to close the configuration dialog box.
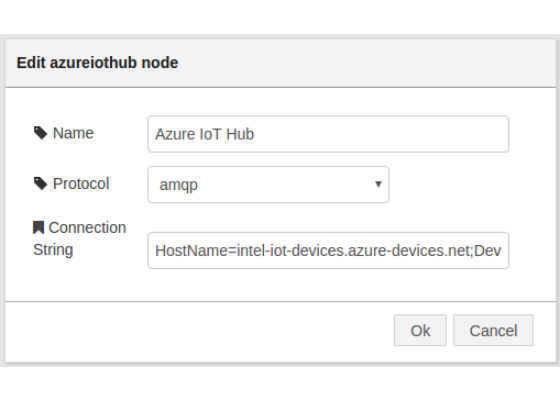
9. Double-click the Azure IoT Hub node to bring up the configuration dialog box. Paste the device connection string you copied earlier into the Connection String field and click Ok. Make sure you enter the device connection string and not the one for your IoT Hub!
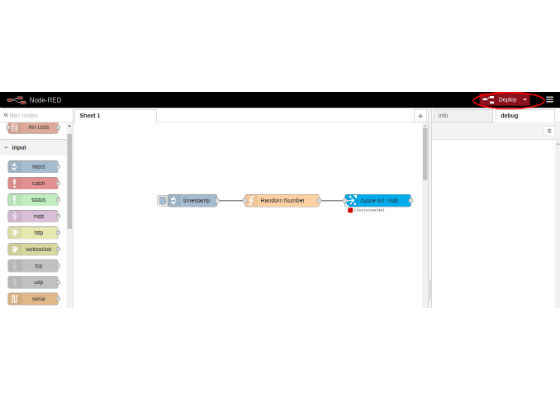
10. Now your flow is configured, hit the Deploy button in the top right of the screen to deploy the flow.

11. If everything is working correctly, the status of the Azure IoT Hub node should change to “Connected”, then “Sent message”, as in the screenshot above. A message will be sent to your Azure IoT Hub every 5 seconds while the flow is running.

12. If you navigate back to the Azure Portal and load your IoT Hub instance, you will see the message count in theUsage tile increasing over time.
Congratulations, you are now sending data to the cloud!
Monitoring device events (Optional)
You can monitor devices in your IoT Hub using the b utility from the command line. There is also a Windows utility called Device Explorer if you prefer a visual application: https://github.com/Azure/azure-iot-
sdks/blob/master/tools/DeviceExplorer/doc/how_to_use_device_explorer.md
To monitor device events in the command line on your gateway, run the following command (providing your connection string and device name):
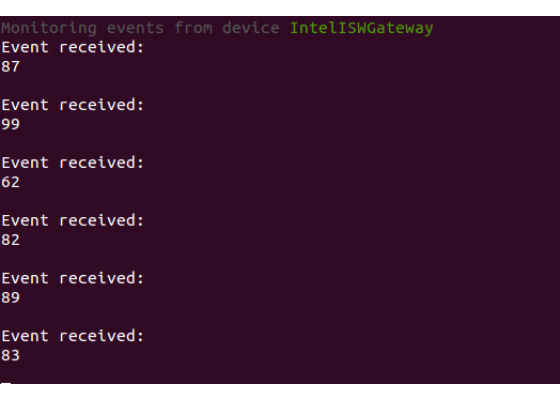
iothub-explorer "[YOUR IOT HUB CONNECTION STRING]" monitor-events [YOUR DEVICE NAME]
If the Node-RED flow is deployed and running, you should see the random numbers being sent to Azure in the console output, similar to the screenshot below.
For more such intel IoT resources and tools from Intel, please visit the Intel® Developer Zone
Source: https://software.intel.com/en-us/node/676215