Using the Intel edison platform to make a video rover car
Overview
 Survey
The Intel® Edison platform is an intelligent computing platform used in developing wearable devices, Maker, and other smart devices. As Maker increase in popularity, the number of products and solutions we can build using the Intel® Edison platforms will grow. In this article, we’ll show you how to build a video rover car using the Intel® Edison platform.
Introduction
The typical video rover car should have a camera, and we could watch the video on other devices, such as a computer, mobile phone, or tablet. At the same time, we could use these devices to control the rover’s movement and camera.
Preparation
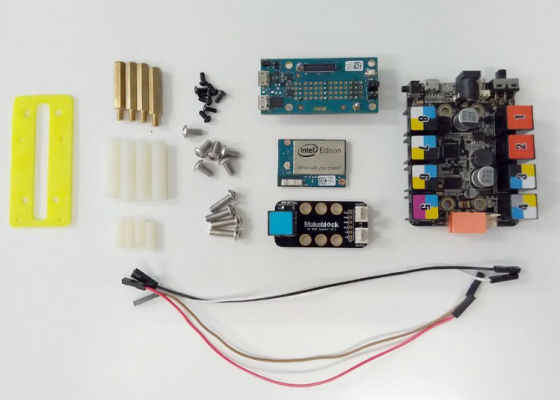
Here is what you’ll need to build the video rover car:
- Intel® Edison breakout board kit
- Makeblock* mainboard
- Makeblock Starter Kit
- Screw M4, nylon stud M4
- Screw M2.5, nylon stud M2.5
- Makeblock Me RJ25 adapter
- Servo, servo brackets
- USB camera (supports MJPEG, UVC)
- DuPont line
- Battery 7.4V
- 3D print brackets
- USB adapter cable
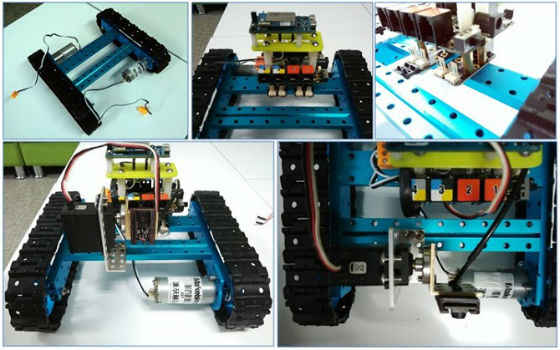
Here is a photo of the parts you’ll need:
Installing the mechanical and electronic modules
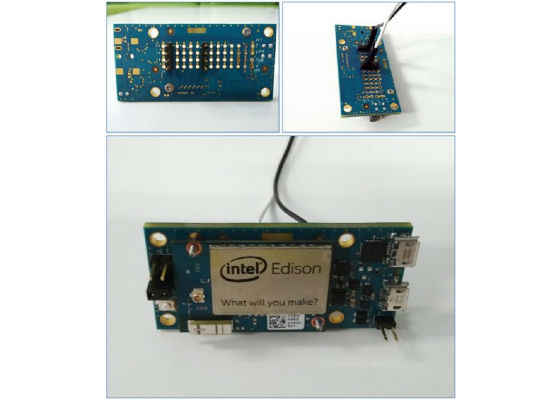
1. Connect the serial port of the Intel® Edison board to the Makeblock mainboard using the DuPont line.
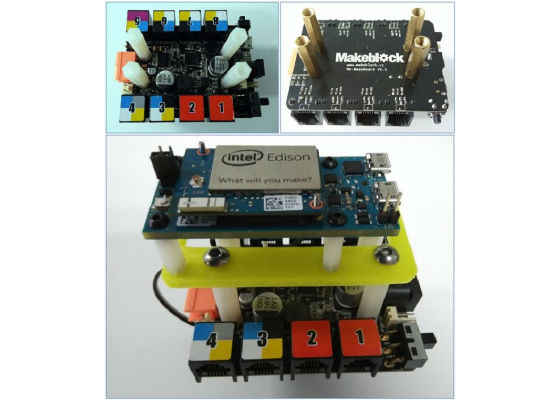
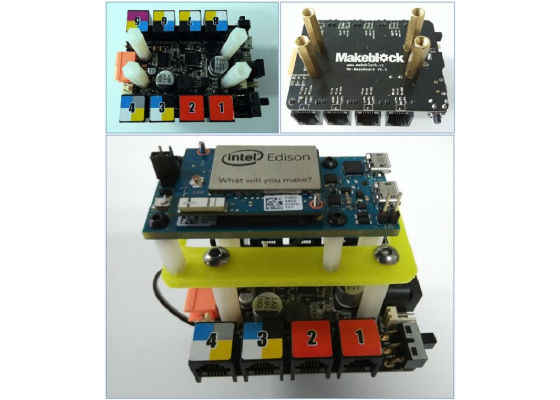
2. Assemble the Intel® Edison board and Makeblock mainboard using the studs and 3D print brackets.
3. Assemble the camera and servo.

4. Install the mainboard and servo on the Makeblock Starter Kit – Track car.
5. The power supply is provided by the Makeblock mainboard and should be at least 7V. Connect the serial port on the Intel® Edison board and the servo through the Me RJ25 adapter. (You should connect the Makeblock Me RJ25 adapter, which is connected through ports 4 and 5 of Makeblock mainboard, connect port 6 with the servo.)
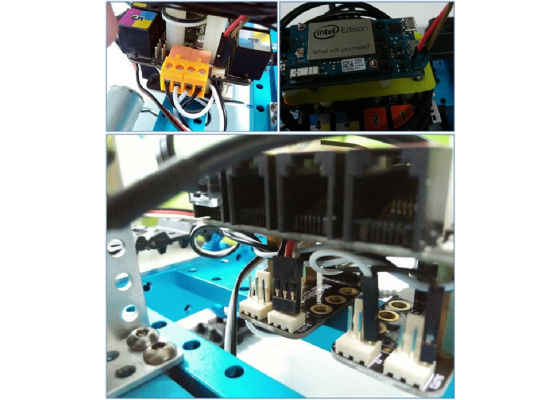
6. Connect the camera to the USB host port on the Intel® Edison board, and then plug in the power supply (7.4V) on the Makeblock mainboard.
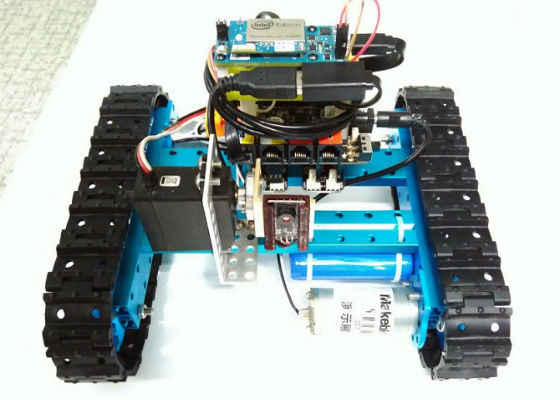
You have completed the assembly of the mechanical and electronic modules.
Installing the software
Step 1. To prepare the system for the Intel® Edison board, follow these guidelines:
1. https://software.intel.com/en-us/iot/library/edison-getting-started
Step 2. Assemble the edi-cam: https://github.com/xeecos/edi-cam
1. Connect the Intel® Edison board via the serial port or Wi-Fi*. Make sure that the Intel® Edison board and your computer are on the same Wi-Fi network. Enter: $ ssh root@myedison.localroot@myedison.local's password:root@myedison:~# Replacemyedison with the name of the Intel® Edison board. When prompted for a password, use the password you created when you configured the Intel® Edison board.
2. To configure the repository, add the following lines to /etc/opkg/base-feeds.conf:
src/gz all http://repo.opkg.net/edison/repo/allsrc/gz edison
http://repo.opkg.net/edison/repo/edison
src/gz core2-32 http://repo.opkg.net/edison/repo/core2-32
3. To update opkg, enter:
opkg update
4. To install Git, enter:
opkg install git
5. Install the UVC drives.
Make sure you install the newest Yocto Project* image for the Intel® Edison board and the UVC driver is loaded. Older versions of the Yocto Project* image do not contain the UVC driver.
6. To install ffmpeg,
- Navigate to bin.
- Type ./install_ffmpeg.sh to run the shell script.
7. Install the Node.js packages.
- Navigate to web/robotjs.
- Install the Node.js packages by typing: npm install
Step 3. Run the application.
1. Update the web service URL: modify the wsUrl in web/robotjs/client/index.html
// CHANGE THIS TO THE APPROPRIATE WS ADDRESS
var wsUrl = 'ws://myedison.local:8084/';
2. Run the node.js
Navigate to web/robotjs, and then run the command: node server.js You will see the terminal log as below:
WebSocket server listening on port 8084
HTTP server listening on port 8080
Listening for video stream on port 8082
Stream Connected: 127.0.0.1:52995 size: 640×480
Viewing the video stream
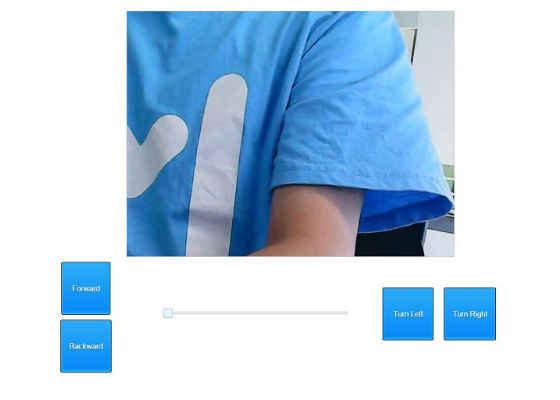
3. Open http://myedison.local:8080 in the browser. You will see the video and control page.
Summary
In this article, we showed you how to use the Intel® Edison board and Makeblock mechanical and electronic modules to build a remote control video rover car. In this case, the Intel® Edison board runs as a server and includes network ability. In fact, the power of the Intel® Edison board isn’t fully utilized; we could use it to do heavier work, creating even more amazing usages.
For more such intel IoT resources and tools from Intel, please visit the Intel® Developer Zone
Source: https://software.intel.com/en-us/articles/using-the-intel-edison-platform-to-make-a-video-rover-car