Garena Free Fire: Notable landing areas on the Bermuda map
Choosing the right landing spot can make a big difference in Garena Free Fire
Picking the right spot depends on your skill level as a player as well as your need to confront or avoid conflicts with other players
It's all a balance between risk and reward.

There are a lot of strategies involved when it comes to winning a battle royale game like Free Fire. It all begins from where you land. Choosing the right spot depends on your skill level as a player as well as your need to confront or avoid enemies. Simply put, there is a risk-and-reward aspect to almost all areas on the map. Low-risk areas tend to have fewer players, but you most likely won’t get high-level equipment. Conversely, high-risk areas have more players that you will need to battle, but if you survive, you’ll be carrying a veritable arsenal of weapons as the game progresses.
If you’re fairly new to the game, then you may want to land in a low-risk area. This will give you the time to slowly build your arsenal, while also giving you the chance to ambush other players making their way to the circle. However, if you trust your skills and are looking for action, then the high-risk zones are the places for you. But a medium-risk zone is also a pretty good option all players of all skill sets. New players stand the chance of getting good loot, with a small chance of other players, while high skilled players can pick up some decent loot and avoid the initial carnage that ensues in the popular areas. Regardless, make sure you land in a viable spot. The last thing you want is to be stuck in the middle of nowhere. So without further ado, here’s a look at some notable landing spots.
Low-risk
Rim Nam Village
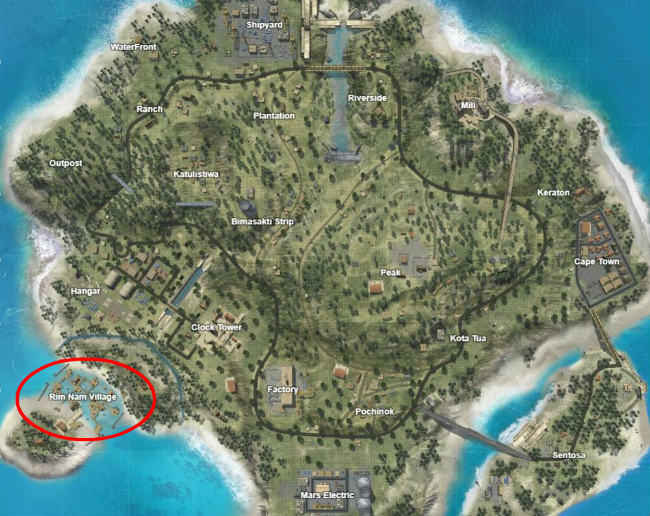
Most of the locations around the edge of the map are low-risk as these areas are rare places where the circle ends up. As such, players tend to avoid them as they usually end up having to run to the circle. However, Rim Nam Village offers pretty decent loot. But, you may have to be quick when it comes to looting as the area will most likely not be in the first circle. After you’re done, consider heading towards the Hangar as the Clock Tower may have enemies camped.
Cape Town

Cape Town is another location towards the edge of the map that is usually not the go-to destination for plates. However, it offers closely stacked buildings, which allows for quick looting of items, Not only that, but the first circle is usually relatively close-by. If the circle is far, there is usually a vehicle that spawns, which can be used to quickly reach the circle.
Medium-risk
Sentosa
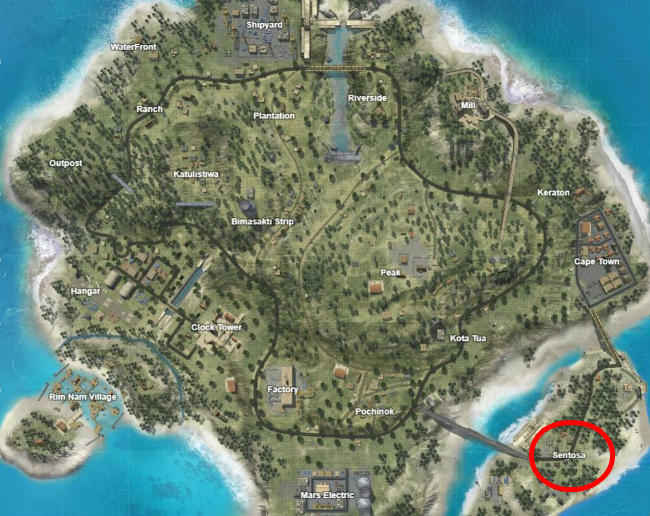
Sentosa may be at the edge of the map, but it offers some pretty decent loot, which gives players an incentive to land here. However, coming back to the main island can be tricky as there is a central bridge that leaves you open to sniper attacks. You could try swimming, but that is slow. But if you do manage to reach the main island, you can head straight to Pochinok or to Peak.
Pochinok
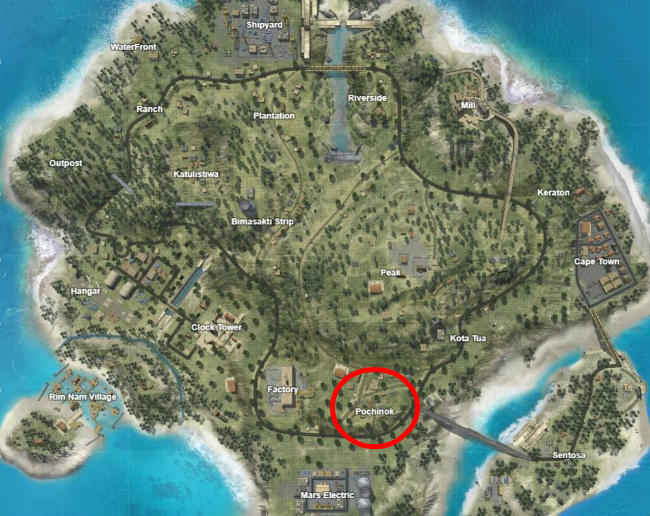
Another location with decent loot. Pochinok features loads of buildings for you to loot. However, the gap between the buildings is quite large, so gathering loot might late a little longer. However, the first circle usually encompasses Pochinok. If not, there is a vehicle spawn in the area or you can ride a cable to Peak if you want to remain stealthy.
High-risk
Bimasakti Strip

The Bimasakti Strip not only offers high-level loot but most of the games usually end up somewhere in the area. As such, the location is usually swarming with players straight from the get-go. You’ll be facing enemies almost immediately, so your first priority would be to look for weapons. There is a central road that divides the two sets of buildings on the map, so try and loot one side before moving to the other side
Katulistwa
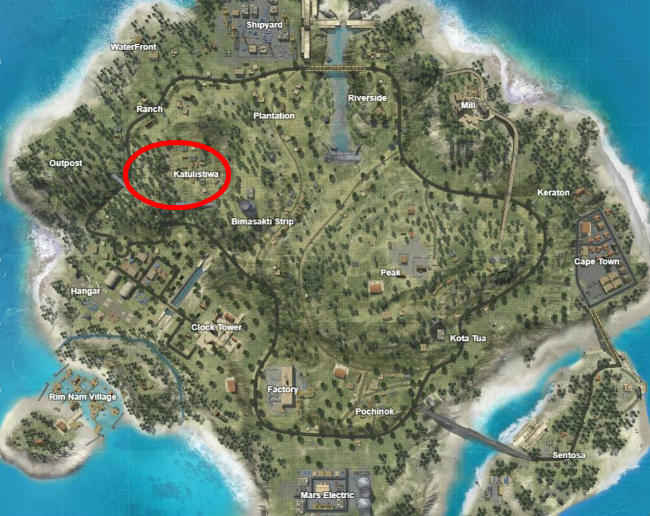
Katusliwa is pretty much a smaller version of the Bimasakti Strip. It is also pretty close to that area, so the circle usually ends up here. As with the Bimasakti Strip, you will most likely face a lot of resistance here. So try and land as soon as possible. If you manage to survive and get your hands on a sniper rifle, consider heading towards the Bimasakti Strip. Notably the hill between the two areas where you can snipe any survivors.
More tips
If you’re new to the game, you can check out our beginners guide here.
Those with a fair bit of experience can check out our advanced guide here.
If you want to avoid an embarrassing death (who doesn’t), click here to know some common mistakes that you should avoid.
Playing the Kalahari map for the first time? Read our beginner's guide to the map.