Everything you need to know to get started with Swift Playgrounds
With Swift Playgrounds, anyone can learn to code of iOS 10

Apple launched iOS 10 last month with their trademark pomp and splendor. With this update, some of the existing features stand polished, making the operating system better than ever. But the most significant development of all is that Apple now has a new foundation to offer called “Swift Playgrounds”.
That Apple has always had the alacrity to make things easier for its developers is no breaking news. The introduction of the Swift language, then, is simply one of its preliminary steps towards attracting more developers. And going a good few steps ahead, Apple is now targeting school kids and attempting to instill programming skills into the young minds with the help of Swift Playgrounds.
What is Swift Playgrounds?
Swift Playgrounds is a free iPad app from Apple which aims to help kids to code in the Swift Programming language. The app uses a unique interactive method where you have to control a character called “Byte” by writing code. All the instructions are written clearly, thanks to which you don’t require any coding skills to start working with Playgrounds. Additionally, you are also offered pseudo-IDE to write and run your own code on the device.
How to get Swift Playgrounds?
Swift Playgrounds is available free of cost on the App Store. Unfortunately, it only works on the iPad at this moment. Your iPad needs to be running iOS 10 in order to get the app.
Getting started with Swift Playgrounds
On launching the app, you’ll be taken through an introductory video and then to the Playgrounds window. You’ll be presented with two tabs: Featured and My Playgrounds.
If you tap the former, you’ll be presented with two introductory lessons: Fundamentals of Swift and Beyond the Basics. There’s another section called “Challenges” where you can apply your existing skills.
To start with, select “Fundamentals of Swift”. You need to download this lesson from the App Store, which you can do by tapping the “GET” button located right below the cover photo. . Meanwhile, you could go through the screenshots and read the description.
Use appropriate moves to make Byte collect the gem.
You’ll see the course under the My Playgrounds tab. Click on the icon and a tutorial will be presented to you. Go through it to get the idea of what you are supposed to do in this lesson. The tutorial ends by asking you to write some code.
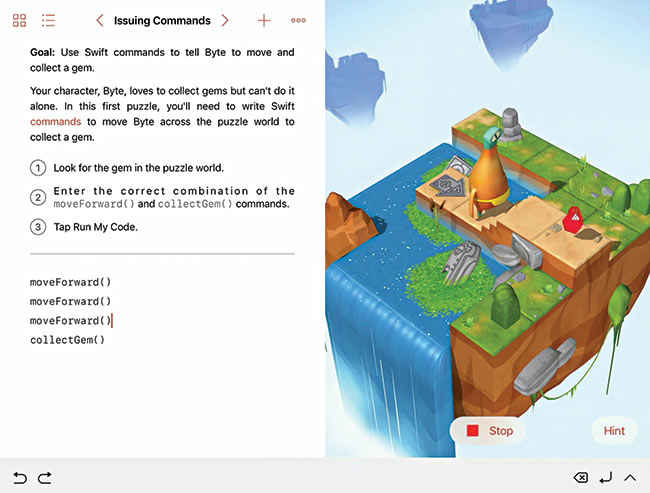
You’ll see some instructions followed by an empty space where you have to write your code on the left side of the screen and an interactive animation consisting of a character named “Byte” on the right. You’ll see a path made of stones, some stairs and finally a red gem.
Your goal in this session is to collect the gem. To do this, you need to write some easy Swift commands such as “moveForward()” and “collectGem()”. Start writing the command by selecting “Tap to enter code” below the instructions. A toolbar will now appear at the bottom of the screen showing you the two necessary commands. Tap the button “moveForward()” and your command will be listed under the instructions. Hit the “Run my code” button located at the bottom of the interactive animation so that the command is reflected on the character. You’ll now see the Byte moving forward.
You may have noticed that the character moved ahead by a single tile. This is because you entered the “moveForward()” command only once. To make it reach the gem, you have to enter the command three times, followed by “collectGem()”. Hit the run button and your character will now collect the gem. With this, you are done with the first lesson. Select next to start with the second.
This time, there’s a new command called “turnLeft()”. This means you need to first figure out how many tiles there are between the Byte and the gem every single time. In this lesson, there are four. So the “moveForward()” command should be used four times. However, this lesson demands you turn the character to the left. So use the “moveForward()” command two times followed by “turnLeft()”. Again use “moveForward()” twice and finally “collectGem()”. Hit the ‘run’ button once you are done.
The third lesson adds a new command “toggleSwitch()”, which toggles the switch as open or closed. Analyse how you’ll have to write the code. There are three tiles between the Byte and the gem, and three between the gem and the switch. You’ll have to make Byte turn and also use the ‘collect gem’ command in the interim period. Run the code after you are done.
The fourth lesson is even more interesting. Now you have to teleport Byte to collect the gem. Analyse the map and see what steps you have to take and apply them. You may refer to the hints in the bottom right corner for help.
The fifth lesson is all about “Finding and fixing bugs”. Here, you are already provided with the list of commands. Their order, however, is changed. If you run your code, Byte won’t be able to collect the gem because there is a bug (mistake) in the program. Carefully analyse the map and rearrange the existing list of commands to perform the right actions.
The sixth lesson is again about finding and fixing bugs. Here, if you analyse the commands they are all messed up and if you run the code, you’ll see Byte taking the wrong steps. Here you’ll have to make lot of changes to the existing code. Analyse the map, double tap the command you want to rearrange, and drag it to its appropriate position. Do this to fix the code and make Byte collect the gem.
The seventh lesson is a tricky one. Here, you have many ways to collect the gem, but the most appropriate one is to use the shortest path. The challenge is specially designed in a way so as to make you put all the skills (including debugging) you have learnt to use. The trial and error method should make it work. If you get it wrong undo the command and try a different one. Here are the commands if you are unable to make it work.
The next section “Introduction to functions” will begin after you’ve completed this challenge. The introduction will give you a lowdown about the functions and their uses. Complete all the sessions in the chapter in a similar fashion. Chapter 2 will get you onto a more advanced level. With this kind of a step-by-step learning method, you’ll be able to grasp the basics of coding in no time.
Playing with Playgrounds
If you have completed the lessons in the Featured area, you can now get your hands dirty and tinker around with your skills. To do this, simply go to the “My Playgrounds” tab and hit the “+” button. You’ll be presented with three templates to choose from: Answers, Blank, and Shapes. The first is a Q&A, the second an unrestricted playground that can be used for anything you want to code and the last one lets you play with shapes and its attributes in code.
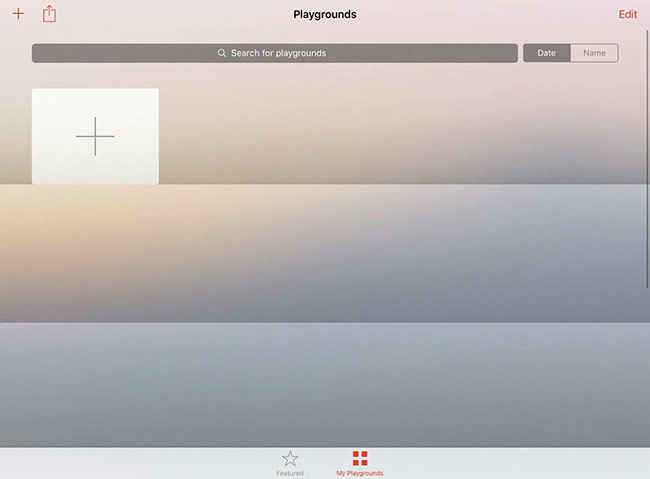
Hit the “+” button to start. All your creations will appear in this area later.
Answers Template
Here you can pose any question using code and manipulate your answer or display it. You’ll see pre-generated code that asks you for your name. Here’s an example:
show(“What is your name?”)
The method ‘show()’ is used to print a text on the output console. Whatever you write within the parenthesis and between the double quotes appears on the screen, which here is "What is your name".
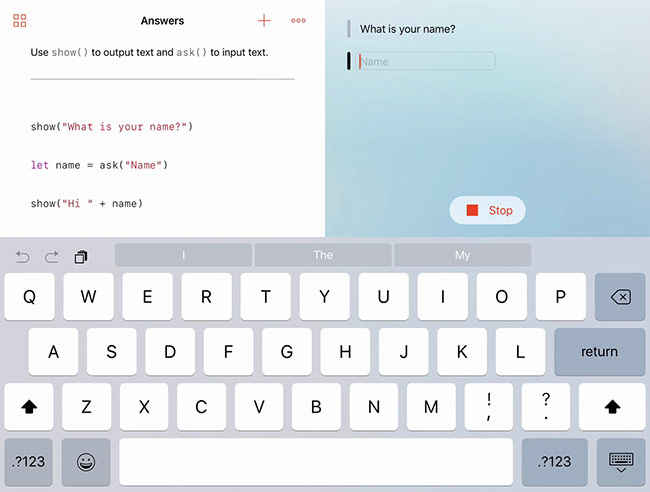
let name = ask(“Name”)
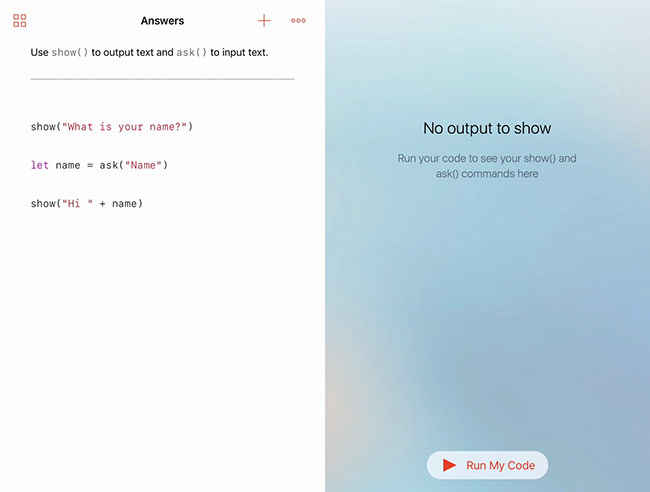
The ask() method creates a textbox for you to enter your name. Anything written within the parenthesis and between the double quotes in the method will be displayed as the placeholder in the text box. The ask method returns a string (a set of characters). When you type your name out, it should be stored in some variable, which will let you manipulate it later. In the example above, let name = ask(“Name”) does the same thing. Whatever you type in the textbox created by the ask method will be stored in the variable called name.
Show (“Hi” + name)
You see a different format of the show method here. In this case, “Hi” will be printed directly because it is between double quotes. Additionally, there’s a plus sign and our variable name. In programming languages, the “+” operator is used to append (join) text. The plus sign is followed by a variable “name”. Thus, the show method will display “Hi <your entered name>” This is because the string “Hi” is joined with a variable, which is currently holding data that you entered through the textbox.
Create a pseudo information system
You may use the question-answer template to make a pseudo information database. The code can look something like the code at this link.
Shapes Template
As the name of the template suggests, you can work on different shapes – create and modify them. You don’t have to draw them but produce them using code. With this you’ll get an idea of how the computer draws shapes and manipulates them behind the scenes.
Once you open the template, a pre-generated code will be shown, which is an example of ‘how to draw a circle’. Here’s the explanation of the code you see.
let circle = Circle()
Here you have created a variable circle and assigned a constructor named Circle(). If you are a programming novice, you won’t know what a constructor is. For simplicity, consider Circle() as a method that will draw a circle on the screen.
circle.draggable = true
Since your variable handles the circle you can use its name to manipulate your circle every time. For instance, in circle.draggable the first part “circle” is our variable name and “.” period is used to access its properties. In the above example, draggable is a property that allows you to drag the circle across the screen. If you set the property to “true”, you’ll be able to drag the circle.
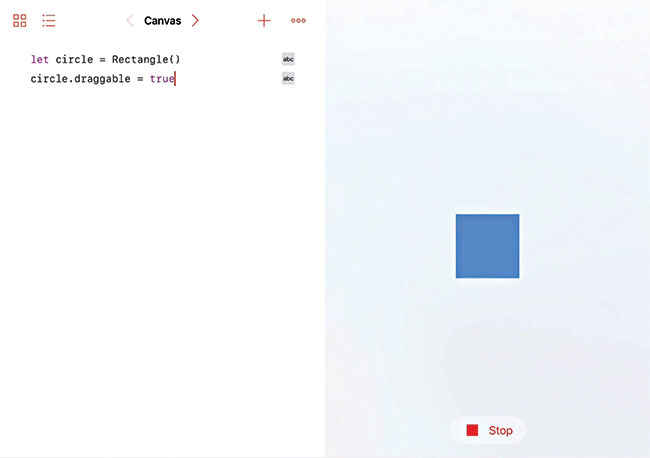
Modify code to draw a rectangle.
You can replace the constructor Circle() with Rectangle() and see how your code runs. With this you can draw different shapes and manipulate them.
Draw your name in a fancy way
Write the following code:
let text = Text(string: “Digit”, fontSize: 48.0, fontName: “Futura”, color: .blue)
text.center.y -= 2
Here we create a variable name text and assign the Text() constructor to it. To make it fancy, however, we add some attributes to this constructor, which is different from a method. So here, you see we haven’t directly entered the name within the parenthesis, instead entering different attributes, which are responsible for changing the appearance of the text.

Your final result should look like this.
The first attribute string: allows you to enter the text to be displayed. In the above example, we have entered Digit within the double quotes. You may change it to anything you want. The second attribute fontSize: lets you specify the text size. The third attribute fontName: allows you to specify the font. Lastly, color: attribute sets a colour. You may change one or more attributes to know how this thing works.
Blank Canvas
The Blank Canvas is not restricted to Shapes or Answers and gives you a free hand. You could start with raw coding here; try different methods out and truly explore programming.
Start by displaying your name with a different method than show(). Make use of the standard programming method – print – to display text on the screen. Write:
print(“Your Name”)
Hit the “Run my code button”. Your code will run in a separate popup window showing whatever you have written. Below the popup you’ll see a button “Add viewer” which you need to use to add the output to the code area.
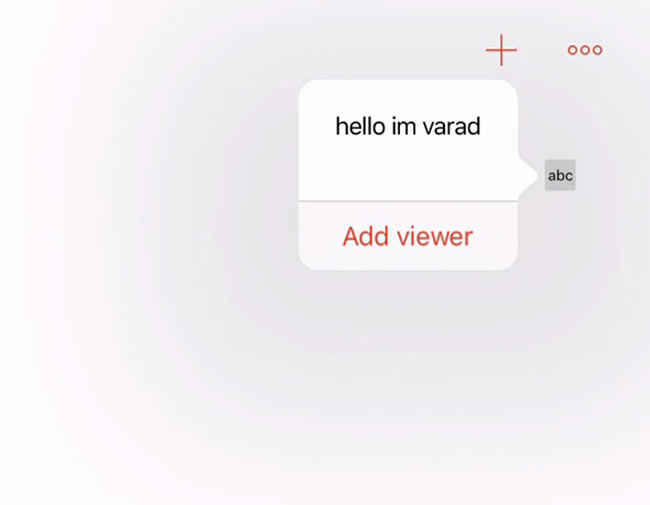
A similar popup will appear showing your name.
Create a quiz game
A quiz game is fairly simple to implement. All you need to do is to add a few textboxes, assign the value you’ve entered to a variable and check whether your answer is correct.
Start with writing a title to your quiz using the show() method.
show(“Welcome to the quiz”)
Add title to the first question.
show(“Question 1”)
Write the some questions using ask() method and store them in variable named accordingly.
let question1 = ask(“What is 1 + 1?”)
let question2 = ask(“What is 10 - 2?”)
let question3 = ask(“What is 5 * 2”)
let question4 = ask(“What is 100 / 1?”)
This will store the answer to each question in the respective variables. You’ll have to check whether the answers are correct. Do it using the ‘if’ statement.
if question1 == 2 {
show(“Question 1 is correct”)}
else {show(“Question 1 is wrong”)}
Here we have checked whether the value stored in question1 is equal to 2. If it is, we will display the output as “Question 1 is correct”. If it is any other value, we will display it using the else statement “Question 1 is wrong”. You can do the same for other questions as well.
How about building a calculator using all the concepts you’ve already learnt? Challenge accepted!
This article was first published in November 2016 issue of Digit magazine. To read Digit's articles first, subscribe here or download the Digit e-magazine app for Android and iOS. You could also buy Digit's previous issues here.