Starting with Django

Django is a web development framework that every Python developer should experience, and might just be worth learning Python for.
Introduction
Django is a free open source framework for developing websites. It offers unprecedented ease in defining complex data structures, and emphasizes rapid development and the DRY principle (Don't Repeat Yourself). Some of the major advantages of Django, which come out-of-the-box are:
- MVC / MTV paradigm
The applications you create cleanly separate the model (the part the describes your data), the view (the part that generates the data to be displayed) and the template (the part that defines the visual appearance of your content) - In-build ORM (Object-relation mapper)
No need to learn SQL! Django lets you describe how your data is related in Python by defining Model classes. The SQL is automatically generated, and you have a ready-made API to work with your application's data. - Admin interface automatically generated
For whatever kind of data structure you create for your website, an administration panel is automatically created, and is usable out-of-the-box. The administration panel can be customized for even better usability though. - Highly customizable URL schemes
Django uses Regular Expressions to match URLs making it possible to create incredible complex URL schemes.
It is important to note that Django is NOT a CMS! You can use it to build your own CMS though. It does not come inbuilt with anything, and consequently it is not constrained by anything. There are a number of modules you can find online that will let you create a Django application with ease.
Installing Django
Since Django is a Python based framework, do go ahead and install Python, you can find it in this month's DVD. You need Python 2.7 not Python 3.
If you are running Linux, it is likely you have Python installed, and Django is already in your repositories. In this case install from your distro's repos (on openSUSE it's sudo zypp install python-django, on Ubuntu sudo apt-get install python-django) this is the best way since this way it will automatically be updated and dependencies will automatically be installed.
If you are running Windows or your Linux distro's repositories do not include Django you can download it from https://www.djangoproject.com/.
Extract the archive to a known directory, and in the command line go to the directory in which you have extracted Django. Now run "sudo python setup.py install" on Linux or "python setup.py install" on Windows.
Dome Django features might require you to install additional Python modules, but that is out of the scope of this article, and we will not be covering those features for now. In a production environment you will need an SQL server and a web server to serve your Django application. Right now however we will use the inbuilt SQLite database and the inbuilt server.
Creating our Django site
Django can be used to create nearly any kind of website. We will be making a simple application that lets you track the books you have lent to others.
We need to decide the structure of our data. We need the application to be able to store a list of Books, and a list of Persons, and associate a book with a person if it is lent to them. A person will have a name, a phone number and an email address so you can contact them. A Book will have a name, an entry for the person who took it, and the borrowing date.
STEP 1: Create a site
Go to a folder where you wish to start this project in the command line, and type the following:
python django-admin.py startproject myproject
This will create the basic structure of your website inside the directory myproject. Enter that directory.
NOTE: django-admin.py might not be in your path on Windows. You can find it in C:Python27Scriptsdjango-admin.py in which case use that path instead of just django-admin.py.
STEP 2: Create an app
You've created a website, but it needs to have an application that contains a bulk of the code. A site may have multiple apps and an app might be used by multiple sites. You can create one with the following command:
python mange.py startapp books
STEP 3: Set up your database
Open the file called settings.py in your project folder in a text editor like Notepad . Right in the beginning you will find a configuration setting called DATABASES, under which you will find 'default'. Under the default database setting, change the ENGINE setting to 'django.db.backends.sqlite3', and the NAME to something like 'myproject.db'. The NAME setting is just a path to the database.
STEP 4: Add your app to your site
In the same settings file, go down to the INSTALLED_APPS setting, and add 'books' – the name of your application – right at the end.
STEP 5: Enable the admin panel
At this point you might also go ahead and uncomment the line that says 'django.contrib.admin' by removing the '#' in the beginning of that line. Close the settings.py file. Open the urls.py file in the same directory, and uncomment the admin lines as instructed in the file. Close the file.
STEP 6: Creating the models
Open the books directory in your project folder, and open the models.py file for editing. Add the following to the file (it should already have 'from django.db import models' else add that as well):
These lines describe the data structure of our website. The Person class defines the person, and the Book class defines the book. The first name, and last name as character field of specifies lengths. The phone number is stored in a character field as well, in case you wish to store numbers as " 91 99 9999 9999", and the email is an EmailField, which is optimized for the purpose.
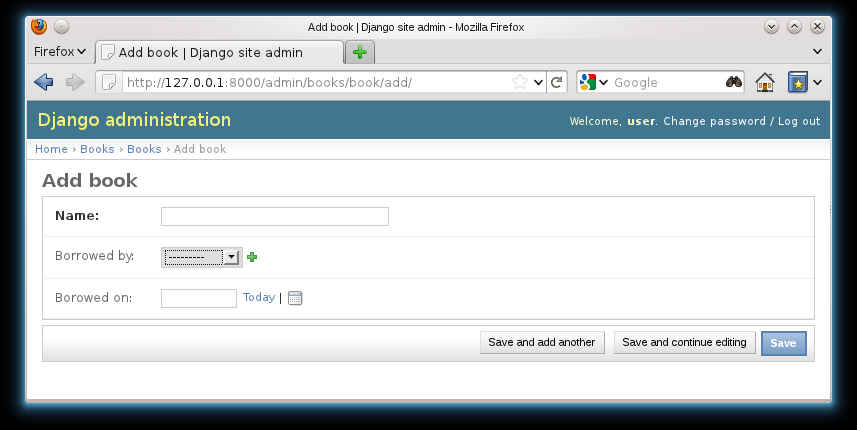
In the Book class the name is a character field with a much larger limit on length. There is a borrowed_on field to store the date on which it was borrowed. Finally you have borrowed_by, which related the Book to its borrower. We can directly use Person here as it is already defined, but otherwise we would have to enter it as 'Person'. With this kind of relation, a Book can only go to one Person, but one Person can have borrowed multiple books.
By setting blank=True we have made entering those fields optional. So if you want you can just enter a first name of a person, but you can optionally enter a last name, a phone and an email as well. Similarly for a book, all you need is a name. Not all books will be borrowed, and once a book is returned it will need to have no one associated with it. In addition to blank=True, we need to set null=True for ForeignKey and DateField for this to work.
Finally, the __unicode__ function describes the string representation of an object. If you were to remove that, every book would be called "Book object" in the admin panel.
STEP 7: Add the Book and Person objects to the admin panel
Create a file called admin.py in your books app directory, and add the following to it:
This code registers the Book, and Person classes with the admin site, so they can be managed using the automatic admin backend.
STEP 8: syncdb
Now in your project directory in the command line run the following command:
python manage.py syncdb
This command will create the database and the basic structure required by each application. It will also ask you to enter a username, email and password for the default site administrator. If you modify your application, you will need to delete your database file and run this command again. You will lose your data in your process though! There are other ways to accomplish this without deleting your data but they are beyond the scope of this tutorial.
STEP 9: Start your server
In the command line in your project directory run the following command:
python manage.py runserver
This is not a production worthy server, but it is good enough for testing. By default it will launch a local server that you can access by entering 127.0.0.1:8000 in the browser address bar. The server is smart enough to automatically restart if it detects that you have changed your code. It won't detect if you have added new files, and might stop working if you save a file with an error though.
STEP 10: Use your website
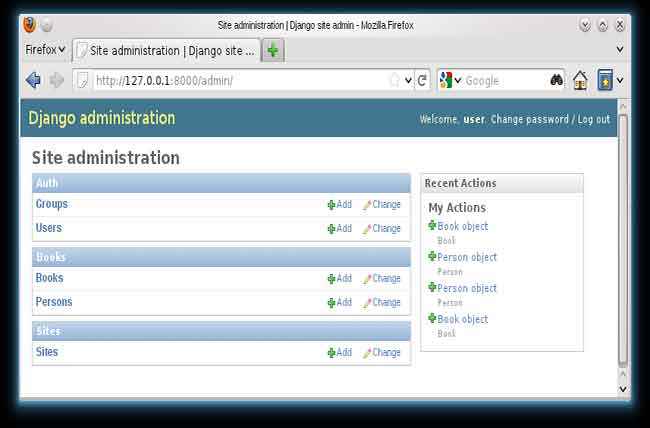
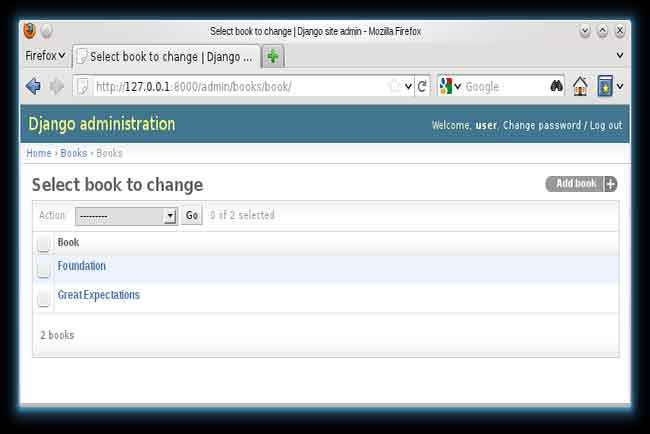
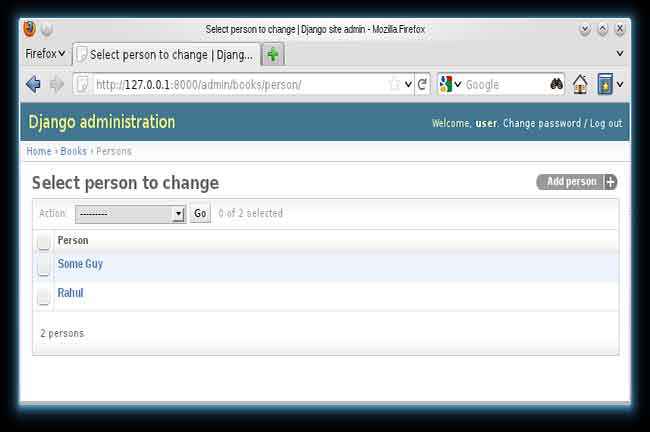
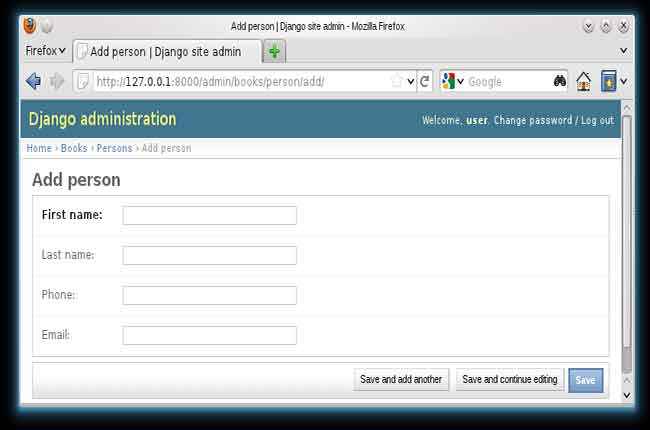
Enter http://127.0.0.1:8000/admin in your browser addressbar, enter the username and password you picked earlier. You will now be able to access a fully functional admin panel that will let you browse and edit the books and person you have added.
That's it! You're done! Well, not really. Now all you have is a website that has an admin panel, but no frontend. In this example, it might be enough to simply view all details in the admin panel, but a normal website will have a frontend. For that you need to learn how Django views and templates work which we will cover in the future.
You can see how easily we have a website up that offers very customized functionality. You could now easily modify this site, and add an owner for each book so it could work as a book management system that works for multiple people; each person can have books they have lent, and books they have borrowed. You can further explore Django using the documentation that is available on its website.
This article appeared in Digit Magazine's October issue.