How to create quality videos on a budget
What is it that sets apart an amateur and a professional movie? Definitely not the camera. Read ahead to know how you can create quality videos like the pros without breaking the bank.

Videos are a visual form of conveying stories and they won’t appeal the audience if something isn’t right with them. Fault could be with the story, narration or maybe the quality. Unless you are any movie director from Bollywood, chances are that this article will benefit you in improving the third aspect, quality, of your low budget movie or say, a video that will end up on YouTube.
Instead of spending a lot of money and then time to learn expensive gadgets, why not try and learn to get the best out of equipment you already own. Right now, I’m assuming that your camera can shoot at 1080p (with quality that you’re satisfied with) and a microphone (or a super quiet environment). For the software part we’ll use Adobe’s Premiere Pro and After Effects. And finally we require a computer with lots of RAM (unless being patient is fine with you). Let’s dive in and take your video up-a-notch.
Color Grading
Video is just amalgam of colors and changing colors can result in a totally different feel because people relate colors with feelings. But color grading would never be the same between two films, so you really need to experiment on your own and choose the best for your shot.
Before you color grade, it is suggested that your set your camera’s color profile to ‘flat’ (most DSLRs have this option) or choose the least vibrant color profile since we’re aiming for a flat/monotonous look. Also, color grade the movie when it is entirely edited because you won’t like to waste time color grading a footage that you won’t use. In Premiere Pro CC, you can use effects like “RGB Curves”, “Color Balance” and “Three-Way Color Corrector” to color grade your movies. From the ‘Effects’ panel from the lower left corner, drop them on the clips.
Then go to the “Effects Controls” and edit the colors yourself. If those settings are hard for you then you might go ahead with ‘Red Giant’s Magic Bullets Colorista III’ plugin which is user friendly but comes with a $200 price tag.
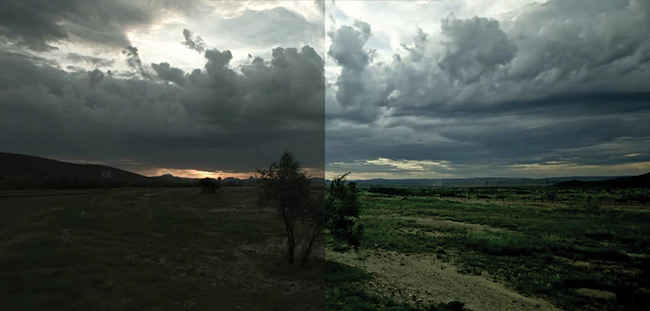
Before and after – Colorista III
Camera Stabilization
Nobody likes to watch a movie that’s shaky unless the shot demands it. The best you can do for a moving shot is to either buy a glidecam (which probably cost more than your camera) or you can try your best to keep your hands steady and later stabilize the footage. Adobe Premiere Pro provides an effect called “Warp Stabilizer” that works very well for our purpose.
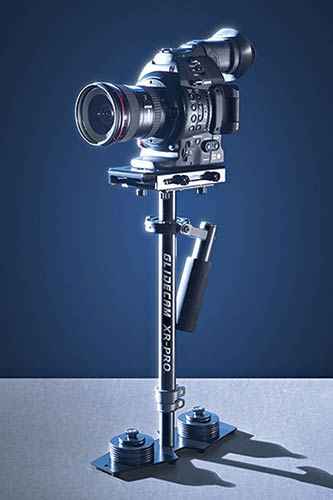
Cheapest Glidecam for a DSLR @ $249
Background Music
Choosing the best music for your movie is really important, but at the same time you wouldn’t want to infringe any copyrights and therefore the music you choose must be either free to use or made by you (check out August’s issue that has a beginner’s guide to making your own music). You can use YouTube’s own library of music that is free and legal to use. You can also head over here. Before you use an artist’s music, message them and ask for permissions.
Adding objects that follow elements present in the video
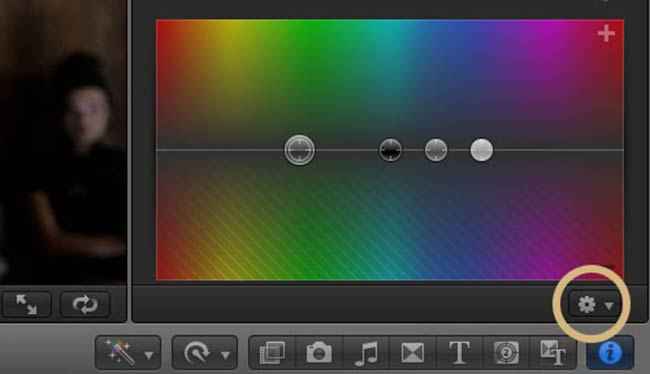
You can actually do a lot with this one – imagine adding various 3D models in your video, or even a full fledged creature!. But for now, let’s consider you want to add text that stays relative to some object in the video. To achieve the same, open up Adobe After Effects and import the footage, crop the active work space to the area which will have the text. Then go to Animation> Track Camera. Leave it for few minute and it will analyse your footage and at the end, it will generate numerous tracking points on the video. Just for a check, play the video and you will see that those points ‘stick’ to their specific locations and when you mouse-over any of the points, a circular disk would appear.
Go through a few point and choose any one of the point whose circular disk looks to be in correct orientation with ground or wall. In other words, imagine how a disk would appear from the viewpoint of camera to that point, and then choose that point which has a disk with real-life-alike orientation. Click on that point and choose “Create text and camera” which will provide you with a text that will follow that point. And there you go! Just edit the text and it will stick to that point. However make sure that the footage is pretty clean – that is, it should have fewer moving objects and should not contain any jitter. These effects discussed above can be seen in action in a 20-second-long video clip below.
Lighting
Every setting can have different lighting; However, in general, use a diffuser (this basically softens the light). Alternatively, you can use a white chart paper as a ‘softener’. So the light directly hits the chart paper and then towards the object. If you don’t even have a chart paper, then use the wall next to you. Just never let the light directly hit the object which will end up by producing a harsh light on object and you won’t like it, unless you actually want that look.
After lighting the object appropriately, you would also need to take care of the environment which would be out of focus but is still relevant. In the environment, remove the objects that are distracting and prefer a clean environment because you want the audience to look at the object and not the background. Consider checking out examples of bad and good lighting to get a better grasp of this.
With all these tips, you’ve got a good head start in filmmaking. Look at the works of great directors and evaluate how they transition audio or maybe how they lighten the scenes. I’d also recommend you to start watching Casey Neistat’s vlogs which has great content and the way he tells story is just perfect! Above all, have a clear story and narration, the equipment would never limit you from creating a masterpiece.
Disclaimer: The views expressed in this section are of the respective Digit Squad members. Neither Digit nor 9.9 Media takes responsibility of their claims whatsoever.
This article was first published in October 2016 issue of Digit magazine. To read Digit's articles first, subscribe here or download the Digit e-magazine app for Android and iOS. You could also buy Digit's previous issues here.