How to Create your own WhatsApp sticker apps on Android
WhatsApp’s nascent sticker feature has amassed a fervour of amateur and professional developers creating Sticker Apps in the Play Store. Here’s how you can create your own app and possibly begin monetising your creations.

WhatsApp’s sticker functionality has witnessed a substantial amount of traction amongst its 200 million users since its recent advent. However, the limited stickers provided by WhatsApp seem rather lacklustre. WhatsApp has now allowed third-party applications to create apps with sticker packs that can be integrated within the app itself. Creators and developers can design their own stickers for WhatsApp and effectively package them into an Android or iOS app. This creates an avenue for users to share their creations with the world and even monetise their creations by distributing the apps on the Play Store or the App Store.
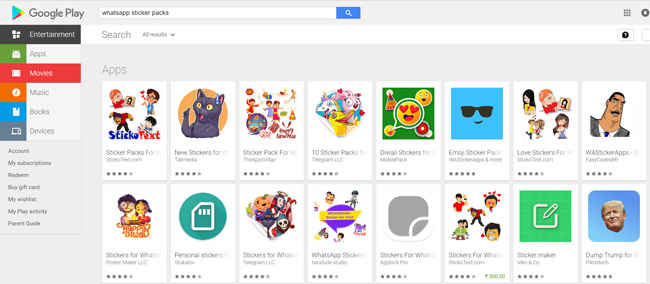
A plethora of WhatsApp sticker pack apps on the Play Store
However, to integrate your stickers into their WhatsApp the users will be required to download your application and keep it in the app drawer to ensure usability in WhatsApp. Ensure that you adhere to the general standards of stickers on WhatsApp by creating legal, acceptable and authorized stickers. You can read their terms of service here.
WhatsApp has provided a sample code that allows users to create sticker apps with minimal or possibly even no level of coding knowledge required. This allows tech-enthusiasts who are sometimes novices to build an app that could feature on the Play Store or App Store with their customized creations free for the world to use.
Sticker and App Requirements
It is essential for users to follow certain requirements and abide by certain restrictions before creating a sticker app to ensure that the creations are compatible and well-structured for WhatsApp to successfully integrate them. Here are a few guidelines you must pay heed to while creating your sticker art.
WhatsApp boasts a few packs of preinstalled stickers
- Stickers are usually images with a transparent background, therefore you must download a background eraser or a PNG image creator that does the same for your images.
- A sticker app can hold anywhere between one to ten sticker packs, each of which must be explicitly added to WhatsApp by the user. It is recommended to not try and add an ‘Add all packs’ functionality.
- Each sticker pack must hold a minimum of three stickers and a maximum of thirty.
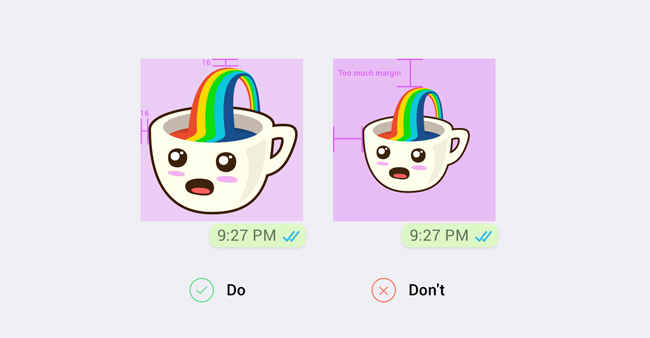
Maintain a 16-pixel gap between the sticker art and the canvas
- Each individual sticker must have an exact 512×512 pixel canvas within which the art must be contained. There must also be a 16-pixel gap between the edge of the sticker art and the border of the canvas.
- The sticker must be capable of rendering on a wide variety of backgrounds like white, black, coloured and patterned since users tend to have different kinds of WhatsApp chat backgrounds. Add an 8px #FFFFFF stroke to the border of all your images. WhatsApp has provided a sample PSD file of the same, you can check it out here.
- All stickers must be in the WebP format. Unfortunately, animated WebP or stickers are not yet supported in WhatsApp.
- Each sticker must be less than 100KB to ensure that users can see your stickers immediately upon opening the chat. Additionally, it cuts the amount of data that would be expended trying to download a larger file.
- A tray icon or an identifier is a necessity for each sticker pack. This image must be 96×96 pixels with a maximum size of 50KB.
Reducing the PNG size

Try to keep the size of your PNG file as low as you can
It is highly recommended to reduce the size of your PNG file to facilitate faster loading times and lesser data consumption. WhatsApp’s in-house stickers are about 15KB each which seems to be the optimal size. There are a few methods that have proved successful in reducing the size of these images.
- Convert your PNG file to a WebP file and reduce the size while making this transformation. Attempt to set the quality of the image to below 100% until you can get the lowest size without any prominent deterioration of image quality.
- You can also utilize a PNG Optimiser or Tool to achieve this end. You can use PNGYU, a simple PNG compression tool, for MAC or Windows by downloading it here.
Convert to WebP file
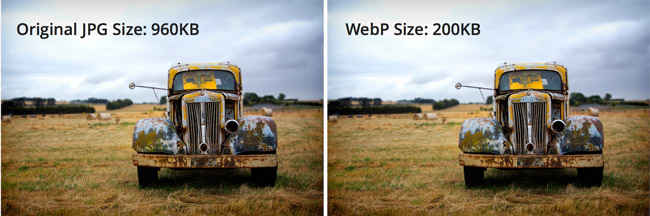
You will need to convert your PNG image to WebP format
To create stickers for WhatsApp, you must convert your PNG images to WebP. This format usually does a stellar job in retaining image quality alongside reducing the file size which is a preferred state for stickers. You can convert your PNGs to WebP using a few different methods.
- Android Studio enables you to make the conversion from PNG to WebP seamlessly. Simply, create a new project on Android Studio and open your PNG sticker art. Right click on the image and hit convert to WebP. Uncheck the box that says ‘Skip images with transparency/alpha channel’.

Android Studio will let you convert to WebP easily
- You can also install a plugin for Photoshop which allows conversions to WebP. Download it for Windows or MAC here.
- Additionally, you can also utilize cwebp, which is a command line conversion tool.
Note: While running tests, we found that Android Studio works best to convert the PNGs into webp files. We faced some errors while trying the other methods, however, they have worked for a large audience.
Get started with creating your app on Android Studio
Get your developer gloves on! We can now get started with constructing the app for your very own sticker pack for WhatsApp. You will need to download Android Studio, as well as the Sample Code zip file. Using the Sample Code, you will only need to minimally modify it to create your basic yet functional sticker pack app.
- After downloading the requisite data, you will need to open the entire folder for the sample app in Android Studio.
Replace all existing files with your own sticker WebP files and PNG tray icon
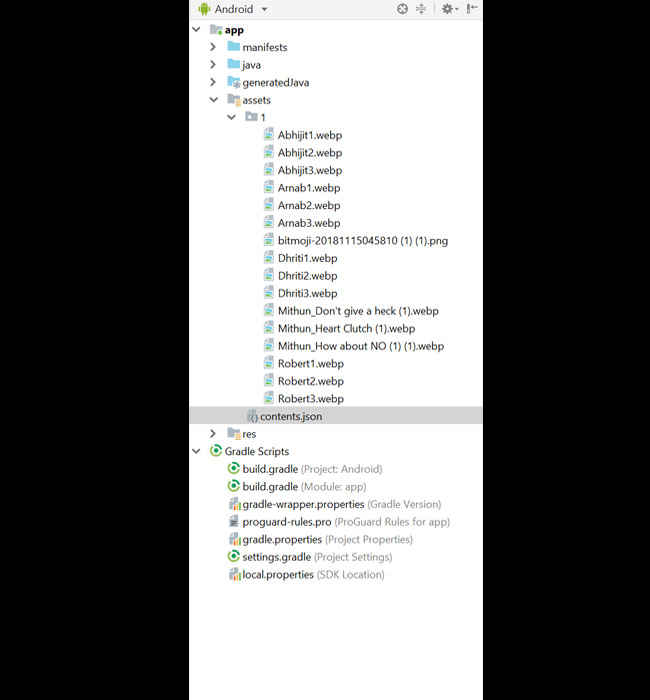
- Navigate your way through stickers-master/Android/app/src/main/assets in File Explorer.
- You will find a folder named ‘1’ inside the assets folder. Open the folder and replace all the preexisting files with your own sticker files in the WebP format. You will also need to replace sample tray icon PNG file with your own identifier image.
- If you are looking to create more than one sticker pack in your app, simply create additional folders named 2, 3 and so on until your needs are met. However, you can create a total of ten sticker packs in an app.
Modify the contents.json file
Next, you will need to navigate to the assets folder yet again and modify some of the metadata in the contents.json file with your own. This is necessary since most of this data will show up in the app you create. You certainly do not want the WhatsApp ‘cuppy’ sticker being part of your sticker pack, do you?
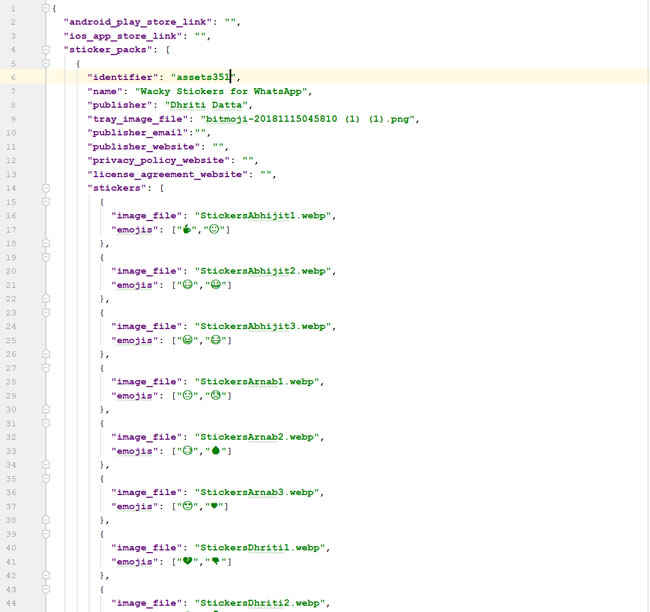
Replace all the essential components listed below in the contents.json file
- Name: Replace this field with your own sticker pack name having a maximum of 128 characters.
- Identifier: Name this with ‘1’ since that is the name of the folder with all the stickerpack images.
- Publisher: Add the name of the publisher or creator here, this also allows a maximum of 128 characters.
- Image file: Replace the current file names with the precise files names of your sticker images containing both name and extension. The order you input the images files in the contents.json file will be the exact order they will appear in the app.
- Android play store link and iOS app store link: Input your app’s Play Store link and your iOS app store link (if you have an iOS version of the app) in these fields. This enables users to be directed to your app in the respective store if the recipient clicks on any of your sticker creations.
- Emoji: You can add up to three emojis for each sticker that describe the emotion of your sticker. WhatsApp will soon support a search function for stickers based on emojis or emotions which will help categorize your creations.
- These fields are optional and need not be inputed with any data: ios_app_store_link, android_app_store_link, publisher_website, privacy_policy_website, license_agreement_website, emoji.
- If your app contains more than one sticker pack, simply create a new array in the ‘sticker packs’ section of the contents.json file and enter all the metadata for the new pack as well along with the names of the images files.
Final Touches
There are a few final steps that need to be taken care of before submitting your sticker pack app for WhatsApp. Let’s hit a home run on these!
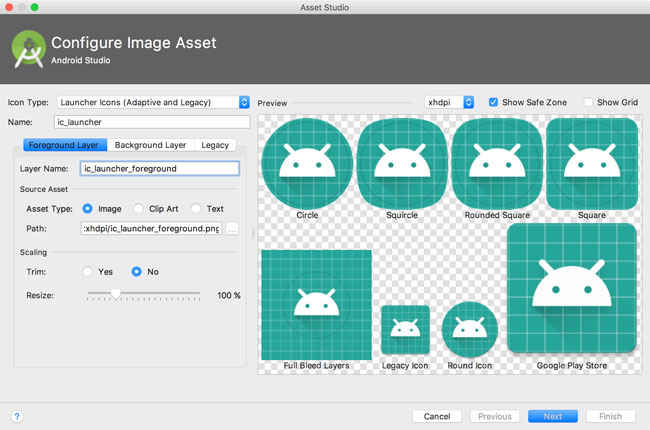
Simply input your PNG file in the tab named ‘path’
- Firstly, change the app’s icon or the launcher icon which will be displayed in the Play Store as well as the app drawer of the user. Navigate through stickers-master/Android/app/src/main/res and find the folders that begin with ‘mipmap’. Replace these icons with your own launcher icon and you will be good to go. In order to create an icon that matches the needs easily, you can use Android Image Asset Studio which is built into Android Studio by default.
- Navigate to stickers-master/Android/src/main/res/values/strings. Here you will need to change the app name. This is the name that will be assigned to your app and be displayed in the user’s app drawer after downloading you app.
- The application id will have to be changed as well in build.gradle (stickers-master/Android/app/build.gradle). Your applicationID must be unique and should not be used previously in the Play Store. To learn more about setting the optimal application id visit this website.
After completing all the aforementioned steps, make sure that you run and test the app in Android Studio which will run checks. If there is any error, you will be able to see it in the logcat. If not, the app will launch and display all your sticker packs.
Submit the App
This is how the finished product should look
A release version of your app must be created before submission to the Play Store. Click on Build > Generate Signed Bundle/APK. Android Studio will go ahead and save your APK in project-name/module-name/build/outputs/apk. During the process of preparing your app for submission, you will receive the option to add a description to your app. Add the keyword WAStickerApps here to make sure that your app will be easily located during a search. Don’t shy away from using additional keywords as well. The more, the better.
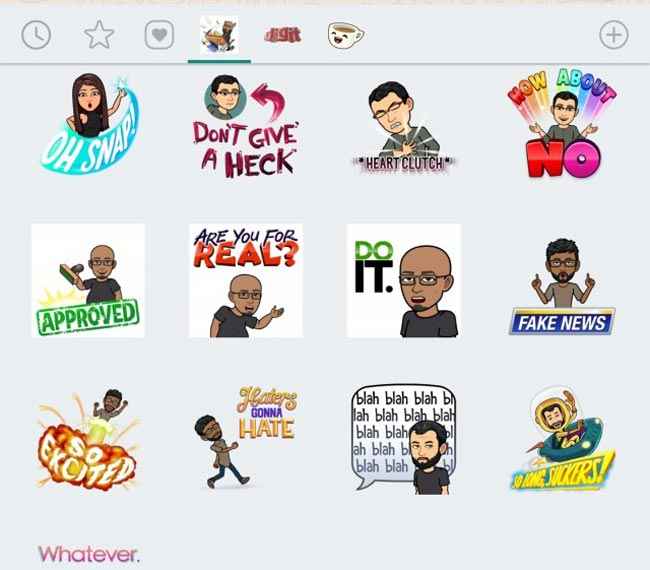
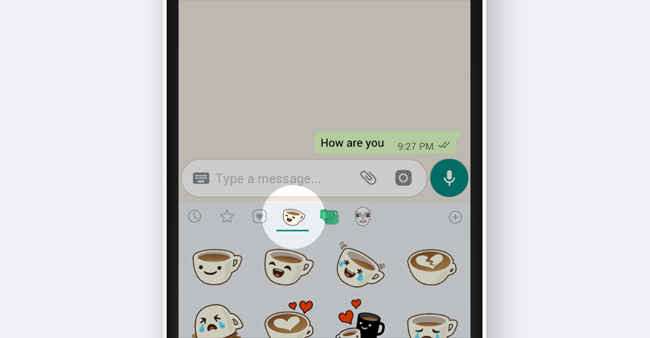
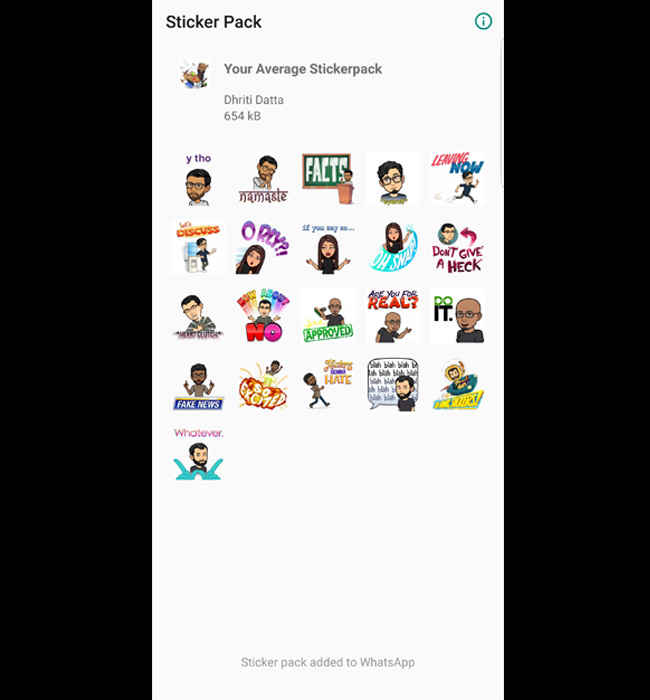
Stickers will appear in your WhatsApp once you have downloaded the app and added it to your collection
Finally, to submit your app you will need to sign up for a Google Play developer account, accept the developer distribution agreement and pay the one-time registration fee and enter your account details. Follow the instructions on how to submit your app to the Play Store here.
You can now show off your very own WhatsApp Sticker Pack app to your friends and family. You may even be able to possibly monetise your creations if your app gets enough traction. If that’s not incentive to try this out, then what is? Get to creating and share some of your WhatsApp Sticker Apps with us at editor@digit.in