How to use new features of Photoshop CS6 beta
HIGHLIGHTS
With the Beta just out, here's a look at the new features of Photoshop CS6 beta

The grand ol’ daddy image editing app is getting a whole new look and a host of cool new features in the next iteration. To get your hands dirty, grab the Beta version available on this Adobe Labs page: http://labs.adobe.com/downloads/photoshopcs6.html Here are a few tips to introduce you to some of the changes incorporated in this version of Photoshop.
✅ Thank you for completing the survey!
User interface
The first thing that you’ll notice when you open the redesigned Photoshop for the first time is the completely souped up and darker interface. This is purportedly in place for a more immersive experience, though the purists who vouch for the original grey-colored interface can always return to the original one, by going to Edit > Preferences. Photoshop calls the interface colours Brightness Options. It has four different brightness user interfaces available. One noticeable and welcomed improvement is the draggable section of all toolbars for easy movement around the windows. Managing the screen real estate was never a strong point for Photoshop but CS6 makes it easier to move toolbars around, with the window glowing blue when you bring a toolbar near it.
There’s this one small change that some of the pro users who’ve been working with Photoshop for years may find irksome. Tools like “crop” and “lasso” now have small cursors at the top. In the previous versions, you had to use the bottom of the lasso to mark a section but now you have to use the tip of the cursor as your guide. Additionally, though not all of the tools behave in the same way, an eyedropper still behaves as an eyedropper.
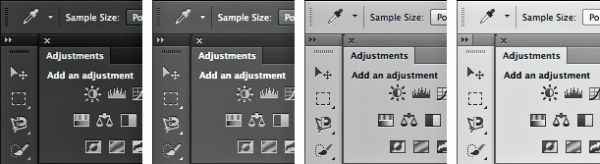
Choose anything between the new ‘dark’ UI or the original grey UI
Background saving
In previous versions, hitting [Ctrl] [S] would mean that you couldn’t do anything else for the amount of time it would take Photoshop to save the file. If the file was large, you could easily have time for a cup of coffee or a stroll around the office. But this isn’t the case with CS6; the saving process takes place in the background, so you don’t need to spend your time fooling around when your Photoshop is saving the file. One thing to keep in mind though: only the changes made till the point you hit save are stored by this mechanism. The changes made after this point aren’t saved – no auto-saves.
Automatic recovery
You feel like ripping your hair out when Photoshop crashes on a file you’ve been working on for hours and the worst part is that you haven’t saved it! Photoshop CS6 introduces automatic recovery, which automatically saves a file as you work. You can set the interval after which Photoshop automatically saves the file, and thus you’ll never be more than 10 minutes away from the last change that you made. Go ahead and test this feature with a dummy PS file.
You can set the interval after which Photoshop automatically saves your file
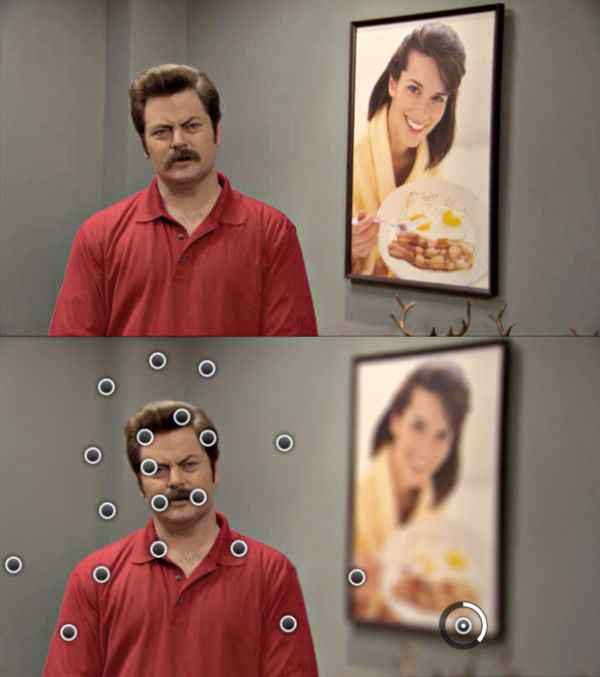
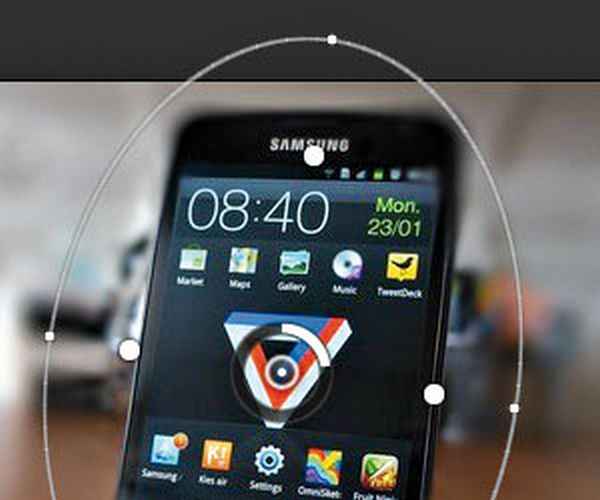
Content-aware Move and Extend
These are two of the more heavily touted features. The “Content-aware” tool lets you select a car parked on a street in a picture and move it from one end of the street to another end, with Photoshop filling in the space previously occupied by the car based on the context i.e. the object around it. It also applies a feather to your selection where you’ve placed the object you just moved. The effectiveness of this tool though is still under question. It’s in no way perfect, and a complex image with multiple objects gives disastrous results. The entire exercise with the “Content-aware” tools feels a bit gimmicky; they merely seem to be in place to entice new users with cleverly developed but poorly performing tools.
Another tool from the content-aware stable is ‘content-aware extend’, which can be used to scale geometric objects like flagpoles and skyscrapers but it doesn’t perform as well on non-geometric shapes such as the human body.
Content-aware Move in action
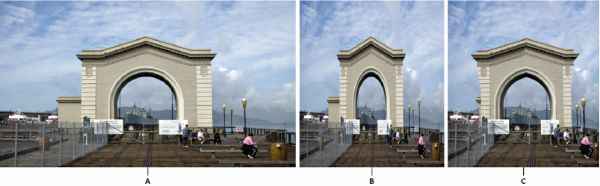
Blur gallery
The Blur gallery will have photography enthusiasts dancing around in glee. It features three filters – Tilt Shift, Iris and Field blur filters. Previously, you’d have to use actions or follow detailed tutorials to get these effects but these filters, integrated inside Photoshop, help achieve the precise effect. The simplest among the three is the Field Blur but it offers the least amount of direct control. The Iris Blur filter gives you much more rounded and comprehensive control over the location and intensity of the blur effect. Though it looks simple, this effect is quite powerful and flexible. The Tilt Shift effect is used to conjure an appearance of miniaturisation. It actually emulates the optical effects of extreme perspective control lenses. This particular filter offers excellent control over the effect to get the desired results.
Photographers rely on focal length, subject distance and aperture to determine in-focus and blurred areas of an image. But with such powerful tools in hand, it’ll be difficult to tell an actual photo and a photoshopped image apart.
The simple yet powerful field blur
The new blur gallery offers a great amount of control over the effect
Crop tool
The new crop tool will harangue a lot of users. It takes everything backwards. The new crop tool functions in the opposite way to how it used to. The cropped canvas will stay parallel to your display and the actual image will move around, rotate and scale according to your command. It’s actually pretty good, once you get used to it.
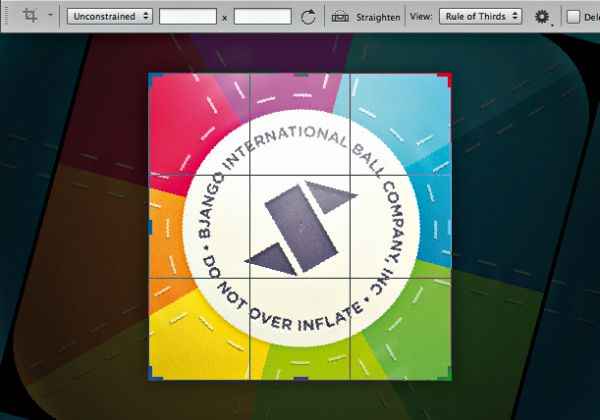
The brand new Crop tool
Video editing
Good news for those who also dabble in a bit of video editing. CS6 includes a basic video editor that will come in handy for photographers who don’t want to sell a kidney and a half to get their hands on a decent video editing suite. The best part is that once you open up a video, you can play around with it using the Photoshop tools you’re familiar with. Color and exposure adjustments, as well as layers, work just how you’d expect them to. If you’d like, you can add borders, textures, filters and even audio tracks to your video. Once you’re done editing, you’re presented with a handful of exporting options. Furthermore, you’ve got a couple of built-in transition effects that you can drag and drop on a clip to get the desired effect. You also get decent options when you want to export videos. Although it’s no Premier or After Effects, the video editing capabilities play their part extremely well and Photoshop fans will feel right at home using these features.
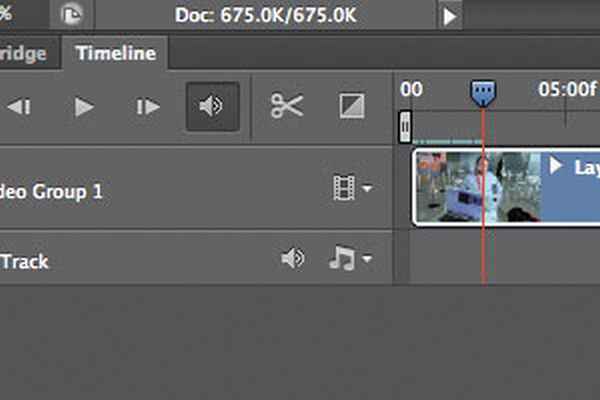
Video editing has finally arrived in Photoshop
Few others that deserve a mention
Gone are the times when you had to look for the info panel when making adjustments. In CS6 when you move or transform something, a small box shows up on the canvas with related values as you perform the adjustment. There are some options to control how this works under the Interface tab in Preferences. Dummy text can be directly pasted in the text layer using the Type menu. Paragraph Styles and Character Styles will behave like in InDesign and many other design apps, letting you store a text style and apply it quickly to text throughout your document. The most awesome addition ever, you can now search layers. You can now search by layer type, name, effect (layer style), blending mode, colour or by a large range of attributes. CS6’s improved searching should make traversing your next 1000 layer PSD a whole lot easier.
.jpg)
You can search layers by type, name, effect, blending mode and color

Miniaturise anything with the new Tilt Shift filter
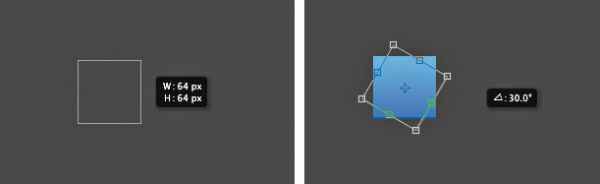
No need to look into the info windows for dimensions any more