[Workshop] Connect with .NET
![[Workshop] Connect with .NET](https://static.digit.in/default/artImg75x64_3843.jpg "[Workshop] Connect with .NET")
Microsoft’s Visual Studio 2010 beta 2, or its free counterpart, Visual Web Developer, makes creating web pages and adding features to them as simple as dragging and dropping. After this workshop, you’ll be able to create your own personal web site — with minimal coding.
Try Microsoft Visual Studio 2010 Beta2
Create a new web site
Open the Visual Studio 2010 IDE. Go to File > New > Web Site. Select the language as Visual C# in the left pane, and the template as ASP.NET Web Site. Finally, select the directory where you want to save this and click OK. The Solution Explorer (right pane) will have all the files that make up your web site. Double-click on Default.aspx and page mark-up: HTML plus ASP.NET declarations and controls will open in the main window. This centre pane has three tabs at the bottom, known as Labelled design, Split and Source. You will be using these three tabs quite often as you create your web site.
When you click on the design tab, the middle window of your IDE becomes the design surface. On this surface, drag and drop items such as buttons, text boxes, labels and so on from the toolbox, (present on the left edge of the main screen), and they will automatically become a part of your web page. The source view allows you to see the same controls displayed as HTML and ASP.NET mark-up.
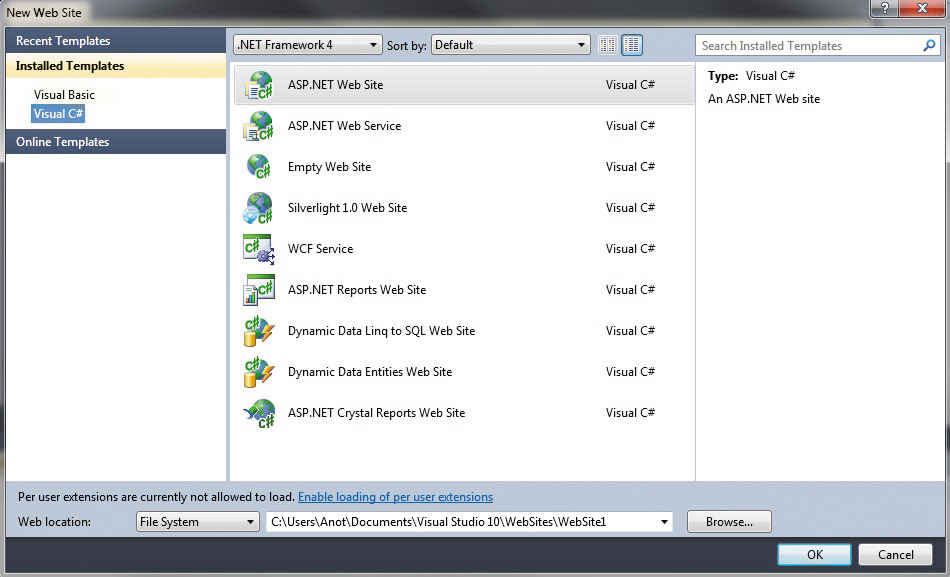
Select the type of project, and pick the objects you need in your website
Adding controls
You’ve already created your web page. To make your page live, you need to add some controls (building blocks of the web page’s GUI) to it, including buttons, check boxes and list boxes.
As you progress through developing your web site, stop and run to see what it does so far. To do this, click on the menu item Debug > Start Debugging, or press [F5]. Click on the Start Debugging icon on the toolbar.
When you run your web site for the first time, the IDE detects that your project is not set to allow debugging and will offer to make that adjustment for you. After you click OK, your application begins, your default browser opens, and the page that contains your controls is displayed. Unfortunately, none of them have any events (event handlers) associated with them. Clicking on anything yields no response as of now. Creating the event handler for the Click event is as easy as it gets. In the design view, double-click the Button control. This instructs the IDE to create an event handler for that button and name it.
The IDE displays the code behind the event handler and lets you complete it. Here is where you add your own custom code, to specify the operations you want the handler to perform when it’s called. If want to set the text property of the label control, which is named Label1, to the phrase Good Morning, you need to assign that string of letters to the text property of the label. Click inside the event handler stub, and then type Label1.Text = “Good Morning”;
After you’ve added the code to your event handler, save the file by clicking the Save button on the toolbar. Run the program again by clicking the debugging icon or pressing [F5]. When the page opens in your browser, click the button. Your event handler is working now, so you should see the text label change to Good Morning.
With the file open, select the code behind, either from the tab at the top of the window, or in Solution Explorer. Go to the click event handler, and change the text from Good Morning to whatever you like. Switch back to the ASPX file. Select some control, and check out the Properties window next to the Solution Explorer. There’s more here than just setting the text, as you’ve done so far. Go to the Appearance section of the Properties, and play around with them to your liking. After you’ve kicked the tires a bit, run your application to see how it looks.
Visual Studio offers a number of different controls, to create lists from which the user can make a selection. These include the ListBox, the DropDownList, RadioButton and CheckBoxes. These controls work more or less the way you’d expect them to. There are several ways to display dynamically generated read-only text in your page — you can set the property of a label control, or you can use a read-only TextBox control.
Adding images and links
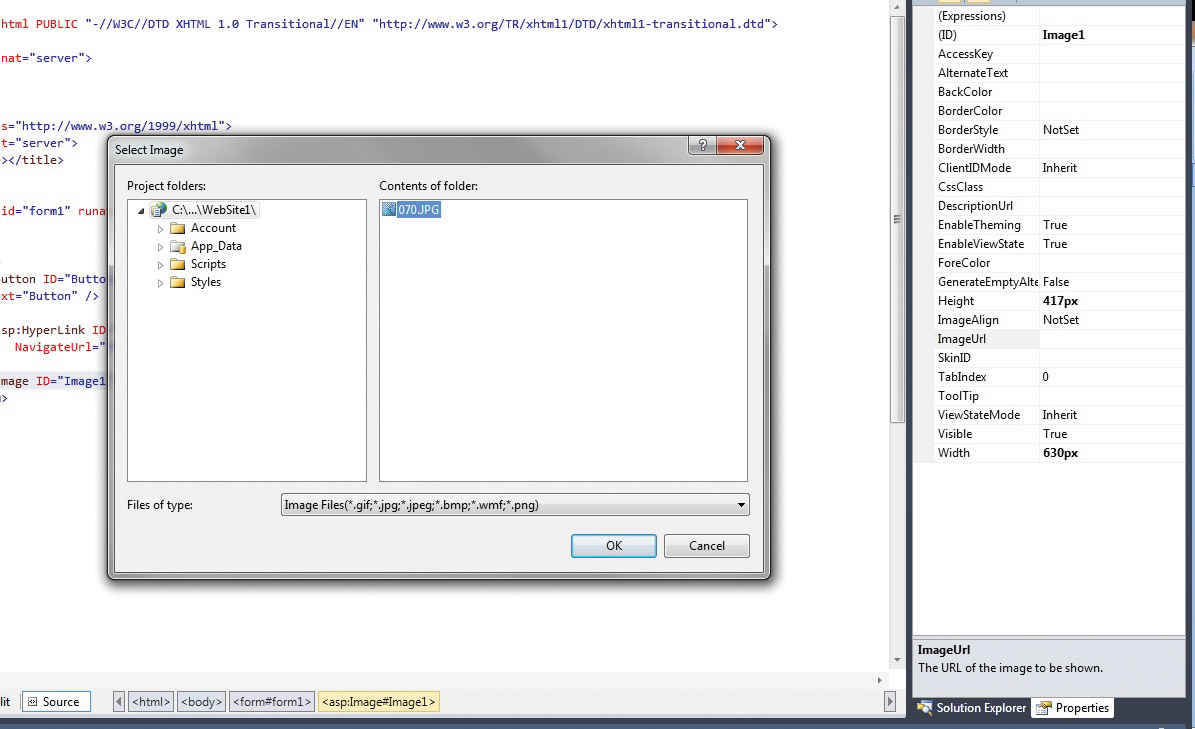
Browse to the image you want to place in your site and add the relevant information, Visual Studio will do the rest
An image can be a photograph, a drawing or even a logo. Visual Studio provides several controls to work with images.
ImageControl is used to display an image. ImageButton is used to create an image that can be clicked, acting like a normal button. An ImageMap control provides an image with multiple clickable hotspots. Each hotspot behaves like a separate hyperlink.
To insert an Image control into the form, drag a CheckBox and an Image control onto the form. In the Properties window, set the ID of the CheckBox to cbDisplayPhoto, and be sure to check AutoPostBack to True, and Text to Display Image. Also, set the TextAlign property to Centre.
Set the ID for the image to Image1 and the ImageURL to the file you would use. Once you have the file, simply drag and drop it on to the Website1 folder in Solution Explorer. You’ll see the image file appear in the file tree alongside your other solution files. You can also use any image file you have handy.
The Image control has three essential properties: the ID (so that you can address the control via code), the ubiquitous runat=“server”, and the ImageUrl that identifies the location of the image in your directory. Because you put this image in the base directory of the application, you do not need a path name.
The name of the file itself will suffice. On our web page, the CheckBox control offers the user the opportunity to control the image visibility. It has its AutoPostBack property set to true so as to force a post-back every time the checked property changes. To make use of this, of course, you will have to write an event handler for the CheckedChanged event.
Double-click the CheckBox to create an event handler for CheckChanged, and add the following line of code:
Image1.Visible = cbDisplayPhoto.Checked;
This event handler changes the Visible property of the image to the checked property output. When the property is set to false, the image isn’t rendered. When you uncheck the box, the page posts back, and the image vanishes.
Hyperlinks provide immediate redirection to another page in the application or to a location elsewhere on the internet. We’ll use a HyperLink control to provide a link to Digit’s home page, serving here very much the same function as an <a> tag would do in HTML. Drag a HyperLink control on to the bottom of your form. Set the ID to hypContact, its NavigateURL to http://www.thinkdigit.com, and its text (which will become its inner HTML) to Think Digit Homepage. Finally, set the Target to _blank to render the content in a new unnamed window without frames.
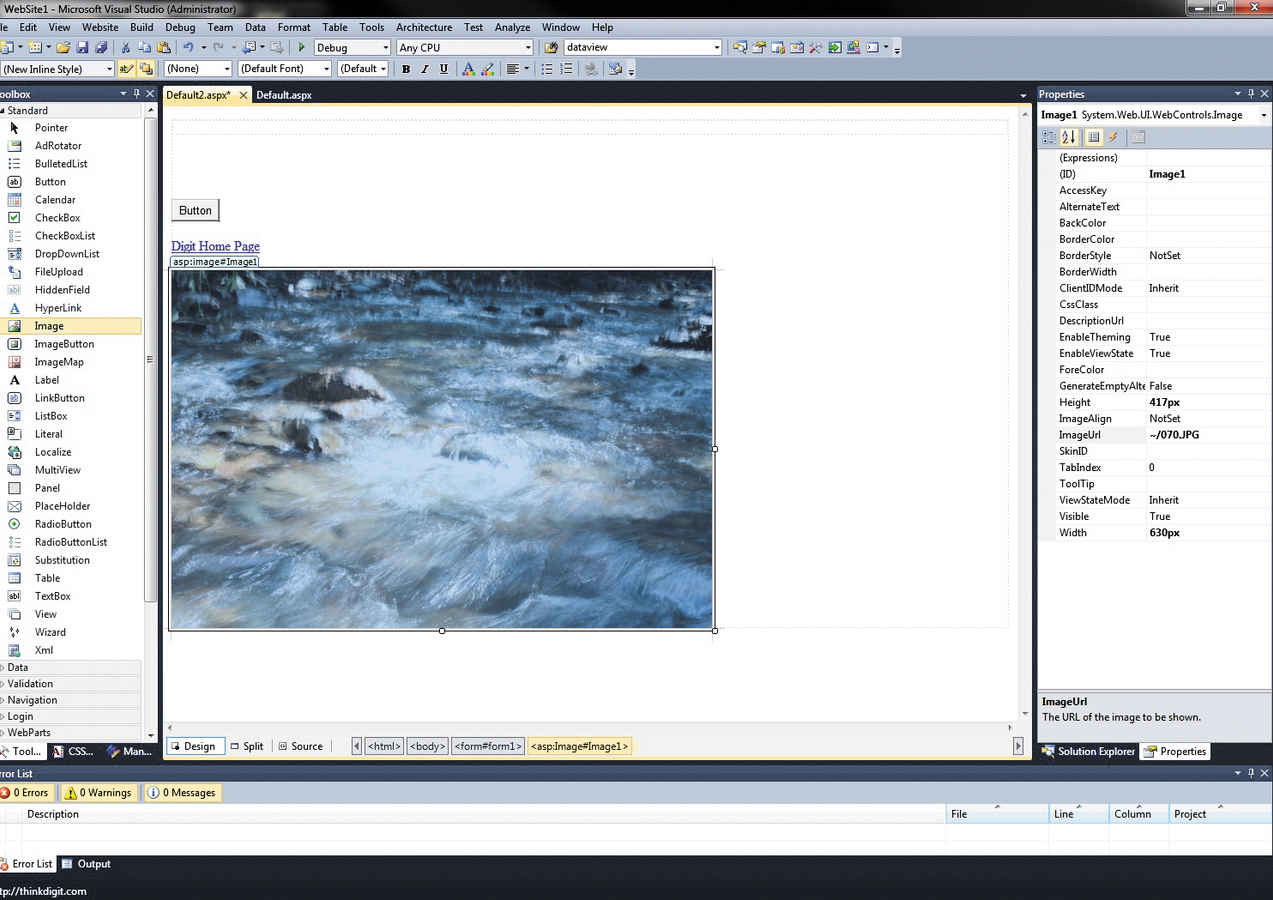
Working with images is easy with Visual Studio
Setting up Users and Roles
You’d prefer your personal web site to make sure users “log in” before viewing your personal content. This allows the site to restrict access to random people, and also allows the user to personalise the site to their individual needs.
Not long ago, creating the framework of logging in was a tedious and time consuming job: you had to create a database to track users, create the ability to maintain secure passwords by hard coding, ensure authorisation on each page, assign users to “roles” (such as guest, member, owner and wizard), and so on. You also had to write code for all the controls that allow the user to log in, to recover passwords, to change passwords, and so forth.
Click the Security tab. You’ll see a window that gives you links to set the authentication type, define authorisation rules (using the access rules section), and enable role-based security for your web site.
To set an application to use forms authentication, click on Select Authentication Type. Choose From the Internet. Click on Done. The appropriate authorisation tag will be created in the web.config file automatically.
Next, define the authorisation rules for different types of users. To do so, click on the Create Access Rules link. To manage multiple rules, you’ll need to click the Manage Access Rules link. You can change the order of rules and hence the priority. If you have a large number of rules to create, it’s easier to edit the web.config file. Once you’ve specified the authentication mode and the authorisation rules, you need to build the actual login page, which is an ordinary ASPX page that requests information from the user and decides whether the user should be authenticated or not.
Putting together the pieces
.jpg)
Set Parameters for your website, without bothering about code
You’ve run all the pages from within Visual Studio 2010, and the web server you’ve been using is the ASP.NET Development Server that’s built into Visual Studio. This set-up is good for testing. However, you can’t run a public web site this way. For starters, it’s unlikely that your computer is set up as a web server.
The ASP.NET Development Server that you’ve been using can’t be used to serve a public web site as it accepts requests only from the local computer. You have a couple of options to get your site live that depend on how much of the site administration you want to take on. The easiest and most common option is to rent space from a hosting company and link it to your domain. Another option is to host the web site on a computer you maintain yourself. This is less common, but certainly possible.
There you have a functional web site with user registration, your personal information, photos, session state, and a consistent look and feel, all coded by you. You can now go out and create sites that you didn’t dream were possible – before you read this, that is. There are plenty of more features that you could add to this site, such as more complex validation, user profiles, data handlers, image gallery and LINQ. The example here provides a good start for additional exploration in web development using Visual Studio.
Try Microsoft Visual Studio 2010 Beta2