Supercharge your Android phone with these hacks

It can be easy to be restricted to using only what your Android smartphone offers you on the surface. And, for good reason. Smartphones powered by the open-source Android operating system are extremely powerful machines and their evolution since their inception is nothing short of astounding. On the surface, Android smartphones offer users nearly everything they’d expect from a smartphone today. Remotely catch up with your long-distance family and friends? Check. Play immersive games with exceptional graphics? Check. Order food, clothes, and groceries online? Check, check and check.
So, the list goes on…
However, if you crave to be an Android power user who tinkers with intricate nuances when it comes to the piece of tech you’re holding, Android offers you plenty of room for that too. Its open-source, highly-customisable nature not only enables this, but encourages it. Android devices give users the power to access the underlying technology directly, and tinker with them to their heart’s content. Endless customisation is something that Android offers to its users, and this extends beyond the UI. However, venturing into such customisations can be slightly daunting. Nevertheless, even if you have passable tech knowledge, you can get down and dirty with Android.
Automate sending random ‘good morning’ messages everyday
Have an SO (significant other) to whom you meticulously send ‘good morning’ or ‘good night’ messages everyday? Why face their impending wrath if you accidentally forget to do so one day? Just automate it. Android has tons of powerful apps, such as Tasker, IFTTT and Automate, which can help you regulate a variety of tasks without so much as raising a finger. In order to send automated, ‘good morning’ messages, our weapon of choice was Tasker. With this app, you can enter numerous renditions of good morning messages in a .txt file and send a different, random one every day to a selected contact, at a random time (from a selected range).
Firstly, create a .txt file with all your good morning messages, each on a new line. Save this file in your device’s Tasker folder. Then, create a profile on Tasker with a name of your choice. Set the time to when you usually send your ‘good morning’ text out in the ‘FROM’ section. Say, 7:00 or 8:00 AM? Uncheck the ‘TO’ section and go back. Next, create a new task and name it ‘Random Messages’ or anything you fancy, really. Click the ‘+’ icon on the bottom right and do the following:
Action 1: Variable Randomize [ Name: %sendtime, Min: 0, Max: 3600 ]
Action 2: Wait [ MS: 0, Seconds: %sendtime, Minutes: 0, Hours: 0, Days: 0 ]
Action 3: Variable Set [ Name: %newline, To: Press ‘Enter’ button once, Do Maths: Off, Append: Off ]
Action 4: Read File [ File: Select your .txt file, To Var: %morningfile ]
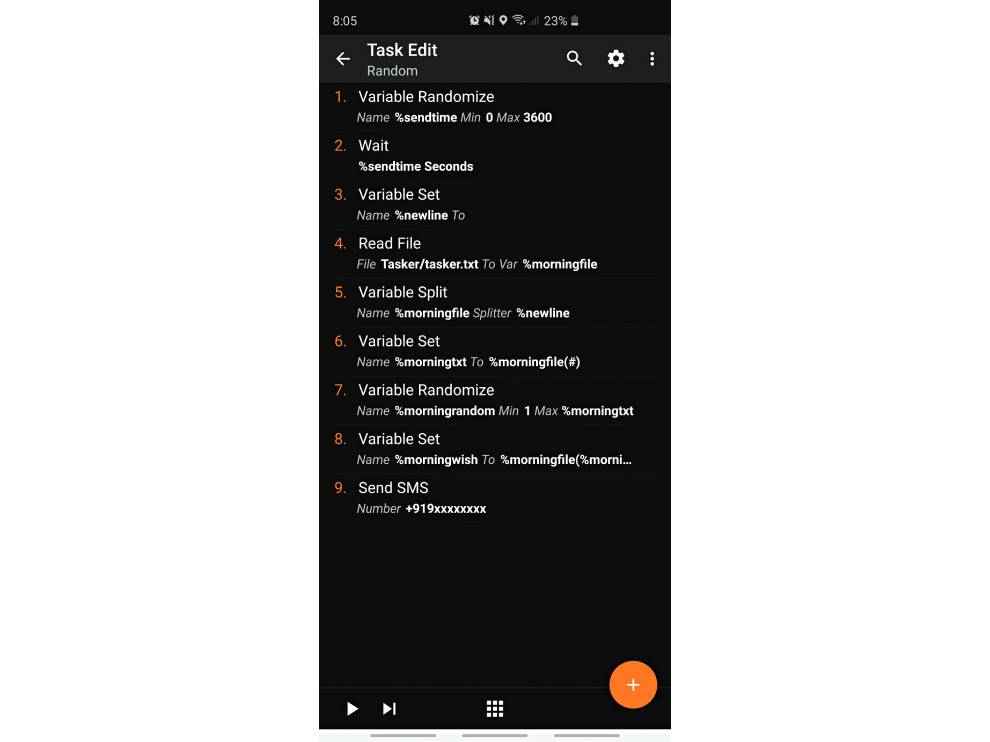
Action 5: Variable Split [ Name: %morningfile, Splitter: %newline, Delete Base: turn off ]
Action 6: Variable Set [ Name: %morningtxt, To: %morningfile(#), Do Maths: Off, Append: Off ]
Action 7: Variable Randomize [ Name: %morningrandom, Min: 1, Max: %morningtxt ]
Action 8: Variable Set [ Name: %morningwish, To: %morningfile(%morningrandom), Do Maths: Off, Append: Off ]
Action 9: Send SMS [ Number: Select from your contacts, Message: %morningwish, Store in Messaging App: off ]
Now, you have created a Tasker profile to automatically send a random good morning message to the contact of your choosing from a list of messages you have listed out on the .txt file.
Note: The .txt file is only useful if you have tons of messages, say like 100 random messages (just to ensure your SO doesn’t figure out they’re automated). If you only have a few random messages, simply set several Variable Sets, add a name like %msg1, %msg2 and so on, and then add your random message in the ‘To’ field.
Additionally, you can also send WhatsApp messages like this daily but that is only available for users with a rooted device. If you do, simply install the WhatsTasker plugin and select send ‘WhatsTasker Send Message’ action as your message client. Also, you can enter your data in an excel sheet instead of a .txt file by using the Spreadsheet Tasker Plugin. Tasker is a paid app that costs `270.
Download Google Camera on any Android device
Pixel smartphones are often touted to be one of the best, if not the best, smartphone to click photographs on. The accurate portrait mode, Night Sight, relatively true-to-life colours and other software-enabled imaging abilities are a major pull for photo enthusiasts to buy the phone. However, if you do not own a Pixel device and still want to utilise Google Camera, many of you actually can! You will need to install the GCam Mod on your Android smartphone, but before doing this, you need to check a few things.
Most importantly, your phone should have support for Camera2 API. This is a framework that lets developers get access to granular controls over the smartphone camera including exposure, ISO and more. The developers then integrate these granular camera controls into their own third-party apps. Unfortunately, not all phone developers have implemented this API into devices even today. Still, if you have a mid-range or flagship phone, chances are you have the API support. To check, you can download an app called Camera2 API Probe from the Play Store. After launching it, check the Hardware Support Level section. There are four options, and this is what each one means: 1) Legacy: No support for Camera2 API available; 2) Limited: Support for some, not all, Camera2 API abilities; 3) Full: Complete support available; and 4) Level_3: These devices have support for YUV reprocessing and RAW image capture. Our test device, the Samsung Galaxy S10 Plus has Full support for the rear camera and Limited support for the front shooter.

If your phone doesn’t have Camera2 API support, then you can only enable it by rooting your device. You will need to edit the “build.prop” file on your smartphone or utilise Magisk to enable it. To enable it through the “build.prop” file, download the BuildProp Editor app and enter this line to the end of the file: persist.camera.HAL3.enabled=1
Tap the save icon and then restart your device. Or you could simply download a Magisk module called ‘Camera2API enabler’. Install the module using Magisk Manager and Camera2 API will be enabled. After this, you need to install the Google Camera mod onto your device. Finding and picking the right mod for your phone can be tricky, but you can look for genuine GCam mods for your specific phone on sites such as XDA developers. This article does a great job listing out GCam Mods for various popular devices – https://dgit.in/GCamMods.
Allowing a guest to connect to your home Wi-Fi using NFC tags
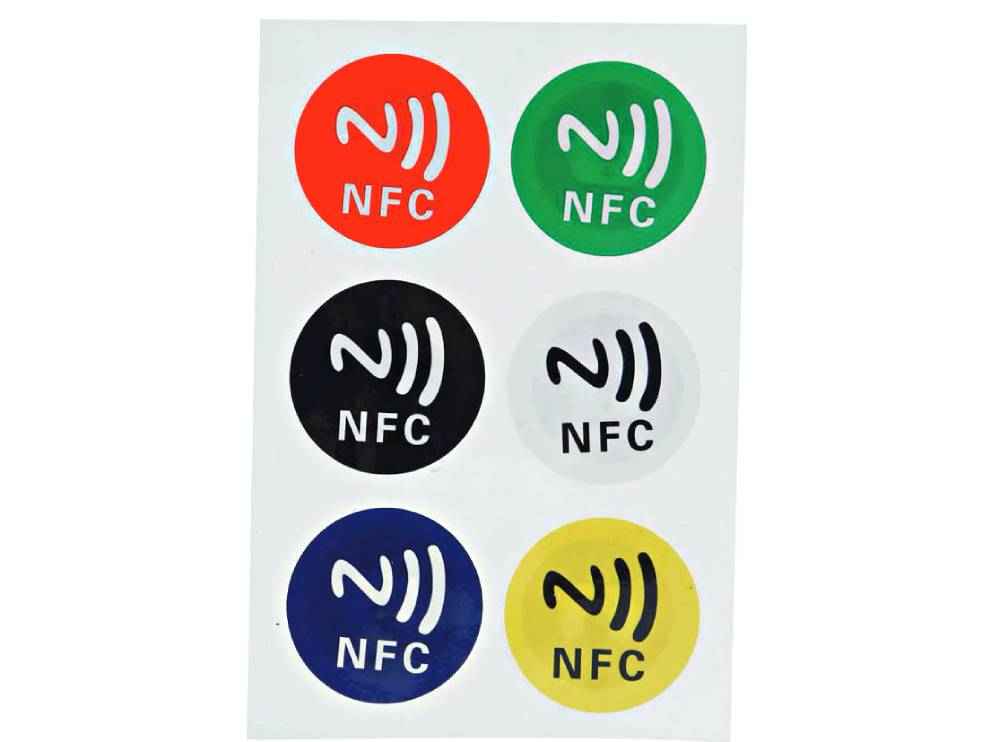
One of the varied uses of NFC tags or stickers includes allowing guests to connect to your home Wi-Fi automatically just with a simple tap. Gone are the hassles of dictating or typing out the super-complex Wi-Fi password you have set, on the phones of the countless guests you may have. For this to work, however, your guests will need to have an NFC-enabled phone, which is, fortunately, not too difficult these days since most manufacturers have added this nifty functionality to their devices. Firstly, you will need to buy a couple of NFC tags/stickers. There are plenty available on Amazon India that you can purchase easily. A standard pack of eight usually costs under `500. Next, install an app on your phone which allows you to customise these tags such as Trigger or NFC Tools. After this, the process is quite simple and intuitive. Ensure your NFC tag is erased if you’ve used it before, and then write the Wi-Fi data to your tag. To do this, go to Wi-Fi and then long press on a network you want your guests to connect to. (Make sure that your phone is NOT connected to the Wi-Fi network when doing this). After long-pressing, select ‘Write to NFC tag’ and then input your network’s password and then hit ‘Write’. Tap the NFC tag to the back of your phone where the NFC sensor is located and that’s it.
The next time someone comes over, ask them to simply tap the back of the phone to the NFC tag and bam! Their device will ask them if they want to connect to the network, get them to click ‘Connect’ and they can hog… ahem, use your home Wi-Fi to their heart’s content.
Pro tip: Don’t want to buy NFC tags? You can also let your guests access your home Wi-Fi using QR codes. Go to Settings, and Wi-Fi and then tap on the current network. The QR code will be pulled up when you hit the Share button. You can print this code and your friends can scan it from their phone’s camera to connect immediately.
Enable RCS in Google Messages
The rival to Apple’s iMessage, RCS messaging is the next step in the world of SMSes. It allows users to send high-quality images, share their location, engage in group chats and even video calls. All free of charge, of course! If you want to utilise this service immediately on your Android phone, you can, in just a few steps. Google has officially released RCS support in its Messages app now and activating it is extremely simple.
All you need to do is follow these steps. Firstly, if you haven’t already, download the Google Messages app from the Play Store. Once installed, open the app and head over to the Settings menu. Tap Chat and then toggle on ‘Enable chat features’. You have officially skipped the wait time for when Google actually officially rolls out RCS features for your device. Don’t worry, even though you have used this “unofficial” method to gain access to the RCS features, a Google representative tweeted that people who have used unofficial methods will automatically get official RCS support when it releases for your device.
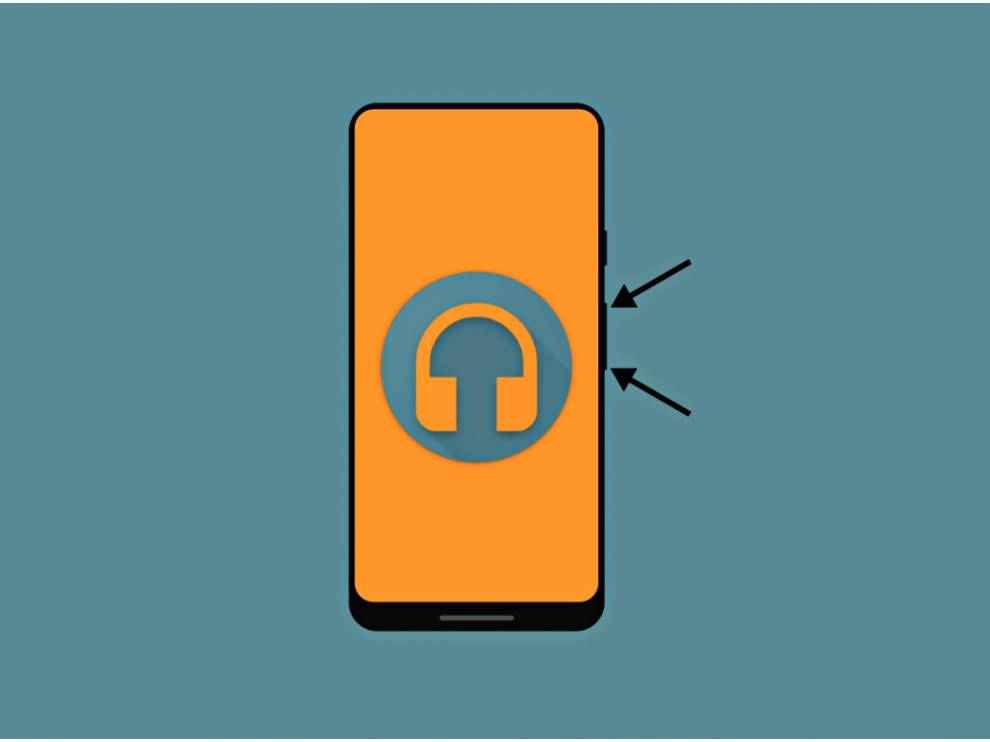
Skip songs using volume buttons
This feature elusive was once only accessible to those who have rooted their device, but now you can long-press volume button to skip tracks/ go back to the previous track without rooting your device. An XDA member named Cilenco developed the Skip Track by Volume Keys app which lets unrooted devices perform this task. This is an open-source app which utilises the volume key long press listener API to change tracks even when the screen is off. To use this, you will need to have an Android device running Android 8.0 or higher.
To set this up, firstly, install the APK for the app from Github (https://dgit.in/SkipTrack) and run this ADB command:
adb shell pm grant com.cilenco.skiptrack android.permission.SET_VOLUME_KEY_LONG_PRESS_LISTENER
In order to run ADB commands, you need to first download the SDK Platform Tools on your Windows, Mac or Linux PC. Then extract the ZIP file to an easily accessible location. Next, on your Android device, go to Developer Options (unlocked by tapping Build Number 7 times quickly in Settings > About Phone). Enable Developer Options and then find USB debugging. Toggle the switch on.
Now, connect your phone to the PC with your USB cable. Set the USB mode to PTP, this can be changed in the notification shade. Open the platform-tools folder on your PC. Press Shift+Right Click and choose ‘Open command prompt here’. Type ‘adb devices’ and hit Enter. You will now see a list of attached devices, choose yours and enter the ADB command mentioned above.
A couple of useful Xposed Modules
If you have a rooted Android device, Xposed Modules are impeccable for customising and tweaking your Android smartphone. After rooting, you need to install an app called Xposed Installer. This allows you to download other apps which can modify your phone.
Note: After installing each of the following modules, remember to enable it. Navigate to the main menu in Xposed Installer and go to the Modules section. Here, check the box next to the Xposed Module you want to enable and then restart your phone.
YouTube AdAway
As the name suggests, this Xposed Module will remove all YouTube advertisements on the mobile app. It also works for YouTube TV, Gaming and Kids apps. This module can also disable video suggestion and information cards.
Snapprefs
This module allows users to auto-save Snapchat images and videos on Android. There are other features available as well such as paint, location spoofing, option to disable Discover and taking screenshots without alerting the sender and more.
GravityBox
This Xposed Module is used for modding and enhancing the features present on Android devices. You can tweak numerous things down to a granular level through this module on your lock screen, status bar, display, navigation keys and more.
BootManager
You can use BootManager to curb certain apps from auto-launching every time the phone starts up. This can significantly improve boot time and battery life, especially if your phone has multiple intensive apps.
CrappaLinks
This module solves the aggravating problem of links opening up in a browser window within the app instead of going to the app itself. This is often observed with Google Play or YouTube links and the CrappaLinks Xposed Module fixes this issue.
XPrivacy
This Xposed Module can stop certain apps from accessing certain types of information. All you need to do is choose a category to block and then tap every app that should be restricted from accessing the corresponding information.
Deep Sleep Battery Saver
This may seem like just another Battery Saver on the surface, however, this is a powerful tool which can not only put your apps to sleep to conserve battery, but also force processor cores into a sleep state!
MinMinGuard
This Xposed Module is an ad blocker for applications only and does not block ads on websites. This ad blocker has an edge over other apps like this one since it doesn’t just remove the ad content and leave the frame as an empty space like others do. It actually removes the entire space in the app where the ad used to reside.
MorseLight – Flashlight + Morse Code
An app on the Play Store called MorseLight utilises your smartphone’s flashlight to convert text to morse code which can then be decoded by anyone within line of sight. You can also decode incoming signals. You need to manually input the signals you’re seeing and the app will convert it back to English.