8 tips & tricks to make the most out of Audacity
Here’s a quick rundown of the most useful tips and tricks offered by Audacity that are directed more towards creating podcasts and voiceovers for YouTube videos.

If you’re into sound editing, you must have probably heard about Audacity, and it’s highly possible that you’re already using it for your projects. Whether it’s sound mixing, voiceovers or podcasts, it does the job for you easily. The open source and free software is so powerful that it’s recommended as a strong alternative to even the commercial audio editing software out there. We have covered Audacity several times before, so here’s a quick rundown of the most useful tips and tricks offered inside the software. You’ll come across tips which are directed more towards creating podcasts and voiceovers for YouTube videos.
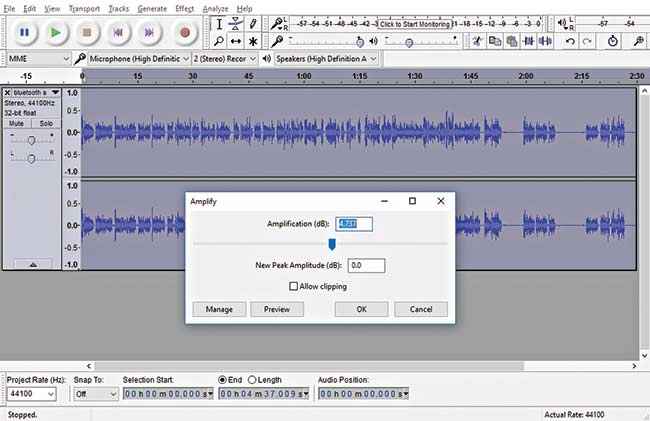
Amplify your tracks
This may be the most common feature used in Audacity, in fact many specifically have downloaded and installed this software just to amplify their recordings. This feature is useful when your recording device has a lower capture volume. It also works the other way, so if it’s too loud, you can decrease the peak by entering a negative value. And it’s fairly simple. Once you’ve opened the audio track, you can both select the entire track or just a portion, and then go to Effect > Amplify. Then you can enter the Amplification value in positive or negative based on whether you want to increase or decrease the peak.
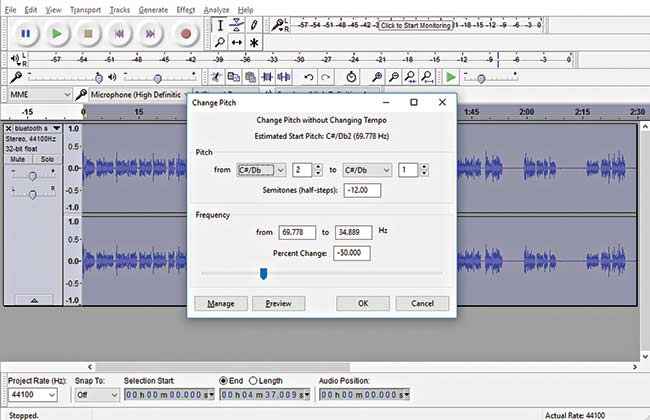
Change the pitch
Ever wondered how to convert a normal voice recording into that squeaky and chipmunky pitch? It’s really easy on Audacity. With an area selected in the track, go to Effects > Change pitch and move the slider or enter a value in Percent Change under the Frequency section. You don’t need to fiddle around with the top section if you’re only dealing with a normal voice recording. You can increase and decrease the pitch by adding in a positive or negative value respectively. Higher the pitch percent change, the more squeaky the voice, whereas lesser the pitch, the deeper the voice. So now you know how to get the chipmunk voice.
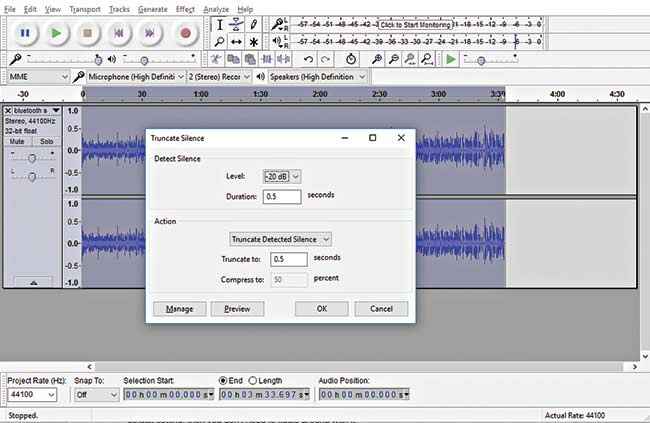
Removing silent portions mid-way
While recording for your video voiceovers and podcasts, there are silences in between as you speak throughout the length. The final version sounds awkward hence it’s always better to get rid of these silent gaps, to improve the flow. You may wonder that you would have to grind and remove all the silent portions by manually selecting and deleting them. But Audacity has a tool to achieve that. Go to Effect > Truncate Silence and select Truncate Detected Silence under the Action section. Once applied, you’ll notice that all the silent gaps have been removed. If you want to get more specific to the level of silence you want to achieve, the Detect Silence section in the same menu lets you select the level of silence you want to remove. But if you’re satisfied with the default setting, then you don’t need to fiddle around with it.
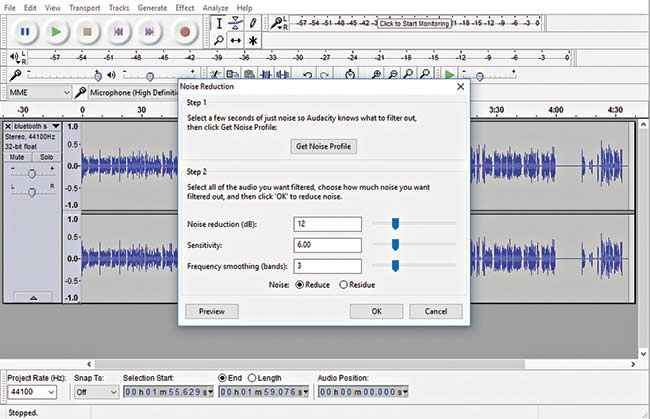
Noise removal
You’re done recording your clip but when you play it back, you hear a lot of ambient or background noise that the mic picked up. Obviously, it’s an unwanted noise and it’s easy to remove them. First select the silent area where you don’t have any necessary sound. Then go to Effect > Noise Reduction and click on Get Noise Profile under Step 1. This is how it acquires the ambient noise signals which can be filtered out. After getting the noise profile, open up Noise Reduction again and hit Ok in the Step 2. Now the track will sound significantly noise free if you play it.
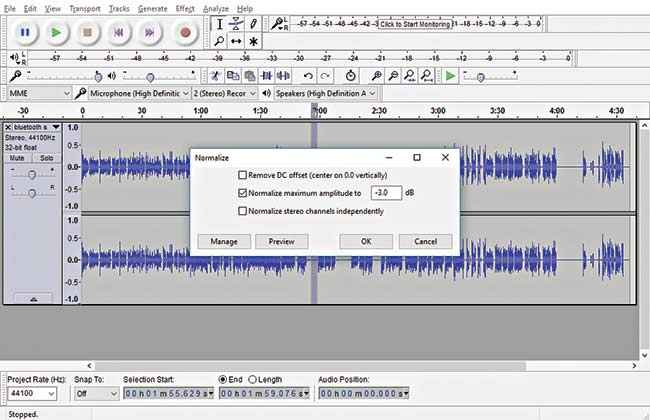
Normalise audio levels
To achieve good quality audio in voice recording, it’s essential to maintain a steady and constant distance from the mic. Otherwise, you might notice a random rise and fall in the sound levels which sounds really bad. Audacity has a tool built-in that normalises the varying sound levels so that you achieve a favourable audio track. This works really great if your audio is too loud and you need to bring down the levels. Go to Effect > Normalize and add the required value, varying from -3dB to -6dB and so on, until you hit the right spot.
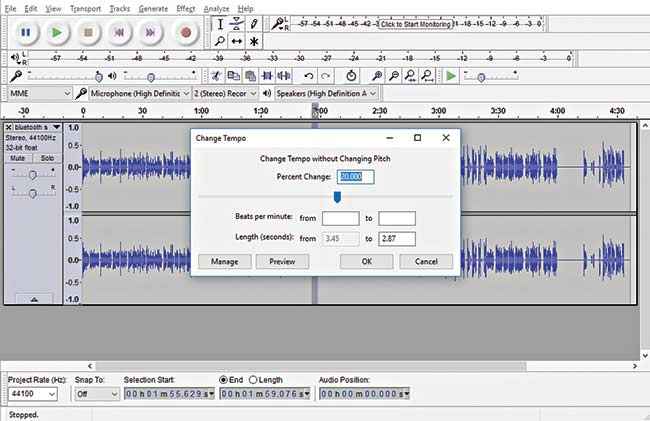
Change the tempo
You might not be happy with the tempo of the audio you recorded and are considering re-recording at a different pace. In Audacity, you’ll be able to do it right through the Change Tempo effect. As usual, go to Effect > Change Tempo and change the value of Percent Change by entering the value or using the slider. Use the Preview button if you aren’t sure and when you’ve hit the right tempo, apply it throughout the track. This is a great tool if you tend to speak slowly while reading a script but want to use a faster tempo in your video or podcast.
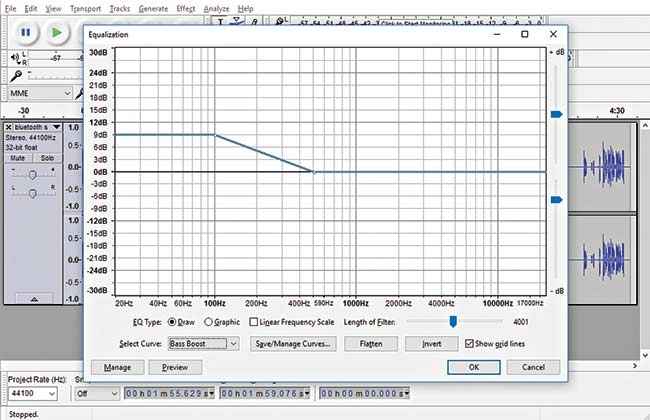
Adjust the equalisation
The recorded clip as mentioned above isn’t always the best and lacks proper tuning for bass and treble. This highly depends on how good your mic captures the audio. If you aren’t satisfied with the tuning, you can change the equalisation manually. Select the entire clip and head over to Effect > Equalization. Here, you’ll be able to adjust the curve according to your preference of boosting the bass or treble. There are presets already available which can be cycled through the Select Curve dropdown list or manually tinker with the curve and save it. To start off, it’s always better to hit Flatten and then change the curve. But then again, as with most equalisers, use your own judgement regarding the settings based on how it sounds.
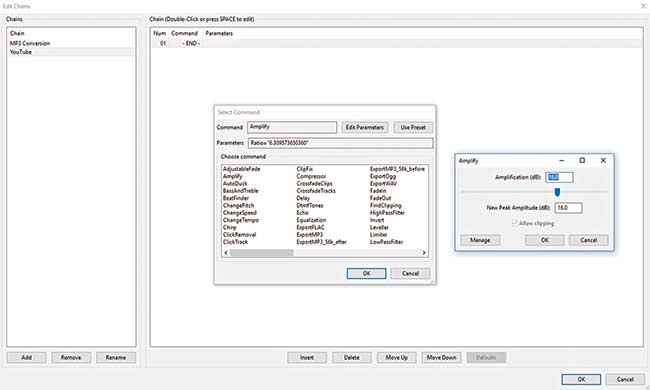
Using chains to apply multiple effects
When you’re editing audio clips routinely with the same set of adjustments, then Audacity can automate all those adjustments with a single tool. By applying chains to tracks, you can implement a set of effects together in one go. To add a new chain, go to File > Edit Chains and you’ll open a window where you have an MP3 Conversion chain already added as an example. To insert a new chain, select Add and give it a name for example Podcast. To add the effects, click on Insert and scroll through the effects and pick the one you need. Once selected, you can edit the parameters of that effect, which is the same as adding the effect to your track. And one by one you’ll be able to add multiple effects in one single chain. Whenever you need to apply that chain to the entire or a selected portion of the track, go to File > Apply Chain, then select the desired chain and click on Apply on Current Project.
This article was first published in November 2016 issue of Digit magazine. To read Digit's articles first, subscribe here or download the Digit e-magazine app for Android and iOS. You could also buy Digit's previous issues here.