Last weekend, I was halfway through a Netflix show when I noticed something odd on my old laptop’s screen. The scene was meant to be dark and dramatic, but on my laptop it looked surprisingly flat. Shadows turned grey, colours felt muted, and the whole frame lacked that punchy contrast you expect from a tense moment. I paused the episode, cleaned the screen, adjusted the brightness, and even tilted the display, but nothing really changed.
Later, out of curiosity, I played the same scene on my sister’s laptop and everything looked instantly better. The colours on her machine were richer, blacks looked deeper, and the frame just felt more alive. That is when it clicked. Nothing had changed on my laptop. I had just never noticed how limited the display actually was until I saw how the scene was supposed to look on a better panel.
If you have ever had a moment like that, where your laptop screen suddenly feels slightly off but you cannot explain why, you are definitely not alone. Sometimes colours lack punch. Sometimes the text looks soft. Sometimes, shows look washed out. And sometimes you only realise what your display is missing when you compare it to something better.
The good news is that you do not need to be a colour expert to understand your laptop’s screen quality. There are a few simple but surprisingly effective tests anyone can try at home. You do not need fancy hardware or specialised software, just your laptop and a bit of patience.
Here are three cool tricks to help you figure out exactly how good your laptop display really is. These are practical, easy to follow, and accurate enough for everyday users. Whether you spend your time streaming, working, gaming, or casually browsing, these tricks will help you understand what your laptop screen can and cannot do.
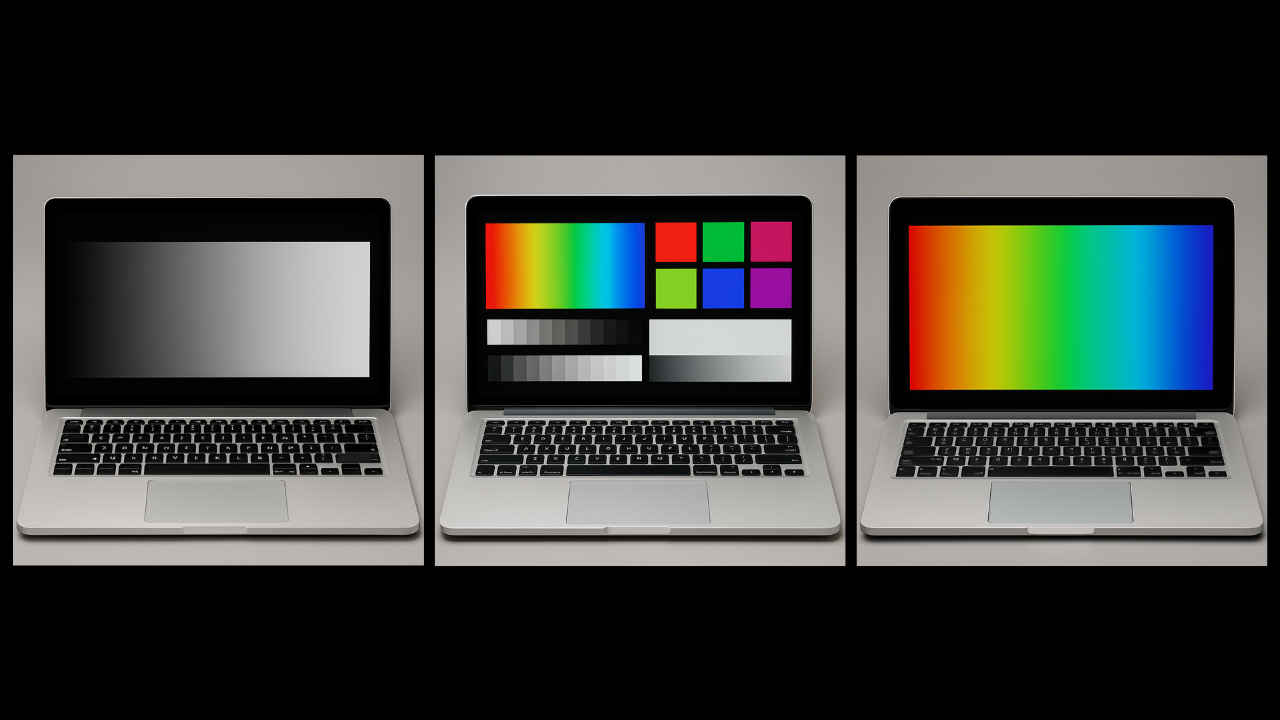
Every laptop brand talks about colour accuracy. One claims 100% sRGB coverage. Another promises a super bright panel or advertises impressive contrast ratios. But unless you know how to check these things yourself, it all becomes marketing jargon. This first trick helps you see the truth behind the specs.
There are free colour test patterns available online. These include gradients, blocks, greyscale bars, sharp text samples, and saturated colours. When you display these patterns full screen, you can instantly tell how well your laptop is handling colours.
A simple colour bar pattern shows you whether reds look truly red or if they lean slightly orange. Whether your blues are deep or washed out. Whether yellows look natural or too pale. You do not need technical knowledge. Your eyes will naturally notice when something does not look right.
(Image generated using AI)
Brightness levels also become easier to judge. For example, if you look at a greyscale pattern that moves from pure black to pure white, you should ideally be able to distinguish each shade. If the darkest greys look the same as pure black, your contrast is not great. If the lightest greys all look like white, your display struggles with highlights.
This trick also reveals issues like colour banding. In a perfect gradient, colours should flow smoothly from one shade to another. If you see steps or harsh transitions, your display is not producing the full range of tones correctly. This matters a lot for creative work and even for watching HDR content.
Another thing to check is uniformity. When you open a plain white or grey screen, look carefully at all corners. If you notice yellow patches or darker zones, the display is not evenly lit. This is a common issue on cheaper laptop panels and can sometimes be visible even on mid-range models.
The best part is that this entire test takes less than ten minutes. It gives you a detailed sense of how much colour accuracy you can realistically expect from your laptop. And you get a much better idea of whether you should trust the display for tasks like photo editing or colour grading.
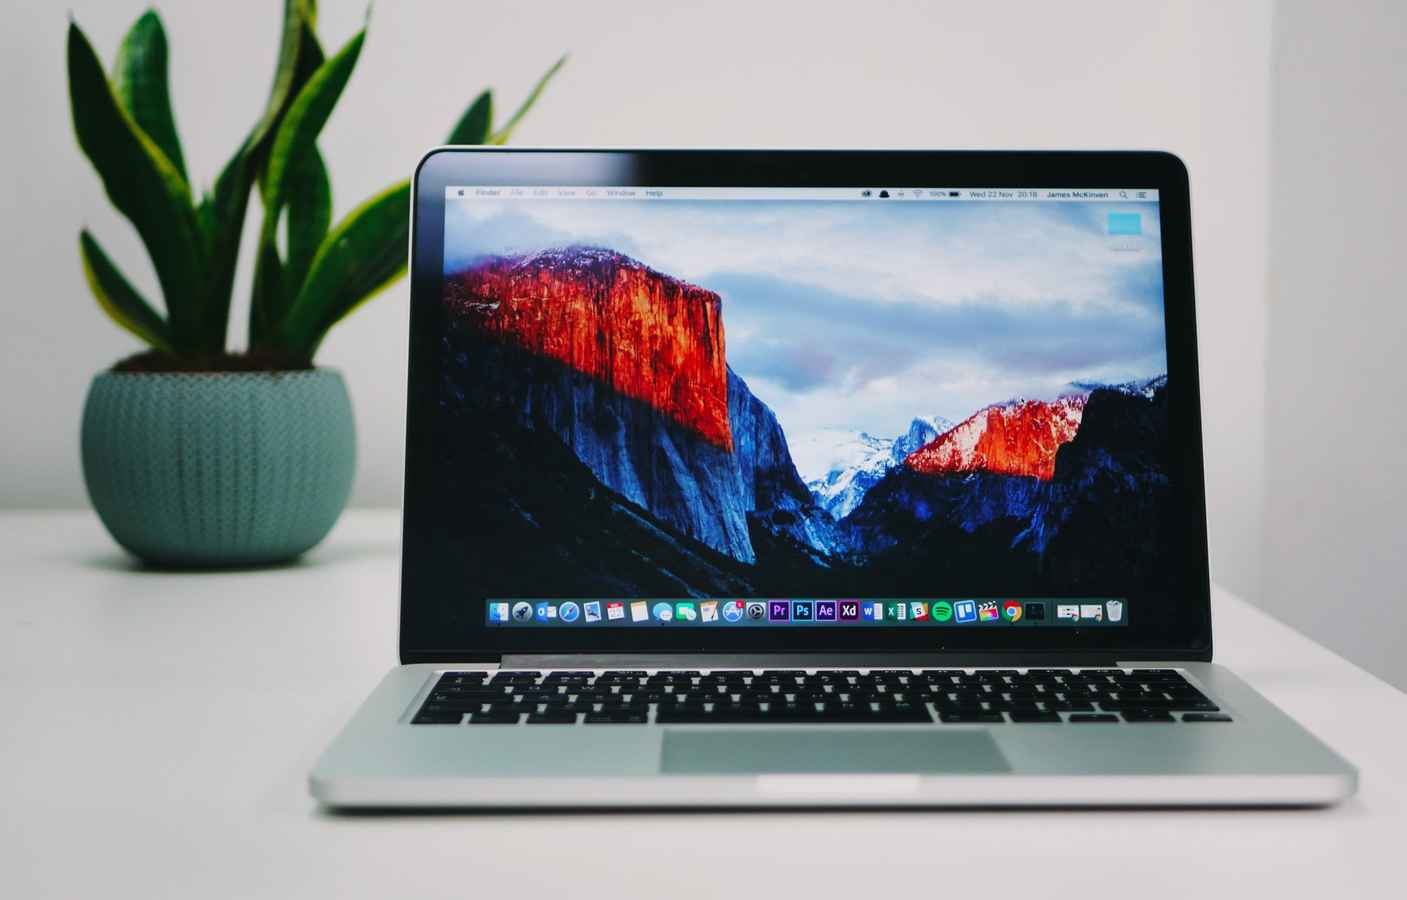
Numbers are helpful, but nothing beats real-world scenarios. After all, you do not use gradients and colour bars in your daily life. You watch videos, play games, scroll through social feeds, and browse the web. This means that you can use real-world content to check two major qualities that define a good laptop screen: viewing angles and backlight glow.
Start with a high-resolution photo. Ideally, something with a mix of bright colours, dark shadows, and lots of detail. Nature photos are perfect. Think colourful birds, sunsets, forests, or cityscapes. Now tilt the laptop slightly up and down. Look at it from the side. Look at it while sitting slightly off centre.
(Representative Image: Unsplash)
A good display should maintain colours and brightness no matter where you look at it from. The picture should not look dull when viewed from an angle. The colours should not invert or shift. Blacks should not turn grey. If they do, your display likely uses a TN panel or a lower-quality IPS panel.
Next, play a dark movie scene. Something like a night chase or a horror hallway shot with lots of shadows. Dim your room lights. This is where you can easily spot backlight bleeding, glow, or uneven brightness. If you see bright patches around the edges, especially in the corners, that is backlight bleed. If the sides look hazy or milky in dark scenes, that is IPS glow.
Neither of these is a deal breaker, but they tell you how well your display handles darker content. If you watch thrillers, horror films, or space documentaries, these issues are hard to ignore because they ruin the mood and lower the contrast.
You can also test motion handling. Play a fast action clip or a gaming montage. Pause any moment, then move forward frame by frame. If you see ghosting trails or smudges around moving objects, your display response time is average. This is particularly important for gaming laptops. Even a beautiful colour-accurate screen fails if the motion blur is too heavy.
Another fun test involves scrolling text. Open a simple website with a lot of text and scroll fast. If the text becomes unreadable or smears heavily, the display has slow response times. If the text remains fairly sharp while scrolling, it is performing well.
This trick helps you understand not just how the laptop performs on paper, but how it feels in day-to-day use. And that difference is often huge. You might discover that while your panel is not the brightest, it offers excellent viewing angles. Or you might realise that although colours look good, backlight bleed distracts too much during movie nights.
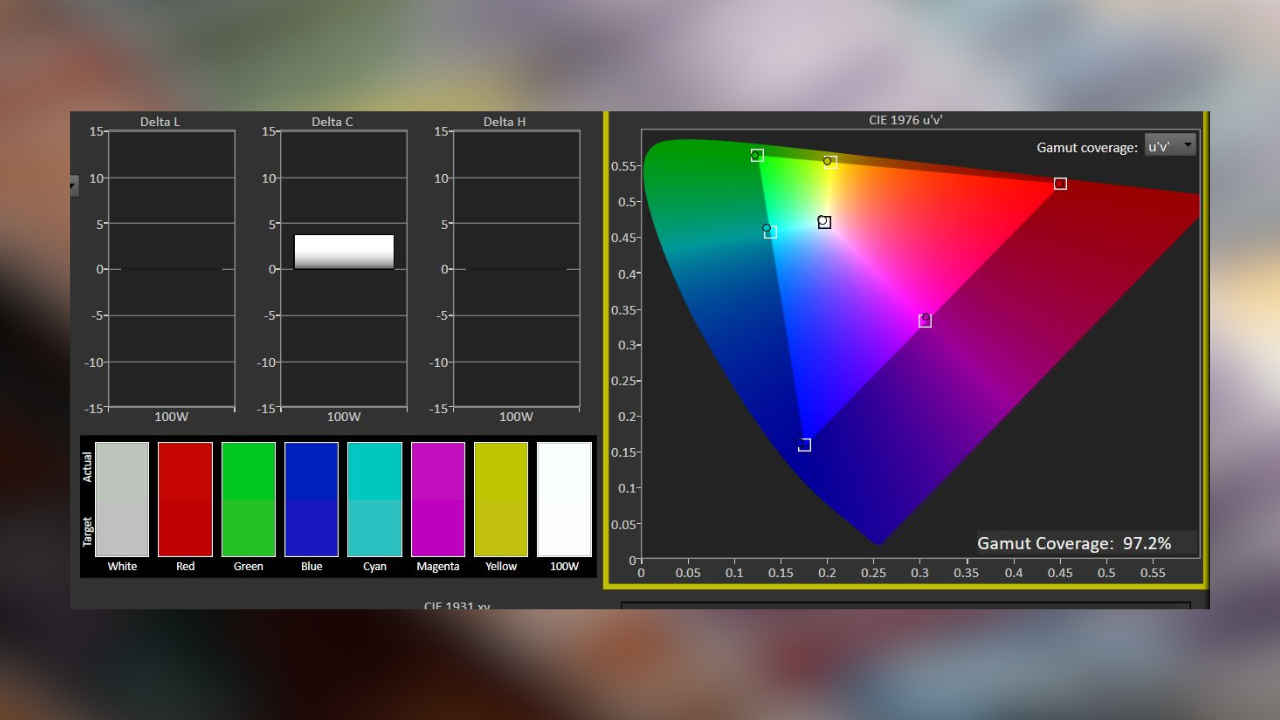
This is where things get slightly nerdy but still very user-friendly. There are various online tools designed specifically to put your screen through scientific tests. And no, you do not need technical skills to run these benchmarks. The tools run automatically and guide you through each step.
One of the simplest tests checks pixel density. Many people buy Full HD laptops and assume they are sharp enough. But a 1080p screen on a 14-inch laptop looks different from the same resolution on a 16-inch laptop. Pixel density affects how crisp text looks and how clean UI elements appear.
If text looks jagged or grainy, your pixel density is on the lower side. A higher density makes everything sharper, especially if you work with small fonts, spreadsheets, or coding environments.
Another important check is HDR capability. True HDR laptops are still rare. Many models advertise HDR playback, but only support certain formats or work well only in controlled environments. Online tests show you whether your laptop can hit the brightness levels needed for real HDR content and whether it can handle deeper blacks.
Do not worry if your laptop fails HDR checks. Even many premium machines struggle with proper HDR. But it is good to know the limitations, so you do not expect cinema-level visuals from a mid-range panel.
You can also use these tools to test colour gamut coverage. They show you exactly what percentage of sRGB, DCI P3, and Adobe RGB your machine’s display can reach. If you are a casual user, sRGB is enough. If you create content for social media, P3 coverage is very helpful. If you are a photographer, Adobe RGB support is ideal.
If the tool gives you a lower number than what the brand advertised, it does not always mean the company is wrong. Sometimes colour profiles or factory calibration settings affect how your laptop performs out of the box. Some users install custom ICC profiles to improve accuracy, but that is optional.
Once you try these tests, you will never look at your laptop the same way again. You will immediately spot when something is off. You will also appreciate a good display much more. And if you are in the market for a new laptop, you now know how to choose one with far more confidence because you finally know exactly what matters.
Also read: Best 5 thin and light laptops from Apple, Samsung and Asus