
ASUS sent us three of their good quality networking products. Let's setup and configure all of them one-by-one
The shift towards wireless technology has long been made, but there are better ways to experience this technology by using feature rich networking devices. Today we have with us the ASUS RT-N14U, ASUS DSL-N55U and RT-N12HP. We’ll setup and configure each of these products and see how they fare in the coming weeks, so let’s get started.
We’ve done an Unboxing, Preview and Introduction article of all these routers previously. You can check it out here
ASUS RT-N14U
Wireless N-300 Cloud Router
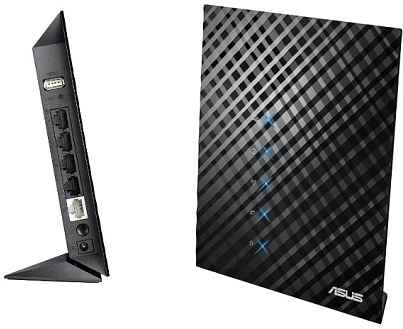
The first thing you’ll notice that this router is beautiful from every angle. With a glossy textured finish on it’s top. But let’s move on to the setup and configuration first. Setting the RT-N14U is easy as you just have to connect the router to your desktop or laptop using the included network cable and the best part is that ASUS bundles everything you will need to setup the router. Start by making connections by connecting one end of a network cable to the routers WAN port and the other end to your modem or network. Use the included power adapter and connect it to the DC-IN port on the router and the plug to a wall power socket and power on the ASUS RT-N14U and wait till the WAN and LAN LEDs are blinking.
Now set the TCP/IP settings to automatically obtain an IP address. In order to configure the router you now need to launch your Web browser, and type in the default address i.e. http://192.168.1.1 and run the inbuilt Quick Internet Setup wizard. When the page opens up, you’ll see that the first page of the Quick Installation Setup shows some of the features of the router.
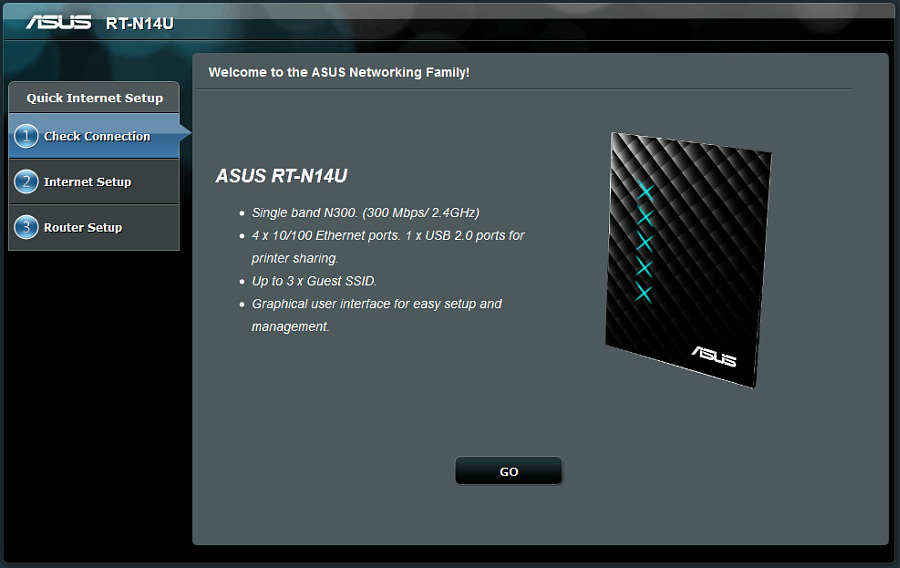
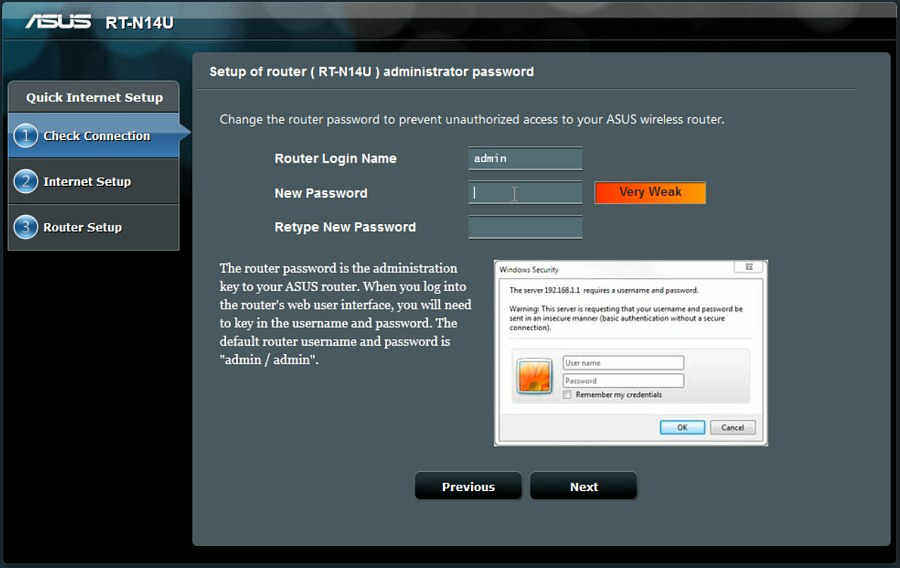
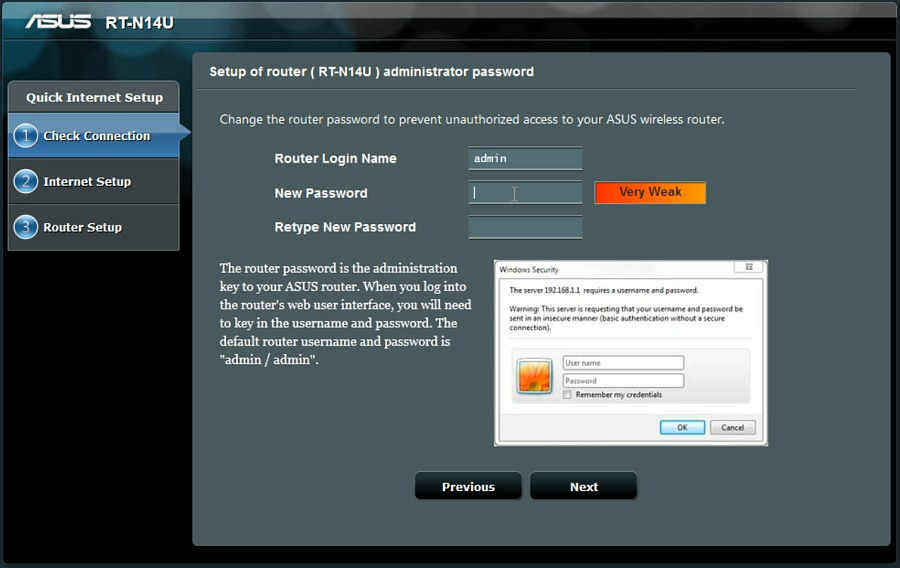
You will now need to follow the onscreen instructions to easily setup and configure the router. Click “Go”, this will take you to the password change page where you will have to enter a new password for the router for security purposes. Once you’ve entered a new password, click “Next”.
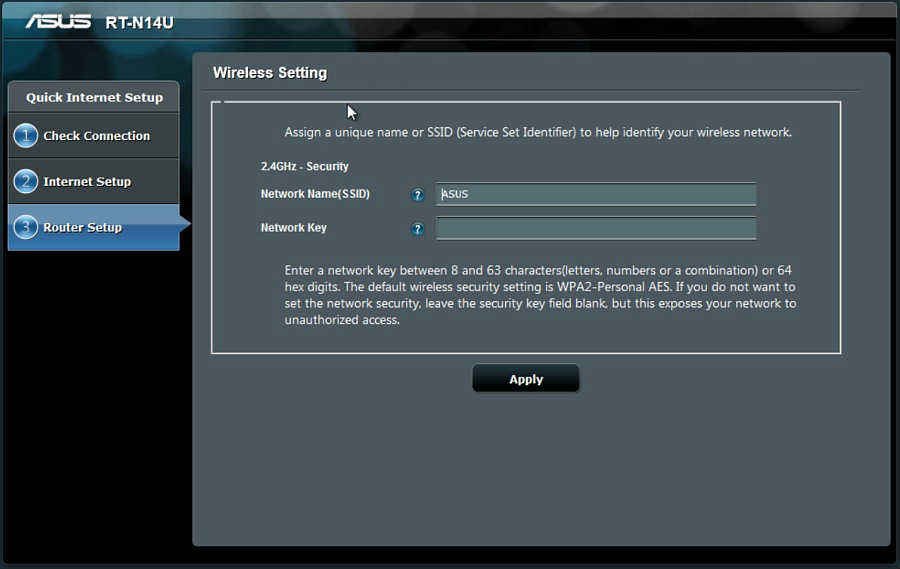
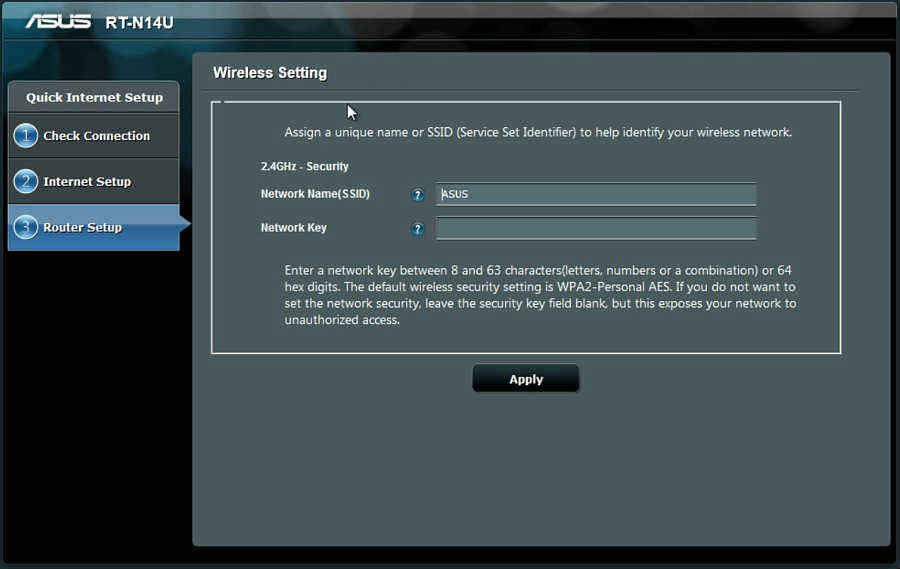
The page will load and the Quick Internet setup will land you on the router setup page where you will have an option to change the Network Name (SSID) and also assign a Network Key. We recommend you to enter a network key as this will guard your network preliminarily. Once done, click “Apply”, you will then see the network summary page which will have all the details of your network.
Once you finish it, the setup is done and you are free to use the network as you please. If you want to check out the advanced settings of the router, you will need to type in the same default address on your browser and enter the ID and password as set previously. We’ll talk about the administrative panel features of this router in more depth in our next article.
ASUS DSL-N55U
Wireless-N600 Gigabit ADSL Modem Router
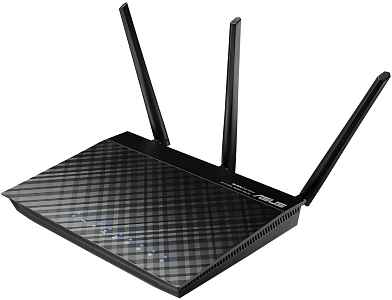
Now, this product from ASUS is a wireless ADSL modem router and has most of the features and functions one can possibly ask for in a modem router. Designed like most of the networking devices from ASUS, the DSL-N55U looks good too. Setting up this router is also very easy, thanks to the Quick Internet Setup wizard from ASUS. In order to configure this modem router, you will first need to make all the physical connections to it. Start by connecting the included network cable to the router and to your desktop or laptop. Then connect your DSL(phone line) to the included ADSL splitter box and through that to the DSL port on the router. Now connect the power adapter to the DC-IN port on the router and plug the adapter to an empty wall socket or power socket and switch on the DSL-N55U.
Upon starting up the DSL-N55U, you will then need to start up your browser and enter the default address that is http://192.168.1.1 and then key in the default user ID and password. First time setup does not require you to enter any ID or password details as the Quick Internet Setup Wizard directly opens up in the web browser when you power on the DSL-N55U. Now, you will need to follow the onscreen instructions to setup and configure the ASUS DSL-N55U.
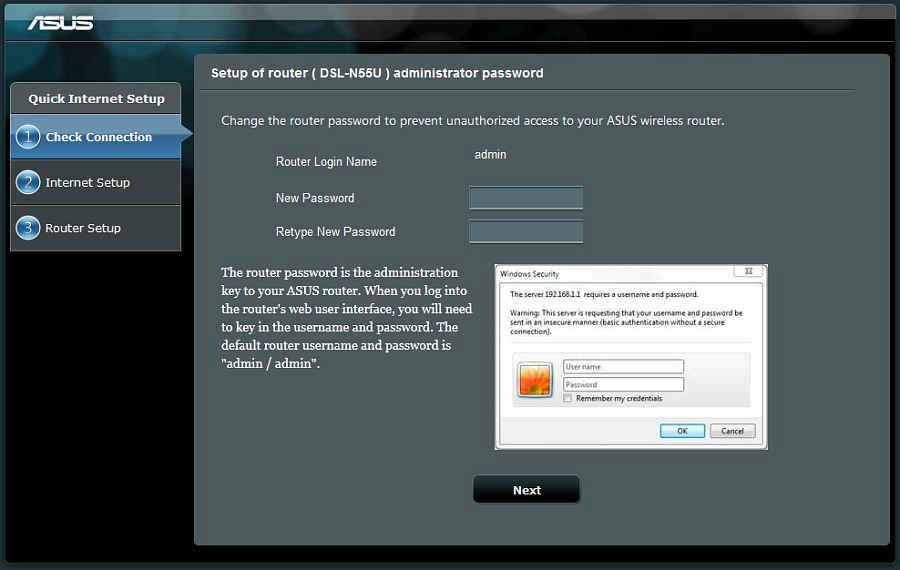
At first, you’ll need to enter a new password for the router for security reasons. When you’ve entered a username and password, click the “Next” button.

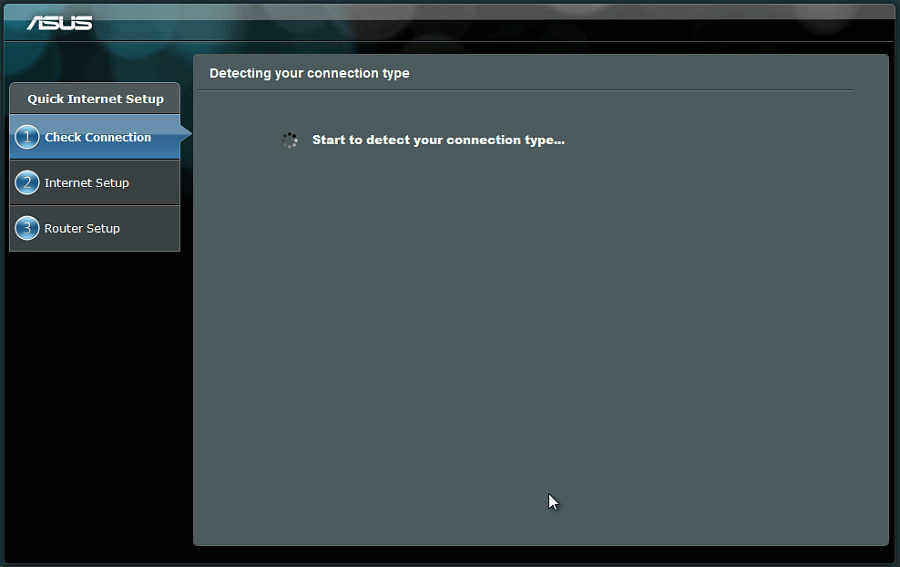
A screen will now show that the router is detecting your connection type and if you didn’t connect a cable properly, then you will notified about it on this page itself. You will need to wait for a few seconds and then the internet settings page will open up for you to manually select your Country and ISP.
Clicking “Next” will submit the settings and land you inside the router settings page where you will need to select options depending on your ISP. ASUS has provided a ISP settings manual with the routers package as well, this manual has configuration codes for most countries and their respective ISPs. This document really comes in handy and ASUS has done a nice job by including it with the DSL-N55U. Since this is a dual band router, you will also have to select the network type or band i.e., 2.4Ghz or 5Ghz. Once you do that, you will then need to enter a Network name(SSID) and network key and click “Apply”. When you’re done with all the steps, you will be directed to a network summary page that displays the complete summary of your network. Click “Next” and you will notice that the connection has been made and you are good to go.
ASUS RT-N12HP
Wireless-N300 3-in-1 Router/AP/Range Extender
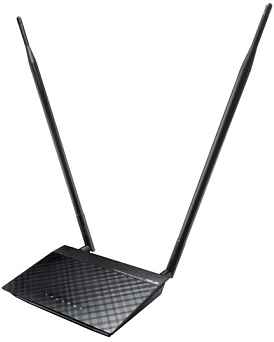
This high powered wireless range extender is one of the best range extension devices from ASUS’s stables. It has 9dBi antennas for upto 300% wider signal coverage. Setting up this router is also as easy as other routers from ASUS. you can do this by following some simple steps. First take the router and connect its antennas. Then connect one end of a network cable to the LAN port of the router and the other end to your desktop or laptop. Now take another network cable and connect it to the WAN port of the router and the other end to your modem or existing network point. You will now have to connect the DC-IN power cord of the power adapter and connect it to the router and plug the adapter to a power socket. Now power on the RT-N12HP. You will see that a new tab or window opens up in your web browser. The window will display the Quick Internet Setup Wizard which will guide you through the next part of the setup.

The first page displays some of the features of the ASUS RT-N12HP, click “Go” to go to the next page.
Here you will have to enter a new password for the router for security reasons and click “Next”. This will take you to the next page.
The next page will load and start detecting your network connection type. Once it loads, you will then be redirected to another page.
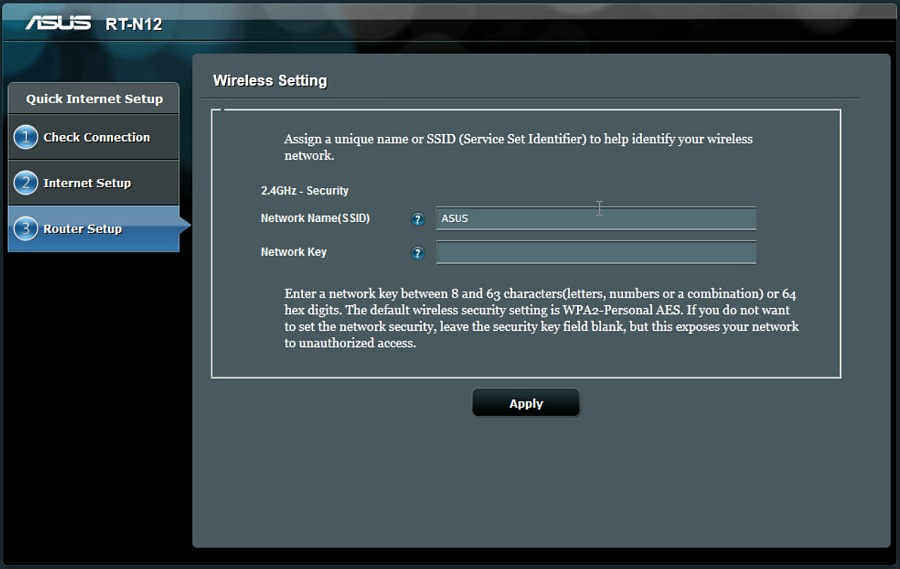
On this page, you just have to provide or assign a Network Name(SSID) and a Network Key in order to improve security. Then click “Apply”. You will be taken to the next page.

The next page will display the Router setup summary along with the current time and date. Now, click “Next”.
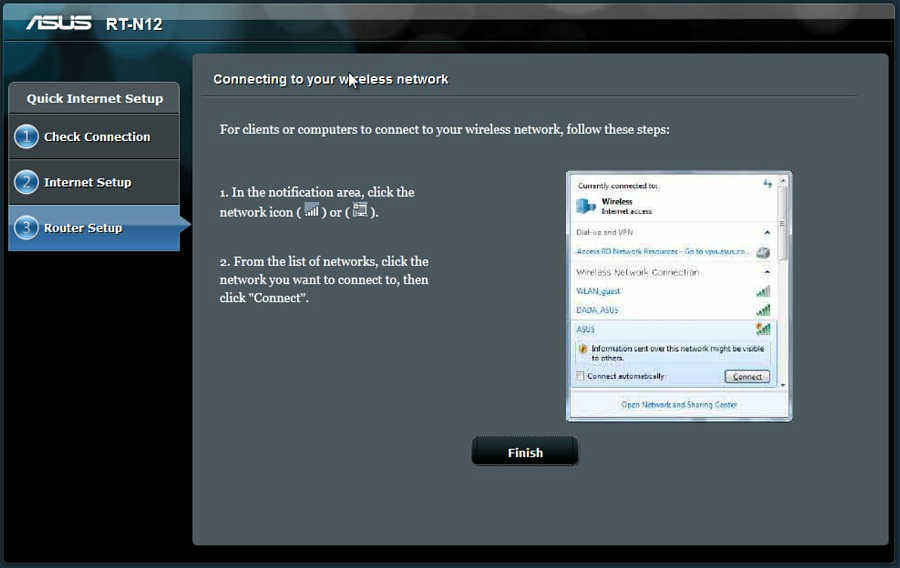
The final page will display how to connect your wireless or wired device to your newly established network. Once you read through it, click “Finish” and complete the setup. You can also perform advanced changes to your network by visiting the administrative panel of the router. This will require you to enter your login ID and password details.
You can also check out the video below where we use screen capture to illustrate how you can setup and configure these networking devices from ASUS.
This was our take on the setup and configuration of ASUS RT-N14U, DSL-N55U and RT-N12HP. We’ll be doing an in depth features and analysis article next week which will be followed by details about the ASUS AiCloud service. Stay tuned for more!
Team Digit
Team Digit is made up of some of the most experienced and geekiest technology editors in India! View Full Profile


