
Using regular routers and adapters is one thing while using ultra high-end ones is another. As we have a couple of flagship models of such routers from ASUS, who wouldn't want to set them up as soon as possible.
Previously we had looked at the unboxing and preview of a couple of routers and an adapter from ASUS.
We were quite pleased with their unique design, boxed contents and the slew of features they offered.
Moving on, in this article, we’ll be describing about how easy it is to go about and setup these devices and configure them using their respective administration panels.
ASUS RT-AC66U:
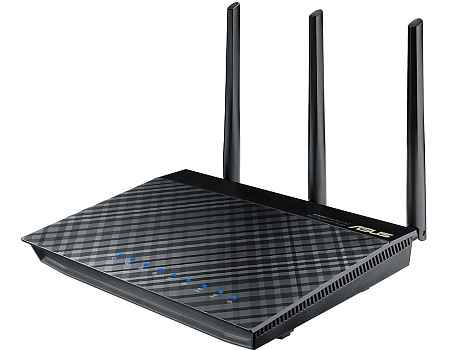
Now, this router is an innovation in itself as it is one of the few dual band gigabit routers in the market that support the new Wireless 802.11ac standard. Not only that, it is also supposed to be blazingly fast. And it’s setup and installation process is equally quick.
Everything you need to install the router is already provided in the box. Before starting up with the installation of this router, disconnect your desktop or laptop from your modem. Now using the usual router installation techniques, you just need to plug the power adapter of the ASUS RT-AC66U router in the DC-IN port, connect the network cable in the WAN port of your modem and plug the other end into your router’s WAN port. After that’s done, attach one side of the bundled network cable to your desktop or laptop’s ethernet port and the other side of the cable to the first LAN port on the router.
After the router and your PC are physically connected, power on your Modem and the ASUS router and wait till the WAN and LAN LEDs are blinking. Now set the TCP/IP settings to automatically obtain an IP address. In order to configure the router you now need to launch your Web browser, and type in the default address i.e. http://192.168.1.1 and run the inbuilt Quick Internet Setup wizard. The first page of the Quick Installation setup shows some of the features of the router.
We now only need to follow the onscreen instructions; Clicking “Next” will take you to the “Wireless settings” page on which you need to assign a Network Name (SSID) along with a network security key. The RT-AC66U also provides you an option to keep the same credentials for a 2.4 GHz as well as a 5 GHz connection as the wireless settings page offers you a checkbox that will copy 2.4 GHz settings to 5 GHz mode. Next we need to click on Apply to apply these settings to the router after which a page opens up which notifies that the Network has been configured and it also displays the Internet and wireless settings including the LAN IP and MAC addresses.
When we head further in the ASUS RT-AC66U router setup, you will find that ASUS has also included a wireless network connection tutorial which provides an illustrated way of setting up or turning on the wireless network connection in the quick setup wizard itself. Clicking on finish, will complete the quick setup and you’re done.
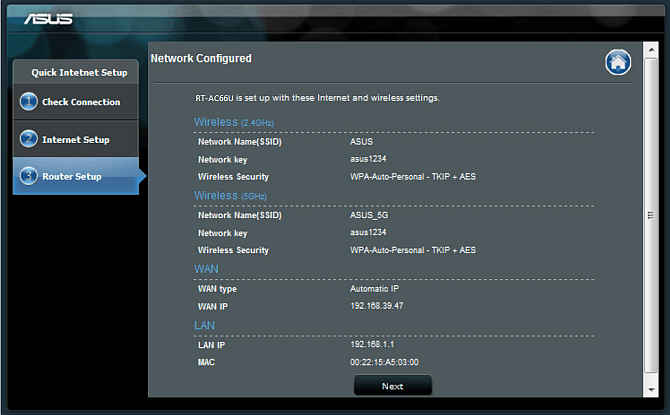
Network configuration page displaying the details of the current setup.
All of the administration features required for managing the network using the RT-AC66U router, reside in the administration panel. Let’s take a look at which different submenus are included in the administration panel. First up, we have the Operation mode which has the option to select a particular type of operation depending on the type of function we want the router to perform.
Next we also have the Firmware Upgrade Menu which displays the “Product – ID” and Current Firmware version. If there is a new firmware version available, then it prompts us to download and install it. We have to browse for the new firmware file and upload it to upgrade the firmware of the device. The next menu deals with Restoring/Saving/Uploading settings for the router. Using this menu, we can restore factory settings for the router, save existing modified settings, and restore a particular setting by browsing for a file and uploading it to this menu.
These were some of the administration panel features of the ASUS RT-AC66U dual band gigabit router. Now we shall move onto the ASUS RT-N66U.
ASUS RT-N66U:
The ASUS RT-N66U is a forerunner to the RT-AC66U and so it looks exactly the same as the RT-N66U and the setup procedure is also the same..Except the newer 802.11ac specification and better speeds along with improved security notwithstanding, the RT-N66U is also a nifty product. Let’s delve deeper into the setup and installation of this router.
Once you’ve plugged the router and your desktop or laptop, you just need to power it on and follow the exact same process used during the installation for the RT-AC66U router and you will be able to finish the setup for this router.
These are some of the previously mentioned steps to quickly setup the router using the Quick Internet setup. Connect the network cable in the WAN port of your modem and plug the other end into your router’s WAN port, attach one side of the bundled network cable to your desktop or laptop and the other side to the first LAN port on the router. Power on your modem and the ASUS router and wait till the WAN and LAN LEDs are blinking. Now set the TCP/IP settings to automatically obtain an IP address. In order to configure the router you now need to launch your Internet browser, use the default address i.e.,192.168.1.1 and run the inbuilt “Quick Installation Setup” wizard also called as Quick Internet Setup wizard. The first page of the Quick Installation setup shows some of the features of the router. Follow through with the steps used previously and you will have your router configured in no time.
The administration panel in this router is exactly similar to the administration panel of the ASUS RT-AC66U. Using it is so much easier that you can change all of the administrative options just by jumping into this menu. All the submenus such as the operation mode, Firmware upgrade utility and the Restore/save/upload settings features are included for the RT-N66U, too.
ASUS EA-N66

The ASUS EA-N66 may look small and different from everything else in the market but it still packs a punch. It is a versatile device as it offers 3-in-1 functionality. It can be used as a wireless Access Point, a Wi-Fi Bridge and also as a Range Extender.Being a dual band adapter, it can reach upto high Wi-Fi speeds like 450Mbps.
Being an ethernet adapter it is very easy to set it up and start using the EA-N66. You will first need to connect its power adapter and also attach a network cable to the LAN port of the EA-N66 and your computer. When all of the physical connections are made and the device is powered on, you will have to open your Web browser and enter the provided IP address. You will then need to login to the router, by using the default login ID and password.
Once there, a setup wizard will guide you on installing the adapter, following it properly will make a network connection using the adapter. When the installation is working, ASUS has provided some information about the adapter’s LED indicator. There is also an option within the setup utility to change the operation mode of the EA-N66 to any of the three supported operation modes mentioned previously.
So, this was all about the basic setup and deployment of the ASUS dual band gigabit routers as well as a dual band 3-in-one ethernet adapter. Stay tuned for our in depth analysis and report of these cool devices in upcoming articles.